Deliver to OMAN
IFor best experience Get the App
معلومات عنا
دعم العملاء
احصل على التطبيق

قم بتوجيه الكاميرا لتنزيل التطبيق
حقوق الطبع والنشر © 2024 Desertcart Holdings Limited


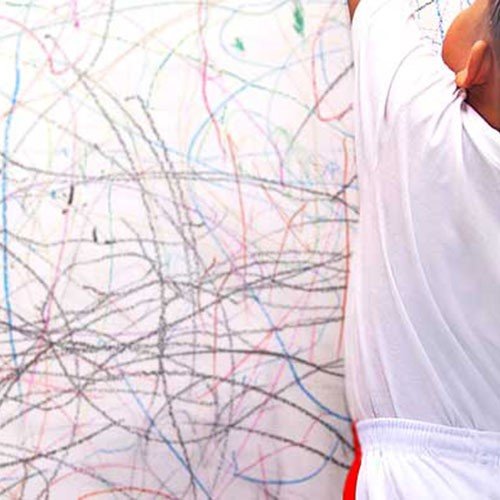
✨ Paint Your Ideas into Reality!
This Dry Erase Whiteboard Paint allows you to transform any surface into a functional dry erase board, covering up to 31.25 square feet. With a non-toxic, odorless formula that contains no VOCs, it's perfect for various environments including home offices, classrooms, and children's playrooms. Compatible with all dry erase markers and erasers, this clear finish paint offers high-quality performance for endless creativity.
| Item Volume | 1 Pints |
| Size | 1 Pint |
| Finish Types | Finished |
| Color | Clear |
| Additional Features | Non Toxic |
H**Y
A wonderful invention! Totally worth it!
This is a wonderful product for parents, school teachers and caregivers alike. What this product does is it transforms any surface into a dry erase surface. Dry erase meaning that you can use the markers that dry and then you can erase them. Best of all, it is safe and easy and is also specially formulated so you do not have any harmful fumes or have to wait days for it to dry. Its awesome because of the amount of surfaces that you can apply it to, wood, metal, concrete and on top of other paint. I had never heard of these type of products before so I'm guessing they are a relatively new invention! No more having to buy clunky or odd shaped dry erase board when you can magically create your own dry-erase board on any surface. Perfect not just for moms but anywhere dry erase is used. At work, at school or anywhere they will let you transform a given area into a dry erase surface. I was surprised at how easy it was to use, and the quality of the dry erase surface. I love that I did not have to wait forever for it to dry. It enables you to be creative and its almost like having the power to create an instant chalkboard! Well worth the price and awesome invention and will definitely be incorporating into my home, school and office life. I have been provided this product in exchange for my honest review!
J**N
Put it anywhere!
I love this! I recieved this to review for free and I would definitely pay for it to use it again! it was very easy to use and worked so great on my son's wall! He enjoys it every day. The only downfall is the time it takes to dry and be ready to use. Besides that it was great!
S**B
Did 2 walls that turned out fine, yet two more wall still have not dried ...
I used this product before with no issues. I recently used it again and had a different outcome. I mixed the product exactly as instructed. Did 2 walls that turned out fine, yet two more wall still have not dried after two days.I emailed the manufacturer and they basically told me I mixed it wrong, like I'm some kind of moron.When you buy this product, you have to pour the contents of a small bottle into a larger bottle and mix for 90 seconds exactly. Not hard, I even timed it with my phone. My kit had 8 bottles, so I did this four times. The funny thing is, the bottles all had differing amounts of product in it. Sometimes the big bottle would overflow when mixing, sometimes it would have a half inch of space at the top.These people must have no way to control how much product is put into the bottles, hence the crappy outcome.I'd stay away unless you like doing things twice at an exorbitant cost. Buy a nice whiteboard instead and use the time you save to take up a hobby or see a movie.
K**R
COVERING AN ENTIRE 106 SF WALL!! Hoping for an AWESOME wall for team strategizing, motivating quotes and coaching ideas!
First I want to say that I have been researching dry erase paint for more than a year. The sole reason I purchased Create Paint was because of the number of 4-5 star reviews and the lower than Draw It cost. If it turns out as I want it to, I will increase my rating, I'll let you know in a week. If it doesn't, I'll reduce my rating. Cross your fingers.Project type: 106 SF wall, smooth to start, original paint, a medium camel color.Prepping:I read EVERY review on Create Paint (it's good to know where other people went wrong and what worked for each person, so do yourself a favor and read more than 1 or 2 reviews), I also looked for YouTube videos on Create Paint but that was a search in vain. No videos that I could find, unless I wanted to spend my whole day looking.I began by using a white all purpose primer over the top. Because I wanted the white board to be as white as possible and because I don't think the primer was as high of a quality as Lowe's claimed, I wound up priming 3 coats.I allowed 24 hours to dry in between primer coats.24 hours after my last primer coat I ran my hand along the wall and used a fine sanding block to sand down each small tick on the wall.I washed & dried the wall.I should also note that I have also painted previously, am very good at it and enjoy it, I have painted various techniques and I don't tape off, as I cut everything in by hand (which works better than any paint tape I've found), that being said, I wasn't intimidated by this technique. I was however a little apprehensive about the two part system and drying time since based upon the reviews, could go horribly awry.Supplies: I purchased a regular roller brush and a Purdy type brush to cut in the sides and corners (though not as expensive as a Purdy because I read the brush would have to be tossed afterwards).Starting the job:We opened the first pint and it was only 1/2 filled. I thought this might be normal, but this being my first time/pint, didn't know any better.We poured in the part P, which was also only filled 1/2 way.We shook vigorously for EXACTLY 90 seconds, and yes, we timed it.I first cut in the edges, floors and ceiling on the section we were working on, poured the rest into the paint pan, and found I could not fill the roller even 1 time with what was remaining, got pretty nervous at that point...After about 10 min the paint seemed to be thickening enough that it would certainly harden before I could finish rolling it (but it didn't so hang in there, it will probably be okay) ;)I had my son helping me, so he began to shake the second pint while I was rolling on the first. The second pint when opened was filled 3/4 of the way, combining it w/ part P and this time the pint was filled, so more paint in that one than the first.With every pint we timed our mixing w/ EXACTLY 90 seconds to mix per pint, and we had a second timer for the OVERALL paint job.**My concern covering this much wall was that the paint would harden on the brush before we were able to complete it, which would make purchasing several paint brushes for the same job necessary. Thankfully that didn't happen and both the edge brush and roller stayed pliable w/ each pint and for the entirety of the job.End of the job: I think because two of the pints were only filled 1/2 way I wasn't able to cover as much as I prepared for, but the part I left unfinished is in the far corner and I probably won't use it anyway, but I will (pending if I like how the end result turns out), cut in another pint to see if adding on to an existing job is possible with this, and update my review. The overall job took us working together about 45 min, however, because we opened pint by pint instead of all at once, it made our working time more functional w/ the viscosity of the paint.Helpful Tips: We worked pint by pint. First by cutting in the edges, then rolling the rest of the section. While I cut and rolled, my son shook up the next pint and looked for any spots which needed to be covered more. This way we were able to minimize overall job time which for a 2 part system I think helped immensely.I WAS able to get 2 coats on the wall, or at least ENOUGH that coverage is thorough except in one spot I'm noticing now at the end where I ran out of paint, so by "working" the paint on the wall, you can usually get it to cover enough, even though it doesn't look like you'll have enough.The paint along the edges wouldn't stick as well as "normal" paint, at least w/ the bristle brush, so you might try to figure out a different look or technique so the edges can be messy or looking "frayed" w/o that look bothering you. If you want it to look very crisp and tidy, the way it cuts in and adheres might bother you, especially since from what I've read, going back over it later doesn't seem to be an option.Having two people doing the job was what made this size of a job doable. Also, we cut the pints in half length-wise after opening them and dispensing the primary contents into the paint pan, and then used the bristle brush to scrape out the rest of the paint in it (the opening is smaller and it's quite messy to do it without making your brush all tacky without cutting it open), but there is quite a bit still in there and for the sake of time, prepare your work station with something you can use to cut down the length of the container and scrape it all into the pan. You'll be happy you did.Okay, so the Pros and the Cons, let's start w/ the cons first so we can end on a high note:Cons:The two-part system can be a pain, though w/ the exception of Draw It, a two part system is the norm with whiteboard paint, so either buy the one part Draw It at a premium, or get over it and just love the project for what it is.The paint doesn't "work" like regular paint (cutting in the edges and in some places going back over it), so if this bothers you, just save up and get Draw It which from what I've read, DOES work like regular paint. (I want to clarify that I HAVEN'T purchased Draw It yet because I wanted to see how the less expensive paint would work, so I have no experience other than a year's worth of research and it coming out ahead of the crowd in every review.)The roller brush, even though just a run of the mill brush, kept "shedding" and I'd have to pick the sheds out of the paint. When you're concerned w/ overall smoothness, this is irritating. To be clear, a different roller in the same roller brush pack didn't shed when applying the primer so I'm attributing the shedding to the stickiness of the Create Paint. This wasn't the end of the world, just watch out for it so you don't have dried sheds in your end project.Right now it "appears" as though the roller brush CREATED a texture (perhaps b/c the Create Paint is so thick??), so I'm hoping the self-leveling claim proves itself to be the case because otherwise, this is not "glass-like smooth" which may impede smoothness of writing once it cures. If this is the case I will find it highly irritating considering our prep to ensure smoothness of application. To be clear, I did not apply ONE thick coat. I applied one coat just like regular paint, and perhaps a little thinner to ensure I wouldn't end up w/ self inflicted bubbles, hence the "working" the paint for uniformity. I then applied a second coat.The time it took us to prime, sand, wash etc. was quite a bit. Now I will wait a week to use it. If your time is worth actual dollars to your business, then you might want to go w/ something that does not require so much prep and cure time but which costs more, you'd probably come out ahead. Determine what's best for your wallet. If you LIKE to do this kind of creative stuff, then you've got your money cut out for you.Pros:It is a beautiful white, so even if I don't like how it dry erases, the color and look wouldn't bother me until I redo it with Draw It.Overall if you use your head and tackle the job pint by pint you won't run out of time to complete the larger job so the bad reviews about the paint setting up before they got done doesn't have to be how your story ends.If I DO like/love how it functions, the price is GREAT, especially when you get multiple quarts (which comes as 2 pints for each quart instead of as 2 full quarts)I'm waiting the week for it to cure and I'll hopefully have more Pros to post.In Conclusion:Overall the job wasn't miserable, but it wasn't really "fun" either, and I LOVE to paint so take that as you will. In our angst to get our timing right and hopefully wind up w/ a successful project, and since I don't normally put on gloves when I paint, I didn't put any on and my hands got pretty tacky. On a good note, you DON'T have to worry about tossing your brush. I had some PRITI NYC Soy Nail Polish Remover on hand and it took the product right out of the brush and off my hands (and it's earth friendly). The odor of the paint wasn't any worse than any other paint, so don't worry so much over that, but keep your windows open b/c any fumes aren't good for your brain ;)If this cures and functions well in a week, I'll buy more and paint more with it and improve my ratings. Stay tuned and cross your fingers with me :D
D**N
Awesome stuff, Plan ahead!
This is great stuff! Be sure that you absolutely follow the instructions to a T. If you did not receive instructions like I see some people reviewing find them before attempting to use this stuff. It works just like epoxy, there are stirring times and usage times/conditions you skip either and the product will fail. With that said here are a couple of things to take note.1.) This is a time limited 1 time shot. Make sure you have all your ducks in a row before you mix it up (have a few extra items around to use up any extra)2.) Smooth surface. While this will work on any surface and does have some leveling properties, the more you smooth and sand the surface the longer your markers will last without destroying the tips. Keep in mind the markers are made for a glass like factory surface which is very easy to achieve on most wood with 220 sand paper.3.) Kiss your brush or roller goodbye, don't use an expensive Purdy if you don't have to..Overall it's really really really cool stuff, especially for kids spaces, garages, businesses (I was really tempted to use it on the fridge but the wife vetoed that. I did receive this product at a discount for a fair and honest review.
ترست بايلوت
منذ أسبوعين
منذ يوم واحد