


Desertcart purchases this item on your behalf and handles shipping, customs, and support to OMAN.
💨 Elevate your kitchen vibe with silent power and sleek style!
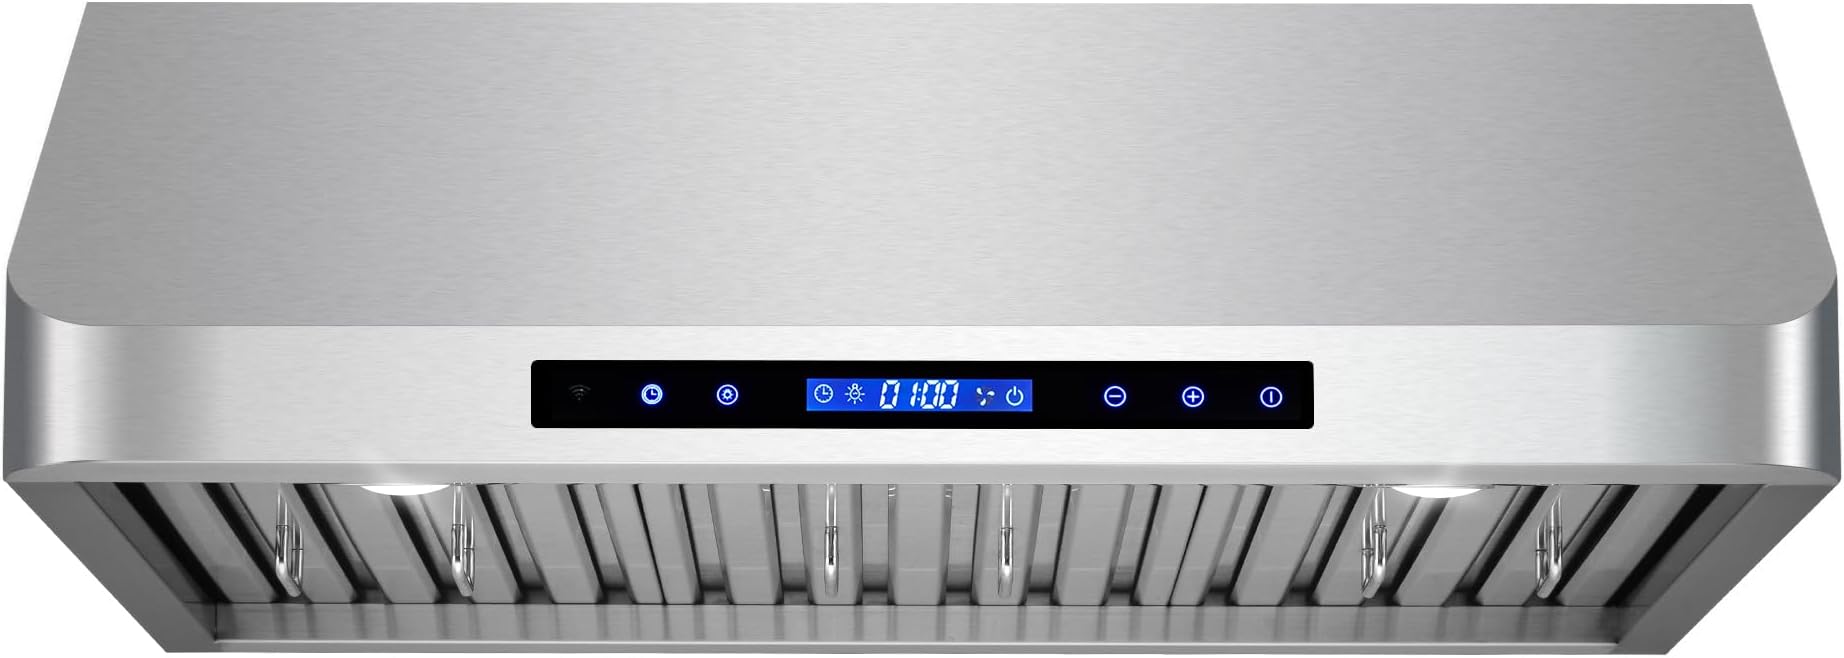
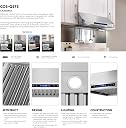
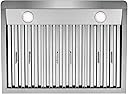
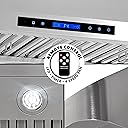
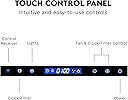
The Cosmo 30 in. Haven Coll 500 CFM Under Cabinet Range Hood combines high-performance ventilation with modern design. Featuring a powerful 500 CFM motor, ultra-quiet operation at 40 dB, and energy-efficient LED lighting, it ensures a fresh, well-lit cooking space. Its durable stainless steel baffle filters are dishwasher-safe for easy cleaning, and the soft-touch controls plus wireless remote offer seamless usability. Convertible between ducted and ductless setups, this range hood fits perfectly under cabinets, delivering professional-grade air quality and style.


| ASIN | B013JVO1U6 |
| Additional Features | Easy To Clean |
| Air Flow Capacity | 500 cfm |
| Best Sellers Rank | #685 in Appliances ( See Top 100 in Appliances ) #120 in Range Hoods |
| Brand | COSMO |
| Brand Name | COSMO |
| Color | Stainless Steel |
| Control Method | Touch |
| Controls Type | Digital Touch Controls |
| Customer Reviews | 4.4 out of 5 stars 1,907 Reviews |
| Filter Type | Baffle |
| Finish Type | Grey |
| Finish Types | Grey |
| Included Components | Premium Stainless Steel Filters, Hardware, Damper and Remote Control |
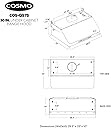
| Item Dimensions D x W x H | 22"D x 30"W x 10"H |
| Item Form | under-cabinet mount |
| Item Type Name | 30 in. Haven Collection 500 CFM Ducted Under Cabinet Range Hood, Touch Controls, LED Lights, Stainless Steel |
| Item Weight | 53 pounds |
| Light Source | LED |
| Manufacturer | Cosmo |
| Manufacturer Part Number | COS-QS75 |
| Material Type | Stainless Steel |
| Model Number | COS-QS75 |
| Mounting Type | Under Cabinet Mount |
| Noise | 40 db |
| Number of Speeds | 3 |
| Product Dimensions | 22"D x 30"W x 10"H |
| Special Feature | Easy To Clean |
| Specification Met | ETL |
| UPC | 869369000010 |
| Unit Count | 1 Count |
| Vent Hood Design | Under Cabinet Range Hood |
| Ventilation Type | Ducted |
| Voltage | 120 volts |
| Warranty Description | 2 Year Limited Warranty |
| Wattage | 49.5 watts |
S**K
Beautiful and oh so efficient
Nicest range hood I've ever had! I love the rounded corners; especially nice since this hood extends 22 inches out over the range. I figured I'd bump my head a lot since we had to install it 25" clearance over the range. But so far it's not been a problem. I like that the control panel goes dark when it's turned off. We have a great room floor plan, so having the LED clock blazing out the time all day and night can be annoying. Having a light on each side of the hood is like having a spotlight for each of the front burners (don't much use the back ones). But best of all is the great, wonderful CFM. It really clears out the steam and odors, I mean really, really clears them out. We replaced an over the range microwave, so maybe this is not surprising, but I can't remember any hood in any house (16!) I've ever had being as effective as this hood. I haven't had to use the highest setting, but the noise is fine on the lower settings. It is very heavy, so it took two of us using a cooler as a support to get it installed. The existing duct is 7 inches, so we bought an 8"x7" adapter which worked out well. The cabinet was already reinforced for the microwave, so all we had to do was enlarge the vent opening from a rectangle to a circle. All in all, straightforward to install but taking some strength and maneuvering in tight spaces. Hey, Cosmo, consider a bracket to support the bottom edge. That would be much more useful than the brackets that came with it.
T**T
Great range hood. High CFM fan really removes odors.
This unit was purchased to replace the over the range microwave/vent combo. First let me say if you have one of those over the range microwave/vent combo hoods in your house I am truly sorry. Get rid of it as soon as possible. Mine was blowing dirty, dusty air back in to my kitchen for 3 yrs before I finally did something about it. My kitchen has a full duct through the roof so why was it designed to blow air back in the kitchen? My guess is it was cheaper and/or easier when the house was built. The Cosmo QS75 has changed my world. Coming from a over the range microwave/vent to this thing is like going from a KIA to an Mercedes Benz. The upgrade is totally worth it in my opinion. At less than $300 to add this beautiful hood to a kitchen is a steal! The LED lights provide a very bright white light. Not the orange glow that most bulbs give off. This one is at least 5000k. My wife can now see what is in the pot on the stove. The fan has 4 speeds and level 4 is a tornado of suction! We use levels 1 and 2 for cooking and barely smell what was cooked afterwards. Our test for this was cooking an Easter ham for 3 hours straight. I no longer smell dinner in my bedroom while trying to fall asleep 4 hours after it was cooked. The stainless vent filter system is really nice. I haven't had to clean it yet but I imagine it's easy. I plan on soaking mine in Dawn and then a light scrub if needed. My only issue so far is the LED's behind the front panel seem to be pushed too far to the left, which causes some of the buttons to not fully illuminate. There are also some very small pin holes that are allowing the blue light through where it should be black. Neither of these issues effect the functionality of the unit so I'm not too worried. Just not sure how this one made it through quality control. Bottom line, I still love this thing! Installation can be difficult as it's in a tight spot. Be sure you have someone to help you for this. We decided not to pull the stove out as we did not want to have to reconnect the gas line. I ended up having to lay down across my stove and counter on my back to get the top screws in. Check to make sure your cabinet bottom has boards at all the correct mounting holes. Mine did not so we had to install two layers of kicker boards screwing each layer into the previous one. You can see the white board used on the final mounting layer above the hood. This will match perfectly once we paint our cabinets, which is our next project. All in all the install took about 3 hours.
M**N
Now, THAT is an exhaust fan.
I live in an open Living/Dining/Kitchen space. The ceilings are up to 18 ft high. The fan that was installed with the house was a microwave with recirculating the air, not exhausting it outside, which is indicated for this type of building. The cooking oils were all over the ceiling fans. We got this Fan, and had a friend/Contractor install it professionally. It required a 8" hole through the solid foam core panel, and moving the Modular cabinet up about 10 inches or so. We had to purchase an outside wall vent louvered cover. It took two pros 3 hours to prep the holes in the wall and cabinet, Install the Fan, and reinstall the cabinet higher... I am not sure why they did it in that order. Luckily it has a PLUG end, and the microwave I removed was already set up with an outlet in the neighboring cabinet... Very handy. Otherwise I would have had to hire an electrician. The only real problem with installation was the plastic coating on the baffle filters, to protect it from scratching. I went through the Manuel three times looking for what to do with that... If it was supposed to come off. And, when I didn't find it there, I went online to the company site, where all they had was the same manual, without any mention of the plastic. So, in frustration, I copy and pasted the name of the fan with "removing plastic from baffle filters" into my search engine. Lo and behold, there was a VIDEO about removing the plastic from the baffle filters!!! Included in the prattle from the demonstrator was "MAKE SURE YOU REMOVE THE PLASTIC... IT IS VERY IMPORTANT TO REMOVE THE PLASTIC FROM THE BAFFLE FILTERS!!! " "Any damage from not removing it is not the maker's fault"... Blah blah blah. WHY IS THIS NOT IN THE MANUEL??? If it is so darn important... I was 99% sure it should come off, but I wanted to be sure I didn't mess it up. The plastic removes fairly easily once you get it started from the ends. I am extremely pleased with the fan. On low, the microwave is louder! There are 4 fan speeds, on 2, I held some smoldering material some 6" away from the front of the stove. Even smoke curling over top of the front of the hood got sucked back down into the exhaust. On 4, it is STILL not as loud as the "exhaust" on the old Microwave! Totally clears the house of smells! And, I had it placed reasonably high off the cook surface, to allow for no one banging their head, and to put spices on the wall behind the stove... LOVE IT, and it looks great! Very clean lines, nicely rounded corners, and heavy duty Stainless Steel including the impressive filters, the display will turn completely off, and it comes with a remote, which will work to about 20-25 ft. Even the contractor was impressed.
D**D
Built like a tank. Great quality. Very powerful.
** update**. Well it’s been 6 months and I still love the vent hood. Still a joy to use when cooking. Yes, it’s loud but no louder than any others I have ever used. As I said before, this unit removes stove smell and steam on low better than most do on high. It also has 3 more speeds above that. So per happy... still after 6 months. I was doing a retrofit job on my kitchen that had no external ducting. Was a big project but I am delighted with the results. This unit is powerful. On the low setting it extracts more than a normal stove vent does on high. It can almost suck the food out of the pans on the stove. LOL 😆 Lights are good and focused where they need to be. very hAppy with my purchase. Well boxed and commercial grade. A couple of notes.. I used a reducer to take the vents 6 inch exhaust down to a 4 inch. I also installed a secondary butterfly backdraft stop to insure outside air would not blow back in during light winds. I tested the unit before installation to make sure it was 100% operational. Going down to a 4inch pipe did increase back pressure but unit still works better than any hood I have ever used. Great unit.
T**R
It is not perfect, but the for the price it is perfect for your wallet
Pros: - Stainless steel finish design that looks fantastic - LED light is bright with just two bulbs. - Noise level is not super silent/quiet, but with 500 CFM or higher I don't know if you can find one that is super quiet. - Smoke suction is really good and does the job. - Not super lightweight but for a dual fan appliance it was not that awkward to install. Cons: - The touch buttons on the control panel is hard to find in the dark. So, if I just wanted to turn on the LED lights from the range hood in the dark, it's not that easy. However, on the other hand I just kind of have a mental memory of where the button could be located on the control panel. I have been able to pretty much turn on the lights when I needed it. - The clock does not display while the fan is running for the range hood. Not a deal breaker, but just would have been nice to have more visual data to see while in use. - The back panel screws, the screws provided and instructed for the back of the range hood, are useless. It is the most confusing and difficult diagram to follow, from an otherwise pretty simple installation. The back screws are there to help hold the range hood while you screw in the top screws. - The screws that goes on the top are the weakest looking screws, but they do the job. They kind of just stick out straight from the top. So if you drill the screws upwards and they poke through the cabinet panel, there are four sharp screws sticking out. Very awkward. Would have been nice to have some kind of end-screw caps to cover them. Summary: I've been using this for a little bit more than a month and have been very impressed. Before this range hood, we had a microwave under the cabinet combo vent appliance. It was one of the worse smoke venting appliance I have ever experienced. The smell of scrambling eggs fills up the entire home. With this Cosmos COS-Q57530, cooking curry, steak and many other food items, the smoke do not go beyond the stove. I have had to use level 2 to cook and nothing higher. The noise level for level 2 fan is not super quiet, but it isn't that crazy either. I can't describe the noise level, but it is better than the over the range (or under the cabinet) microwave vent that was originally installed. Oh the timer to shut off the range hood is pretty awesome, I have learned to use that lately. If I cook something that smells pretty strong, I will set the timer to shut off 5+ minutes (you can configure it for 1 minute or higher). I can go eat and not worry about having to get back up to turn off the range hood. The installation diagram paper that they provided was pretty good, I had to ultimately ignore the back diagram because it just didn't make much sense. I drilled so many holes in the back of the wall and none of them matched up to the actual holes on the range hood. If they were required I would have been really angry. I used a small hand lift to raise the range hood up (don't buy the hand lift they sell here, it's a horrible design). The diagram hole for the power cord is accurate, so don't think drilling a smaller hole will work out (I found out the hard way). I had to widen or cut a circular shape hole since the over the range (under the cabinet) microwave vent had a square vent and Cosmos is a round 8 inch vent. It comes with a flexi-duct adapter, which I plan on replacing because I read that it is not recommended for safety/long term use. I can see that the creases from the flexi-duct could potentially catch grease and build up long term enough to potentially catch fire. Furthermore, the flexi-duct is not smooth, so air travel going through it may just cause more noise compared to a smooth/solid duct. My duct goes straight up in the ceiling so not difficult to swap out. Overall, I do recommend this range hood. I haven't had any issues (yet), but I have read where another customer had the fans stop working after a month or two...? I suppose we shall see, because the previous reviews seem to be good overall. If I run into any major issues, I'll be sure to add it to my review here in the future. I use my range hood every day for slightly over a month and have had no issues with it so far. Update 06/21/2021: Installed this last Oct 2020, and we have been using this on a daily basis (2-3 times per day). No issues up to this day. I have not had to turn the fan on past level 2 (out of maximum of level 4), as an example, for either steaks or curry cooking. Still need to get rid of my flexi-duct, but I have to go and find the right fitting.
M**N
Very nice product, but difficult to install.
This is a beautiful and clean looking hood that works well once it is installed. Installation was a complete nightmare that took two of us about 8 hours for problem solving the tricky install. We had to add blocks to mount it up, and while the hood is extremely well made, the access to mounting holes is nearly impossible. I searched other reviews here and found one who detailed the exact same situation we encountered and even discovered the same round about solutions that my husband did. Very complicated. Value for money is good, once installed.
G**R
Quality Appliance 👍🏼
This is a hi-end quality hood at an affordable cost. Permanent steel washable filters, dual fan motors, good installation template. It’s heavy, 53lbs. We needed a hood to use the 10” of under cabinet space & this fit perfect. Installer & I were NOT impressed with the 4 screws provided to hold the unit up to the cab… we drilled the holes & then used steel bolts with wide washers & nuts. Our install is ductless… however every hood has to duct the exhaust air somewhere. This model ducts it either up into the cabinet thru an 8” hole you need to create in the cabinet bottom, OR it can vent out the back into a wall duct. Ours will vent into the upper cab… I moved a shelf down to within 3” of the bottom & then sized a simple furnace filter to just sit in that space. NOTE: if going ductless you’ll also want the two charcoal filters available (only) thru the Cosmo website at $65. Bottom line: a quality product! It moves air even at fan speed 1. If you duct to the exterior, great. If ductless, you just need to be a bit creative & understand that air must vent somewhere; and get the charcoal filters.
N**X
Do Not!! Use packaged manual
There are two different models, the JL is the newest. They use different carbon filters if converting to non-exhaust (in room circulation). So you can't order filters through mfg website until you have product s/n in hand so they can sell correct carbon filter. The actual hood width is 29.5", which matches the template. There should be a slight gap on either side. Mine will be tighter than the 2/5" recommended, more like .25 ". Picture of carbon filter installed prior to install. It will be a pain after as with a 25" gap between stove top & hood and filters being recessed, the stove will need to be removed every time filters need changed unless you think it possible to lay on the stove upside down and manuever within a 25" gap.🤔 Download and print the latest online version of the manual before doing anything else! The packaged one is likely obsolete based on package date. Pictures in product description do not show location of power cord (right side). Ordered a plug to fill previous power hole on left side (once again Amazon). Templates go on with print side against the wood. If not you get outlet hole on wrong side. I cut a 1.5" hole centered for new power cord (measure 2x cut once). The part about bending over excess on template is for top template. Remember there is an extra gap on template edging beyond the printed line take into consideration. The directions only indicate the weight as "heavy" (it is actually 59 lbs and change per TS). Better make sure your cabinet supports are screwed into studs and not just drywall anchors, so your significant other does not end up wearing it, if not I hope your job is good enough to cover alimony & child support 😉. There is no way to use the wall keyholes as designed for a under cabinet install, but you can use the top ones (a must & first point of connection). The packaged manual directed screwing into drywall before top. The new version does a 180. You have to remove stove/oven to install (obviously)& space is a premium so getting holes properly aligned is critical to success. Use the template as a rough only, then measure the crud out of it every which way but loose twice over. Take into account trim and cabinet offsets for reference measurements if not you will pay for it. One support person said some people vent into cabinet (when using carbon filter kit and not exhausting through a wall) and the drawing only shows hole in cabinet bottom, not top. At 500 cfm and nowhere to go expect back pressure, overheated motor, and doors flopping like your cabinet is haunted, not to mention a mini sauna from vented clean steam into cabinet, unless the carbon filter blocks "all" moisture and fills drip pan. Black mold in a cabinet would not be fun. If there is a gap between ceiling and cabinet top, best to cut a hole directly above the first. A 8" hole will not likely be enough for bottom hole if using the keyhole slide method in top ideally 8.5 or slightly more"). They need to relocate exhaust vent in design slightly to compensate for the offsets in my humble opinion. Why you ask? Well with an 8" hole you have exactly .25" clearance between duct and hole (when it is not collapsed) add width of compressed duct plus the 1/2" offset (1/4 all around) to slide top from keyhole to slot (final resting place) and you have a preinstalled duct ramming into a cabinet instead of through a hole with 8"! Bending the duct to try forcing it in is asking for damage to it. Duct must be installed before hood goes up depending on whether your entire cabinet bottom is flush or if you have standoff supports with gap in middle see picture. If there is a gap, there will be no room to attach ring to duct after installing hood. The alternative to a larger hole might be to set up some temporary support to rest the hood on and have someone hold in place while someone else sinks screws into all the predrilled/anchored holes. Picture attached of one concept I may use if run into a duct clearance issue. This is where keeping all that scrape lumber around pays off and you can tell your wife, I told you so. New lumber is not cheap. Also due to weight and only 4 wood screws on top, you are going to want to use the beveled washers on top to disperse the weight to a larger area than screw head. Well because the beveled washers provided are the same size as keyhole or a smidge bigger, when raising the hood over preinserted screws it is unlikely they will drop through keyhole in order to allow sliding but hey maybe not. Just saying pre-fit the beveled washers before getting to far in as it would be irritating to raise it up and not have the washers drop through. You may need to buy your own or plan to insert screws and beveled washers while someone holds up 59lbs who keeps saying hurry up I can't hold much longer then drops it with 2 screws in, ripping out the bottom of your cabinet ouch. The wood screws are designed for the washers so even though no direction in manual provided how to use them, they better be on bottom side of hood when your done. (Think"everything" through before you grab the first tool or pencil or end up measuring everything 4x). Instead of buying an 8" flange to come down from top hole, I bought a 8" louvered & screened vent to point exhaust in direction of my choosing. It is the tightest fit imaginable to get the provided ducting over it, but it can be done and avoids the cost of a flange & is so tight I won't need a band. See pictures ( Amazon is your friend here - struck out at Lowes). Getting top hole aligned with bottom hole is tricky. Take into account the inside cabinet wall side thickness when measuring bottom edge to align top hole as bottom hole won't have the extra material. My top hole kisses (lip locks) the cabinet support at the top. Drill a small test hole from bottom to check saw alignment from top down to make sure you don't cut through a support ledge. You may need to offset slightly to avoid that screw-up. This hood may sit a lot lower than what it replaces. Measure from cab bottom to stove, subtract 10, should be 24-36, if not reconsider your purchase. Still waiting on my hole saw..first one defective arbor pins would not align with saw sent back. Second one discounted "like new" was missing arbor and bit all together. So now after research the correct arbor on order via Amazon from same German mfg. so it should fit. I trust German QC more than some others and leave it at that. Hope you found humor in this review but the installation will be anything but funny if you do not spend the time to triple check centered spacing side to side, hole spacing to back wall and spacing between holes. Wear gloves and use care to prevent dings and scratches, ie don't throw any tools at it while cussing. 😉
Trustpilot
1 month ago
3 weeks ago