Desertcart purchases this item on your behalf and handles shipping, customs, and support to OMAN.
🔧 Seal it fast, seal it strong — because your ride deserves the best!
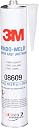
3M 08609 Window-Weld is a professional-grade, high-strength urethane adhesive designed for fast, permanent windshield and auto glass bonding. Featuring a super-fast 1-hour cure time and a no-mix, one-part formula, it delivers OEM-level strength and weatherproof sealing with easy, drip-free application. Trusted by pros for reliable, leak-proof results across a wide range of vehicles.
| ASIN | B000FW61EW |
| Best Sellers Rank | #2,885 in Industrial & Scientific ( See Top 100 in Industrial & Scientific ) #12 in Urethane Adhesives |
| Brand | 3M |
| Brand Name | 3M |
| Color | Black |
| Compatible Material | Glass |
| Container Type | Cartridge |
| Customer Reviews | 4.6 out of 5 stars 4,448 Reviews |
| Full Cure Time | 1 Hours |
| Global Trade Identification Number | 00051135086094 |
| Included Components | Window-Weld |
| Item Form | Paste |
| Item Package Quantity | 1 |
| Item Type Name | Urethane Super Fast Cartidge |
| Item Weight | 0.9 Pounds |
| Manufacturer | 3M |
| Material | Urethane |
| Material Type | Urethane |
| Model | 08609 |
| Number of Pieces | 1 |
| Other Special Features of the Product | 1.Professional Auto Glass Bond 2.Easy, No-Mess Application 3.Super fast 1-Hour cure 4.Easy caulking 5.OEM Strength |
| Part Number | 08609 |
| Special Feature | 1.Professional Auto Glass Bond 2.Easy, No-Mess Application 3.Super fast 1-Hour cure 4.Easy caulking 5.OEM Strength Special Feature 1.Professional Auto Glass Bond 2.Easy, No-Mess Application 3.Super fast 1-Hour cure 4.Easy caulking 5.OEM Strength See more |
| Specific Uses For Product | 1.Windshield Replacement 2.Back/Side Glass |
| Tensile Strength | 1000 Pounds Per Square Inch |
| UPC | 051135086094 |
| Unit Count | 10.5 Fluid Ounces |
| Viscosity Level | Medium |
| Volume | 10.5 Fluid Ounces |
| Warranty Description | New out of box defects |
| Water Resistance Level | Water Resistant |
G**A
Great to repair my 02 thunderbird soft top
Great product. Awesome results.
P**O
This stuff really works.
Used this on my 2009 Audi A4 Convertible top glass rear window and it is holding extremely well. It has amazing sticking power, dries pretty fast. My only caution is when doing a window on a convertible top, you don't need a huge amount to do a good repair. I cut the bead line too big and I put too much material between the top and the glass window. I also used the CR Lawrence Suck and Clamps to hold down the top to the glass. So the combination of too much material and really tightening the clamps too tight, I made a mess and had a lot of material ooze out onto the glass. Also, I tightened down the clamps so tight that I must have forced some of the material up through the fabric, so that when I removed the clamps I had visible stains on the outside of the convertible top. However, my top is 9 years old, and this repair should get me another two years until I can buy a new one. Listed below are my recommendations. 1. Make sure to buy the primer that goes with this and use it. 2. Raise the top ever so slightly to take the pressure off it, then brace it so it doesn't drop down. I used rags under the back of the top and a cardboard box between the top and the front window. 3. If you have a lot to repair, consider doing it in small steps, it's much easier that way. 4. Use thin disposable gloves, have several extra on hand. If you get any material on the gloves, put on a new pair. 5. Cut a small bead line, and apply a thin coat to the sealing area between the glass and the top material. 6. Use the CR Laurence clamps, but don't tighten them too tight, only enough to get a good touch seal so the bonding material makes good contact. An alternative to the clamps could be one or two automotive inner tubes or pool toys, that you brace inside the car and then inflate to allow them to put pressure on the glass from inside the car. 7. If any material oozes out onto the glass, loosen the clamp a little and allow the material to set up for about an hour. Then you can take the clamp(s) off and very carefully cut the xtra material using a razor blade. Be very careful not to fray the top with the razor blade. At this point the material doesn't need a lot of pressure to cut off, and light pressure on the blade will easily cut it. Re-apply the clamps. 8. Starting within 30 minutes of applying the material, gradually ease the pressure off the clamps until after about 3 hours you can completely remove them. 9. I let the repair set for two days before I drove the car. 10. Take your time, it's not really hard to get a good repair.
W**.
Mucho satisfied
Recently bought a used camper shell with vent windows that were taped in place. This stuff really did the job for repairing the the windows and obviously worked better than the stuff that A.R.E. Company originally used.
T**P
Mustang convertible rear glass repair AAA+++
I was extremely happy with how this adhesive worked ... I followed directions found on the internet using suction cups, 3M primer, primer spreader sticks/balls and 3M Window-Weld urethane adhesive w/wood strips to spread the load. I was particularly pleased with the good initial tack and the extended open time of the adhesive. This allowed me to move the glass and stretch the top while my son perfectly aligned the fabric to the existing glue line resulting in a very near perfect repair. The rear glass bond had failed very quickly (over 2-3 days) resulting in over 3/4 of the glass coming loose. First the top section separated and by the time my supplies arrived the passenger side had separated past the corner and half way across on the bottom. It took 3 separate "gluing" sessions to bond it all back up over a 2 day period. The first 2 sessions re-glued the bottom section and the upper corners leaving the full width of the top glue-line for the final session. BTW - The picture of the passenger side of the glass is the trial-fit and does not show the use of continuous spreader-sticks around the corner. I don't think the "After" picture shows it but there is a small flaw in the bead across the top ... I had too much space between the clamps and I did not get perfectly consistent squeeze-out in one small section. The important note is that by saving the "tip" from the glue cartridge I was able to plug-it-up and keep the adhesive from drying out so I could continue to use it as each section cured (4-5 hr minimum). In hindsight, I should have done the final top section in 2 parts but I was (incorrectly) concerned that the adhesive would dry out in the tube before I could get the full window re-glued. Excess primer drips/runs and Window-Weld adhesive squeeze-out was of no concern. A razor knife cleaned it all up both perfectly and quickly. It has been a week since the repair and there is no evidence of the adhesive failure ... I expect it to last longer than the rest of the original 13 year old top. If the last of the original/factory installed bond fails I will not hesitate to order again and repair it in exactly the same way. Totally satisfied.
S**L
Turned out great!
I want to thank the last reviewer’s comment because I too have a 2004 Volvo C70 convertible and wasn’t sure if I should do it until I read it. I used the recommended product and the associated primer to glue the back window back to the top. A few tips: 1) Use latex gloves and replace them often 2) Open the roof slightly before you glue the roof I’d say about an inch open from the back as a gauge and dont fully close for 2 days. 3) Tape the boarder around the window to help during cleanup. 4) In order to push the rear window inside I used down sleeping bags that worked really well. 5)I glued the top and top corners first because the clamps I ordered only had 6. 6) I used paint stir sticks to apply even pressure to the window. 7) Plan for 2 -3 days for this. 8) Have a cover for the roof to protect from the elements. 9) Check out the videos as well. It worked great and I hope not to do this again
C**H
What you want to reglue convertible windows.
When combined with the primer, this adhesive holds like St Georges dragon. I used it for re attaching a wayward Mustang convertible rear window and it did the job. Top up, top down, window stays put despite the strain it gets from the top fabric pulling at it. It was this or replacing the top and this works much better. Do mask off the areas you don't want glued and wear gloves while working with this adhesive. It gets everywhere quickly! You might get if off the glass but you'll likely never peel it off of the top canvas.
J**Y
Perfect application for BMW convertible fabric window installation
I’m updating after 4 years now. I Used on a separated rear BMW convertible glass. The bond is still holding up great and still shows no signs of separation. Have a helper, she can help keep clean - * below you will read Does what it’s supposed to do. I Used it to install a rear window on a BMW convertible. It worked great! * buy the window suction clamps 1) Use the 3M primer with this - **it provides the bond to glass- I also placed some on the fabric, I don’t think it would hurt - the weld won’t bond to glass without 2) Use small bead (not heavy) all around the edge of glass - ** make sure it’s enough but not a big glob - 3) tighten window suction enough to start the squish of weld. **Do not extremely over tighten. That will squeeze to much weld out and window will not stay bonded. Let set for a hour 4) Use plastic/ rubber mechanics gloves and finger a clean bond around window. Just like you would with window caulking. Be careful on touching anything with the weld. It will be very hard to remove. Thinking clean will give you a nice result - I had a helper (wife) take a old towel to clean excess weld from my gloved finger so I could continue the clean caulking edge I was after. When the job sat for 26 hours the weld was super hard and looked great around the glass edge to the fabric. * keep in mind this weld is a glue - if it gets on anything- it is on it. You can scrape it off glass with a razor but avoid painted or fabric where you don’t want it as it will be hard to remove. Take your time and you will get the bond your looking for. This saved me thousands of dollars vs a replacement of top that I was quoted as the only way of fixing Other items I used to install a rear glass on 135i BMW convertible. * C.R. LAURENCE #SC6 Suck-N-Clamp Six-Pack * 3M window weld primer
N**Y
Great working product!
Great product, works great. I will buy again!
W**K
Thumbs up
Powerful
D**Y
Works great!
Replaced a window, worked great.
L**S
Buena calidad.
Llego en bien estado.
M**Y
Great product
Great product when used properly and in combination with 3M primer. The rear window on my wife's 2006 Crossfire Roadster separated from the convertible top so I used these two products to glue it back to the top. About 3/4 of the window needed to be glued back and these product worked extremely well. You need to plan how you'll do it and take your time doing it but you'll be happy with the result. Total cost of the items needed (primer, window weld and suction cups) was about $150 and was done over 2 days given you can only do half the window at a time.
M**N
Fantastic
I actually bought this to fill in engine mount(s) where they started to crack and move to much. This Urethane made the mount(s) a lot stronger and functional again (yes, there are some vibrations can be heard, but it will go away after few days of use).
Trustpilot
1 month ago
4 days ago