
Desert Online General Trading LLC
Dubai, United Arab Emirates
Desert Online General Trading LLC
Dubai, United Arab Emirates


🚀 Elevate Your 3D Printing Game with Precision and Speed!
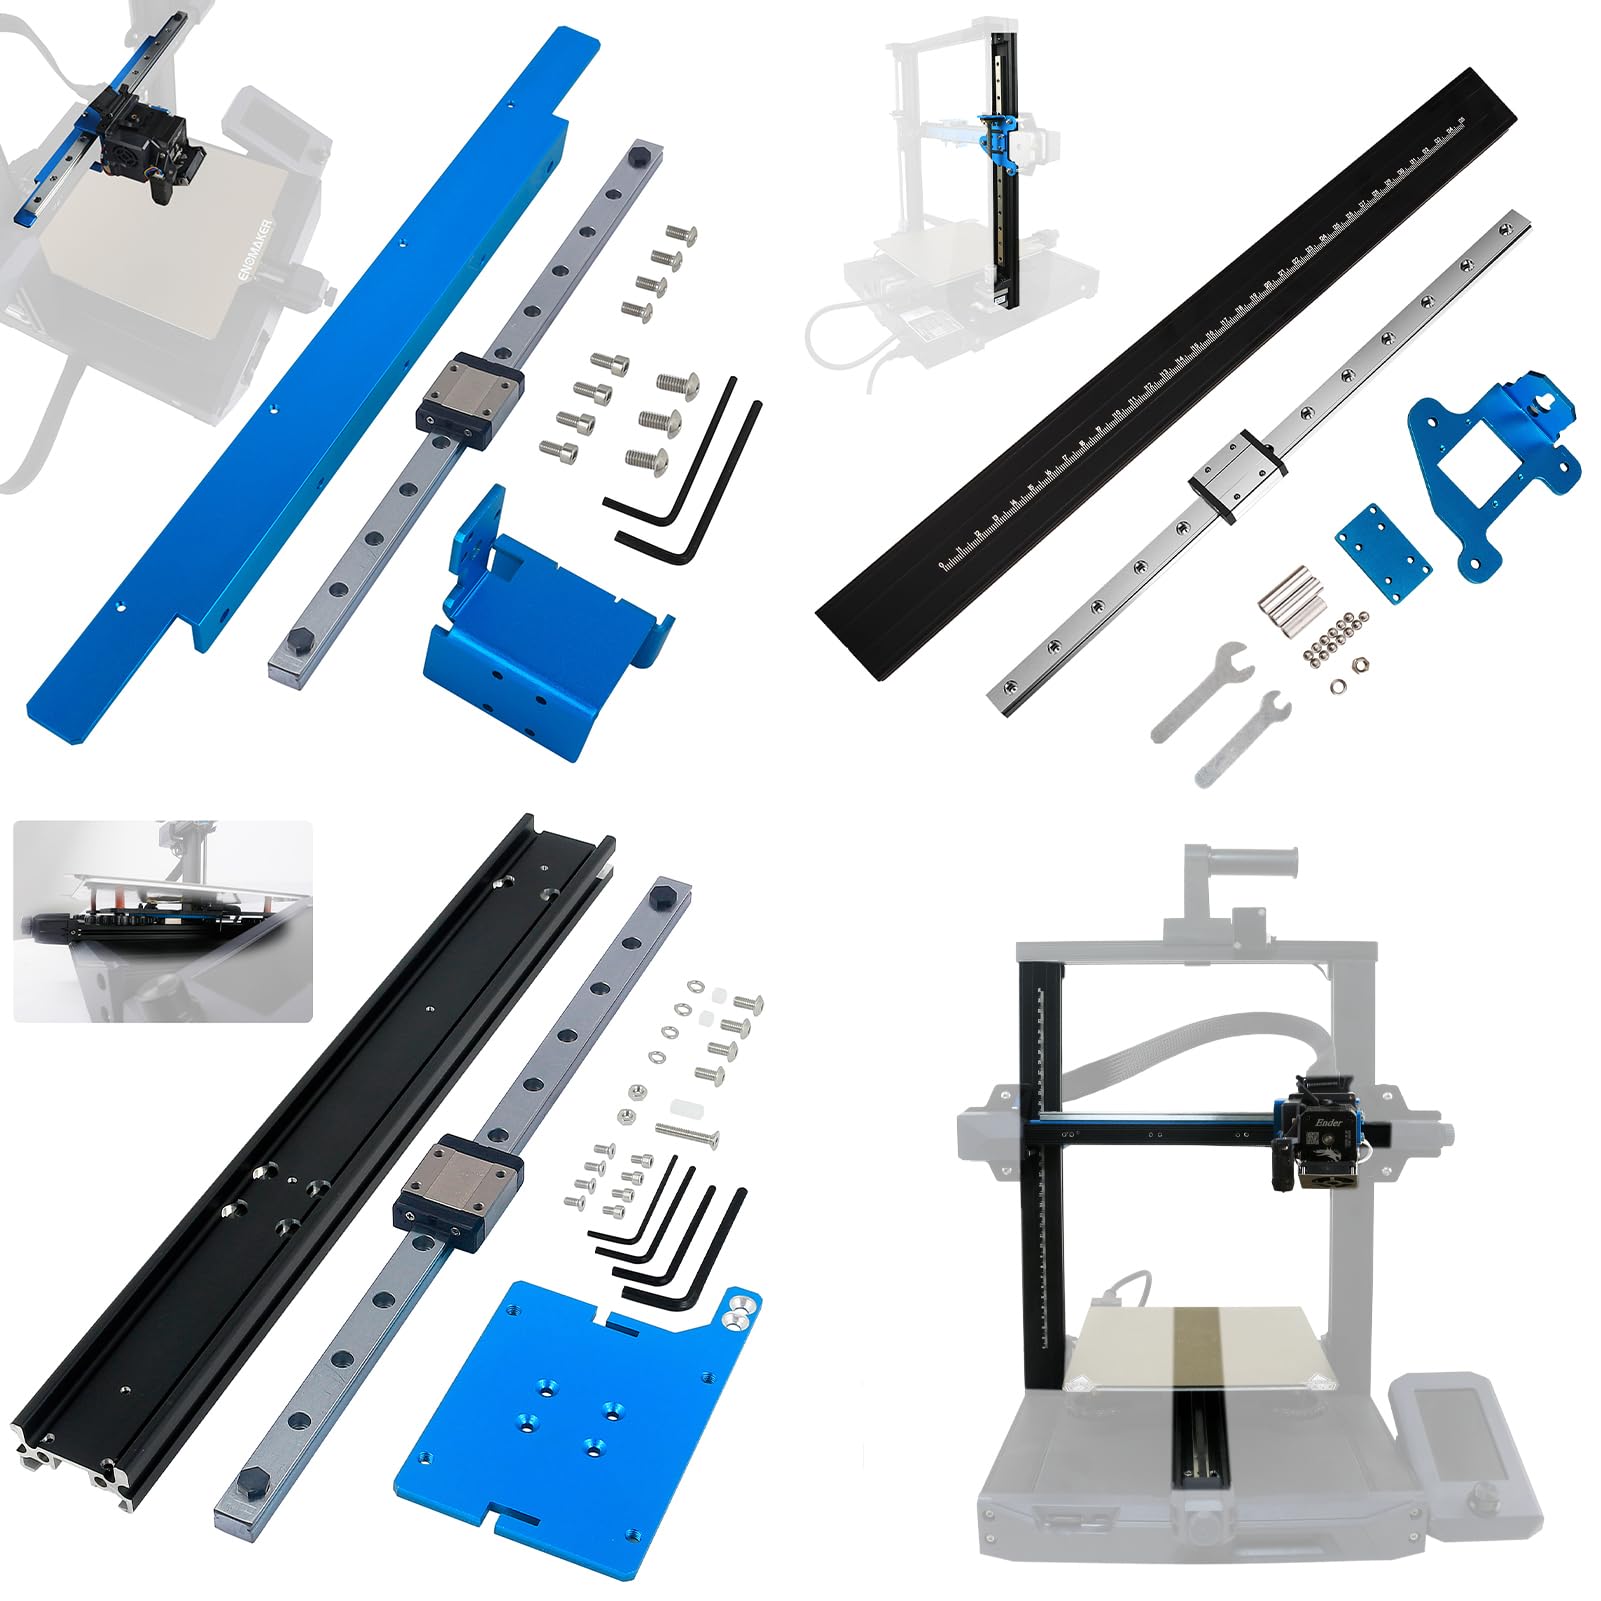
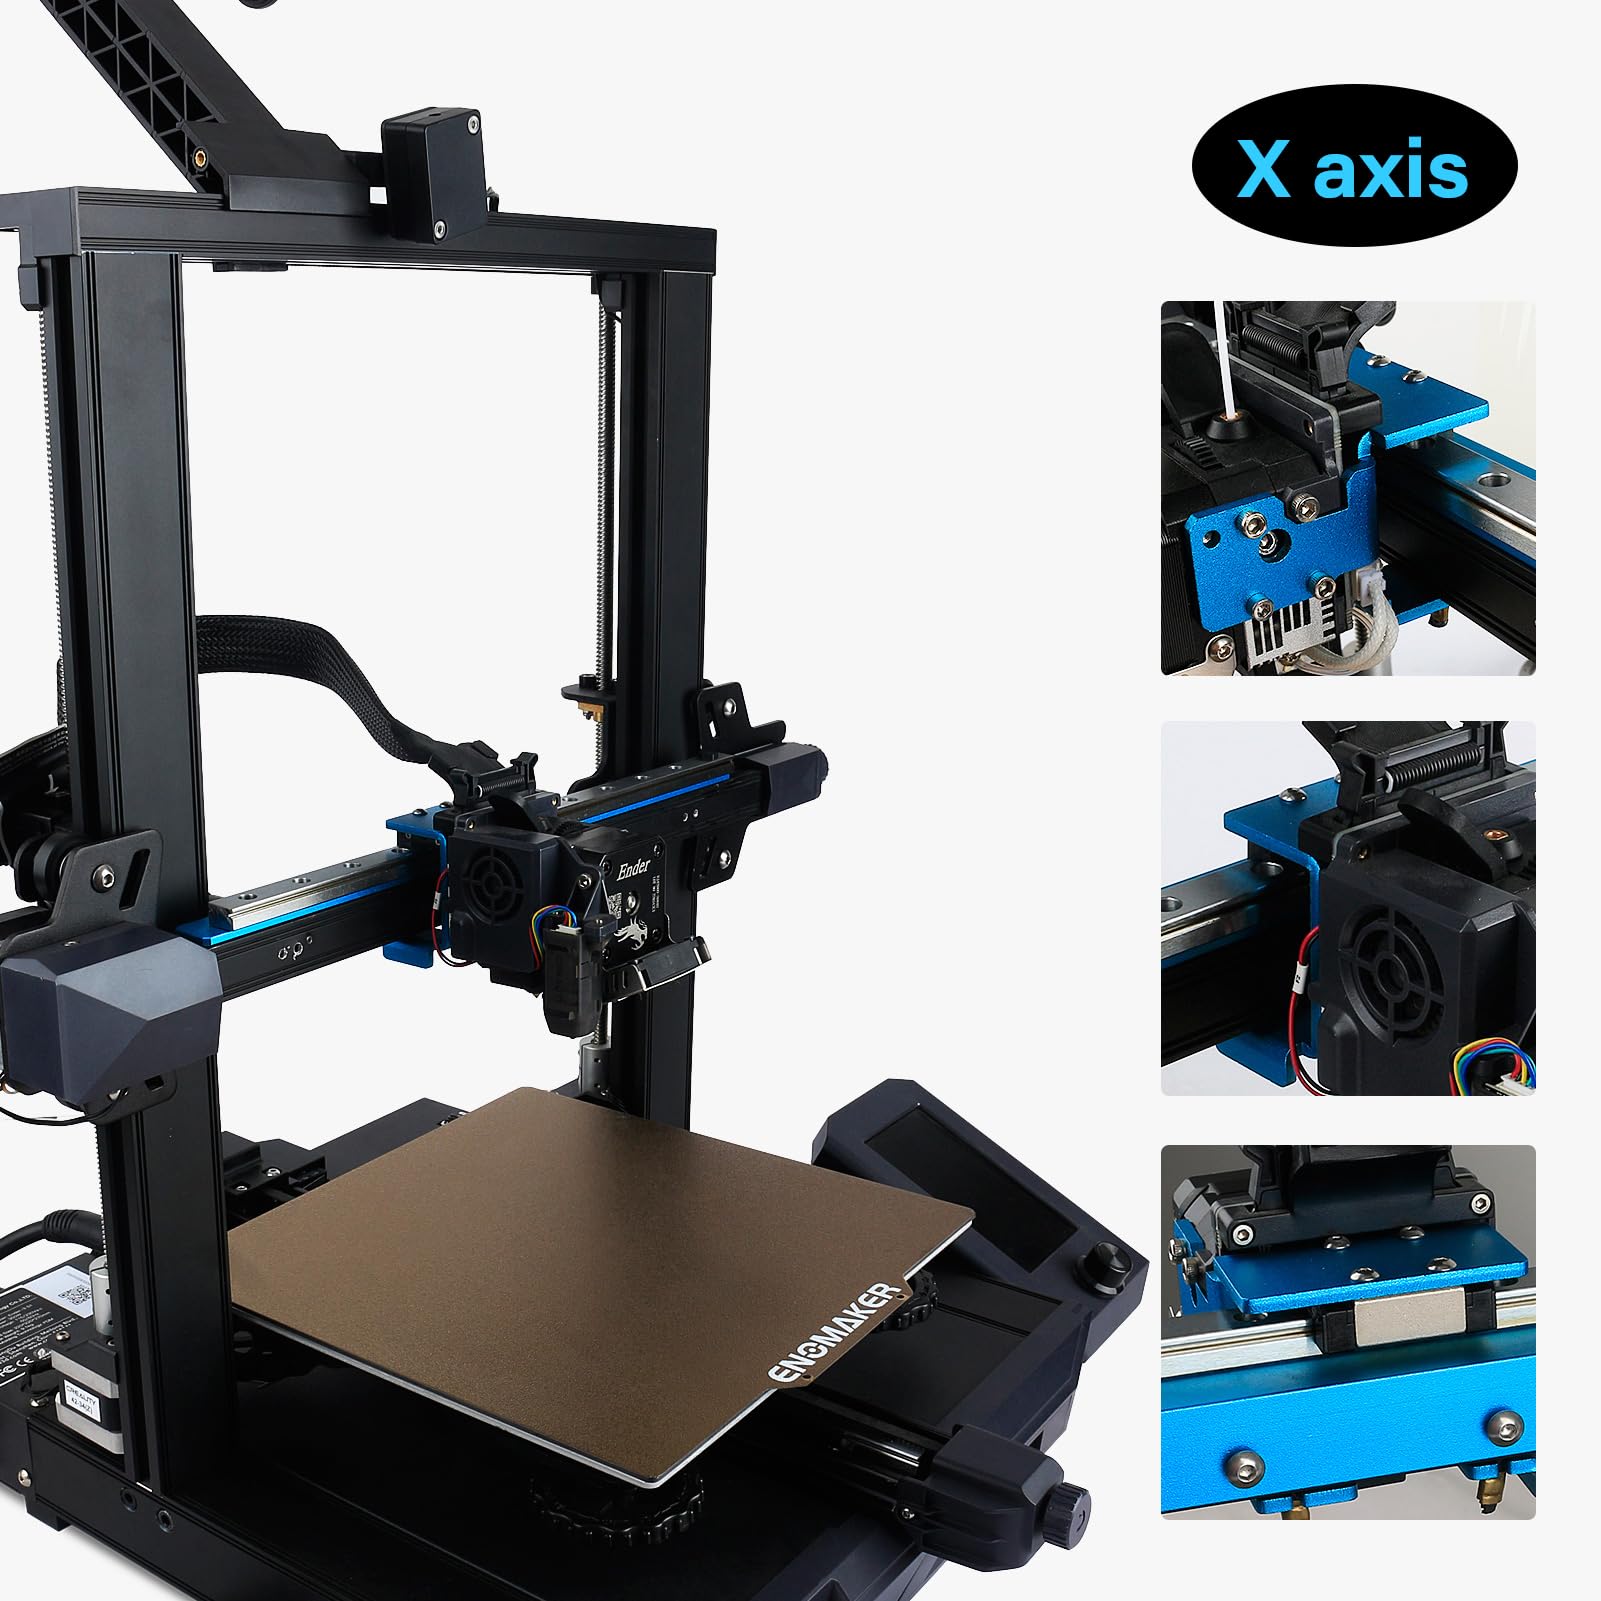
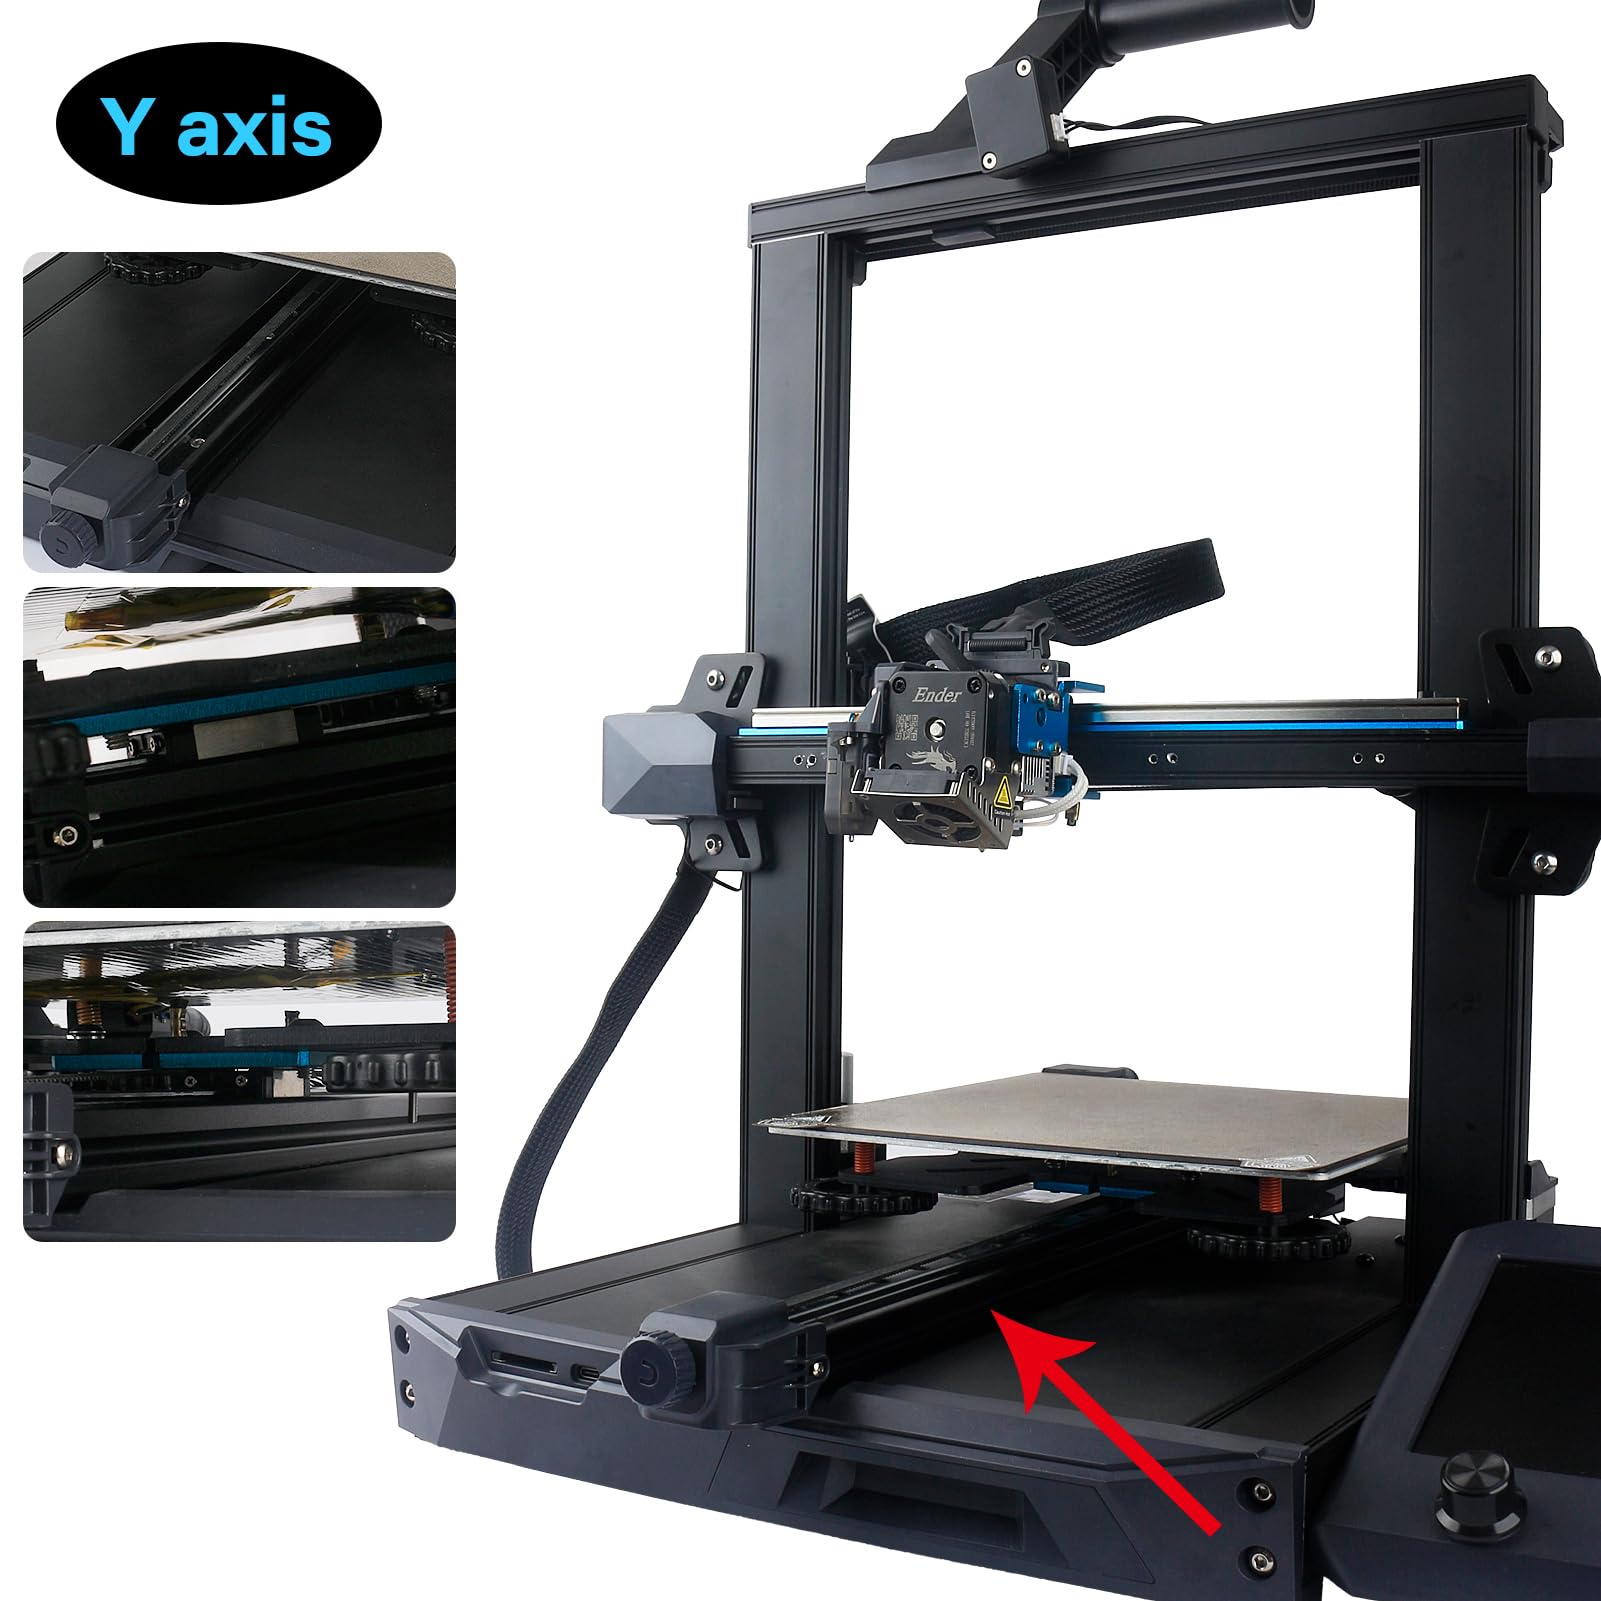
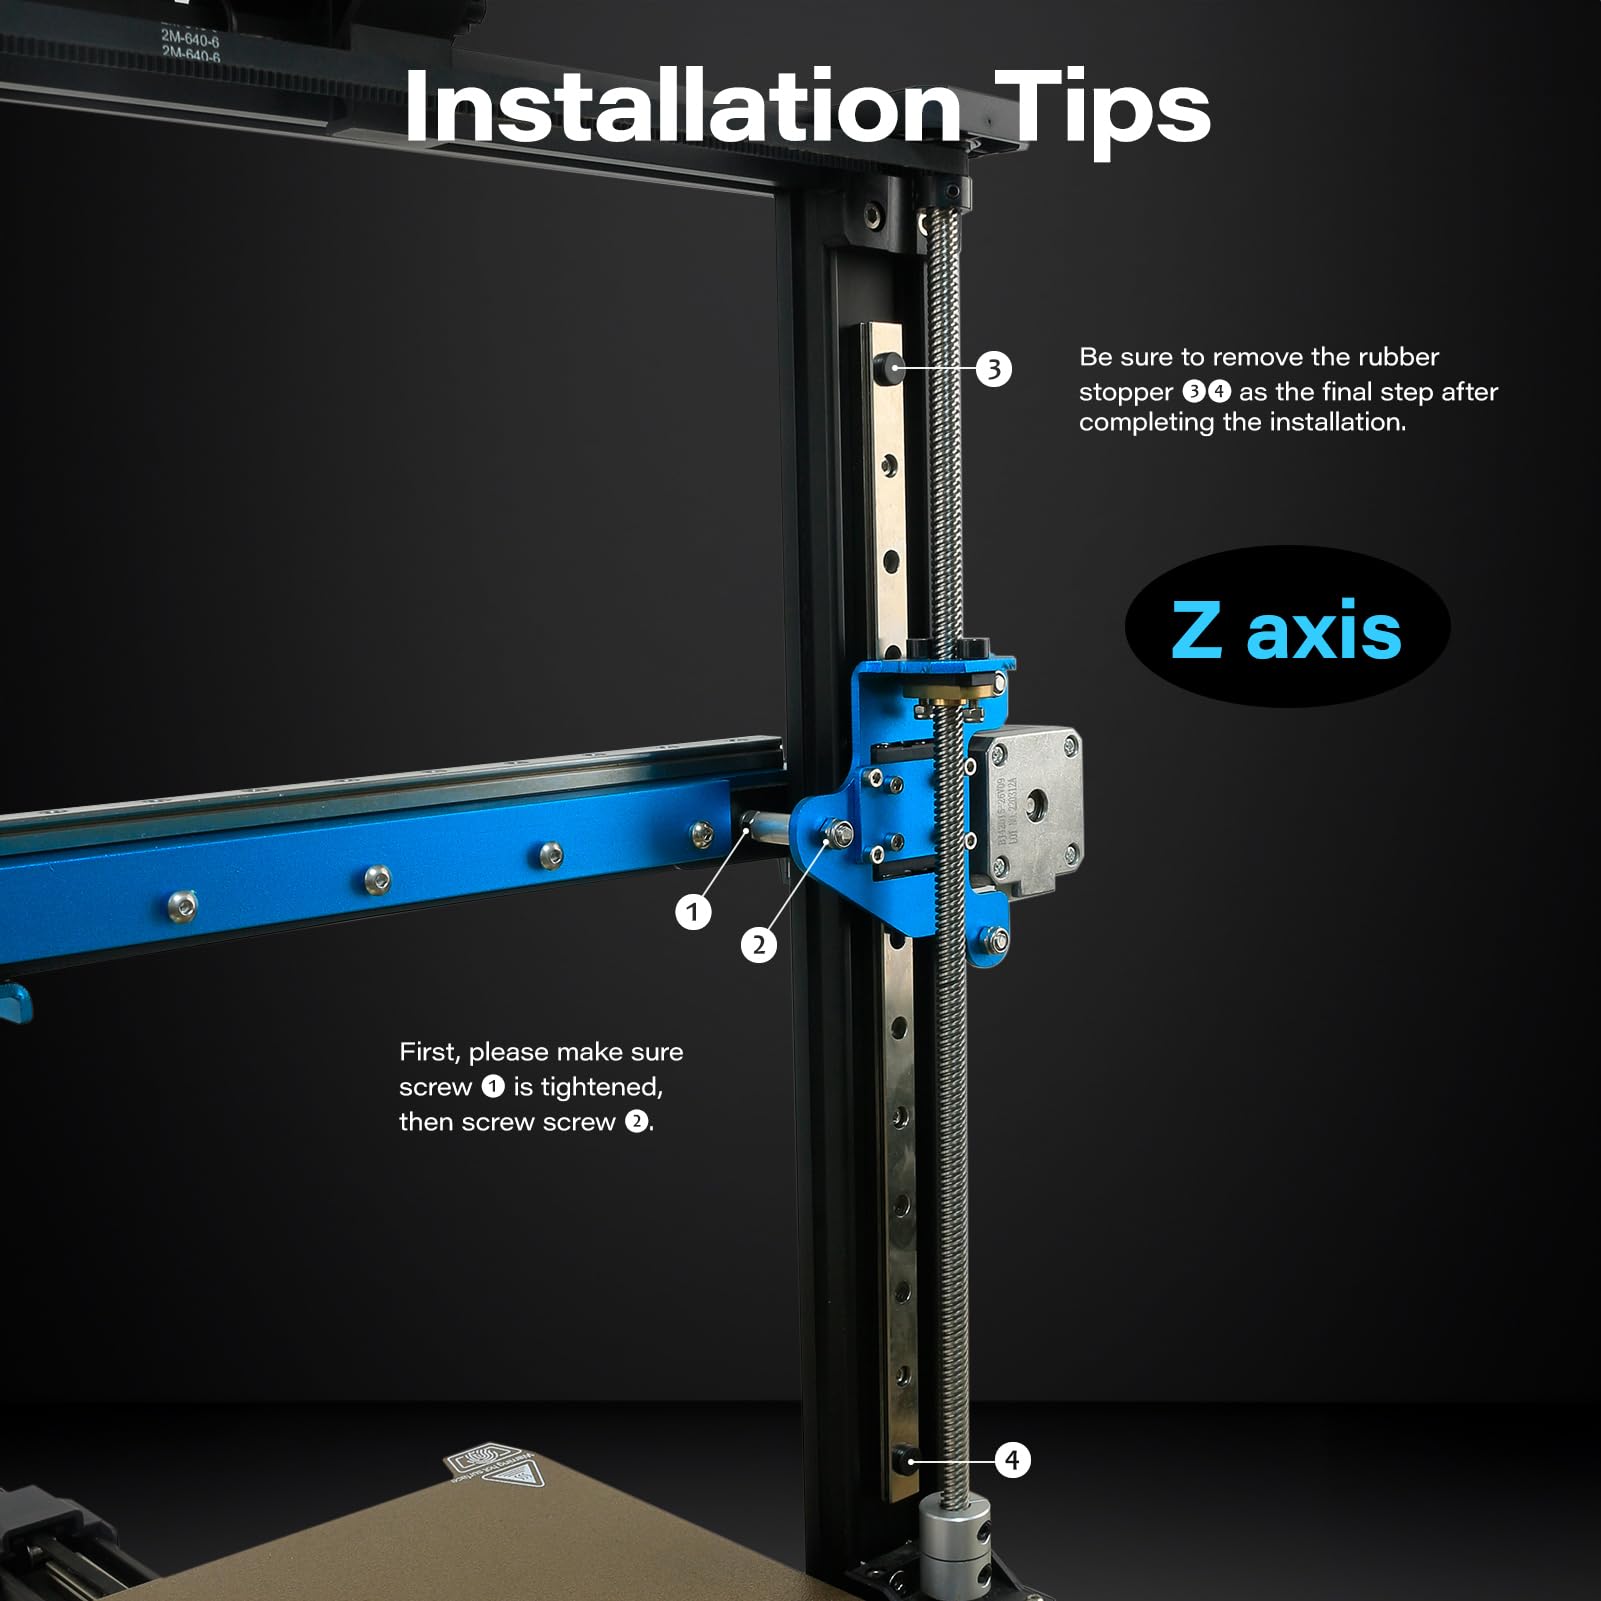
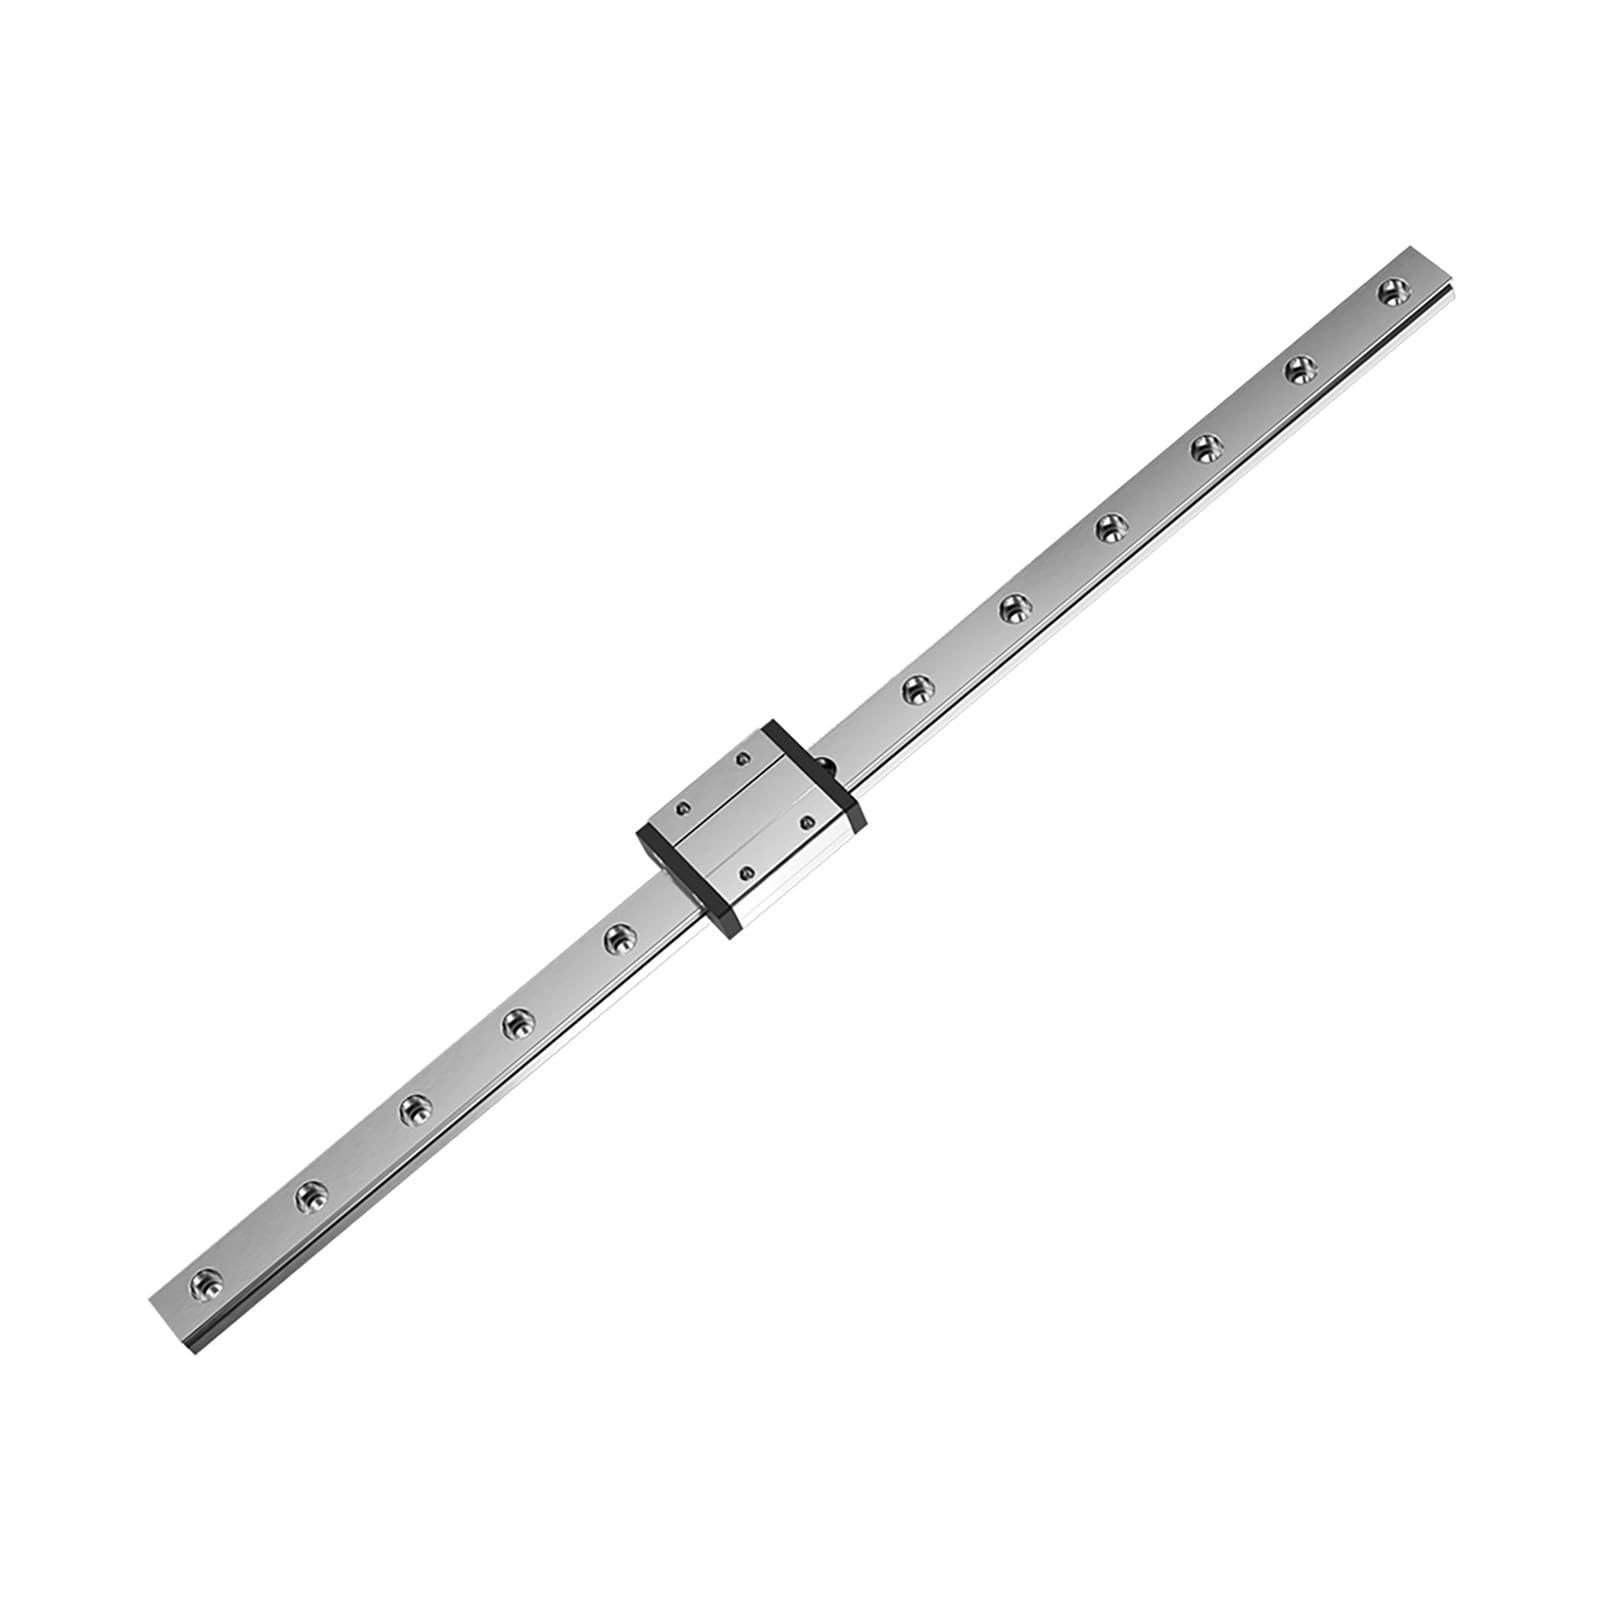
The ENOMAKER XYZ Axis Linear Rail Guide is a high-precision, durable upgrade designed specifically for Creality Ender 3 S1 and S1 Pro 3D printers. Featuring premium steel linear bearings and a low-friction rail system, it delivers smoother, faster, and more stable printing performance while adding a stylish peacock blue finish and secure rubber stoppers for enhanced reliability.
| Manufacturer | ENOMAKER |
| Part number | ENO-3S1-XYZ-RailGuide |
| Item Weight | 1.45 kg |
| Package Dimensions | 48.01 x 14.48 x 7.37 cm; 1.45 kg |
| Manufacturer reference | ENO-3S1-XYZ-RailGuide |
| Colour | blue,black,silver |
| Style | [XYZ axis]Ender-3 S1/Pro |
| Material | metal |
| Item Package Quantity | 1 |
| Batteries included? | No |
| Batteries Required? | No |
J**N
The good, the bad and the downright ugly!
Bought this as I was fed up with adjusting print head wheels and dealing with flat spots etc. I was aware that these rails can be more of an easy life upgrade than improving quality and was also very aware that some of these cheaper kits had some dubious machining on the carriage itself that caused a lot of people problems, so I bought this entirely expecting to have to return it.Nope, it went together way easier than I expected! The chassis came with options for different DD extruders, (something the Creality kit did not offer) that I was even able to bolt my very modified Hero blower setup to with no hassle. The rail itself comes with a mounting bracket that makes alignment very easy, unlike other kits I had seen that required some sort of alignment tool.Due to the way the carriage mounts, you will need to bring your Y-axis stopper forward a bit as you'll find your nozzle will now sit about 1cm in front of your bed when at the home position.The rail and carriage are much better quality than I was expecting, there was no play in the carriage and the carriage body itself looks reasonably well machined with bearings that were all the same size.This is where the ugly bit comes in. The reason I know about the bearing sizes etc, is because I had to take the entire carriage apart to clean the oil that the manufacturer drowns it all in.This is why I would say this upgrade is not for those who may not be comfortable with taking apart very small parts as you will need to clean that oil off properly and re-lubricate with decent oil/grease before installing. I cleaned a ton of grungy oil soaked deposits from the rail guides and the bearings themselves, this is what destroys these carriages and is the reason why the carriage felt a bit grindy when first opened from the packaging.So, if you don't have shaky hands or sausage fingers and you have a bit of patience, there's a bunch of Youtube vids that can show how to take these apart and clean them etc. I'm very happy with this upgrade so far and will be looking at switching the Z & Y for rails eventually too!
J**L
Unbalanced Z alignment
The blue mounting bracket isn't flush so the left side floats in the air. Meaning the extruder wiggles on one side
ترست بايلوت
منذ 4 أيام
منذ أسبوعين