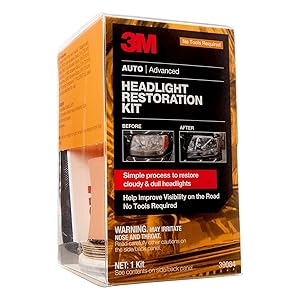
💡 See and be seen with headlights that shine like new!
The 3M Headlight Restoration Kit offers a simple, 5-step hand application process to restore clarity to yellowed or dull plastic headlights and other vehicle lenses. Designed for vehicle-specific fits, it includes sanding discs and a polishing pad with compound, requires no tools, and is waterproof for durable results across cars, motorcycles, snowmobiles, and more.


| ASIN | B006VB8JTQ |
| Additional Features | Waterproof |
| Auto Part Position | Front |
| Automotive Fit Type | Vehicle Specific Fit |
| Brand | 3M |
| Brand Name | 3M |
| Color | black |
| Compatible with Vehicle Type | Motorcycle, Snowmobile |
| Customer Reviews | 4.3 out of 5 stars 2,491 Reviews |
| Global Trade Identification Number | 00051131390843 |
| Is Assembly Required | Yes |
| Item Dimensions | 3.7 x 3 x 5.5 inches |
| Item Weight | 4.48 ounces |
| Lens Color | clear |
| Lens Material | Plastic |
| Light Source | Incandescent |
| Light Source Type | Incandescent |
| Manufacturer | 3M |
| Manufacturer Part Number | 39084 |
| Model Number | 39084 |
| Model Year | 1990 |
| OEM Equivalent Part Number | 39084 |
| Set Name | Hand Application |
| Special Feature | Waterproof |
| UPC | 051131390843 |
| Unit Count | 1.0 Count |
| Vehicle Service Type | Motorcycle, Snowmobile |
| Voltage | 12 Volts |
| Wattage | 55 watts |
| Year | 1990 |
K**N
Way better option than replacing the whole headlight! Looks fantastic, worked exactly as described.
As you can see in the pictures, my headlights were in rough shape! The ones with the blue painters tape are the before shots. This is my company work truck, has over 325k miles, I drive it a minimum 35k a year. Many of these trips are fully coast to coast (Maine to California) and the front end gets so beat by the big trucks on I-80 kicking up crap, all the bugs, salt and sand in the winter... you get the picture. I didn’t want to have to spend a few hundred bucks to have Toyota replace the lights with how many miles it has now, but they were pathetically dim due to the scratches and other wear on the outer lenses. Figured it couldn’t possibly hurt to give this a shot for a fraction of the cost of replacing them. As you can clearly see in the pictures, they look amazing. And honestly the pictures don’t do it justice, the amount of light now coming through is like I switched on the high beams. Highly recommend this product. Instructions are easy to follow and everything you actually need to do it is in the package. Only things not provided are some decent soft towels, a spray bottle of water, and painters tape (my trucks paint is a joke but figured I’d keep it from looking any worse!) Opening the hood makes them much easier to get to. I didn’t need all the sanding pads and my headlights were ROUGH, like actually rough. Kept front end out of the sun, it was probably 75 degrees out and for once not super humid. I’m sure you don’t want them being really hot from the sun or freezing, as keeping them consistently wet in the last few steps is really important. Took a good amount of work and it clearly states in the instructions the time you put in sanding and smoothing them out is ultimately what will make the difference between them coming out just ok or really good. Will definitely get this again if I need it!
M**E
Simple-Easy to follow and works perfectly!
I've had a lot of time on my hands since surgery (laparoscopic gallbladder removal) so I've been finding little projects to do to keep me somewhat sane. I purchased this 2007 toyota Prius over a year ago. As part of the selling agreement was for them to repair/restore or replace the headlights because it was obvious how bad they were. Long story short, they failed to do so after I purchased and signed everything. I purchased this product skeptical but slightly hopeful given the awesome comments I read. I read the directions online along with getting pointers from the reviews. Took me about 1.5 hours to complete, fairly simple, just follow the steps.(I feel I should stress how little I know about cars and car repairs but the instructions are SUPER SIMPLE) The only way I deviated from the instructions was by having a rag and pot of water to dampen the sanding pad and lens rather the suggested spray bottle (I didnt have and didnt honestly feel like driving to the store for that) and everything turned out perfect! For me, the sanding was cathartic and it's a very crucial part of the process. I also purchased a UV protection spray but, I'm giving it a couple days before I apply it due to a number of reviews stating it created a foggy/haze all around the lens.
R**R
Worked for me
I used this on a 2000 model car and got good results as shown in the pictures. Directions were easy to follow. (Almost had too many directions since it outlines every little step.) The two things I was upset about and that made me leave a 4 star review instead of 5 are: 1. The hook & loop sanding pads were very small. I thought I was going to be able to use them on my sander, but when I opened the package, they were very small.(3") 2. The compound is in a tear package instead of a resealable tube. So once you open it, it's as good as gone unless you are doing more headlight restorations very soon. On the plus side, it took me about 10 minutes per headlight from start to finish. Everything went very smoothly. If it weren't so humid outside, I wouldn't have even broken a sweat. If you can follow directions, I wouldn't hesitate to purchase this product. There are more out there, but this is the first I have tried and I was pleased with the effort required and the results.
T**E
Such an Easy Kit to Use! My First Time Trying and It Works Great!
I thought I bought the kit with the drill attachment and I was bummed at first because the yellow build up was so bad on my Mom's car. Since I wanted her to see better at night and for others to see her car, I decided to try it anyway. This is a hand only, no tool required kit. After following the steps and spending about 20 minutes per headlight, I am AMAZED with the results! It actually removed all of the yellow crud! I still have some discs and solution for another set of headlights too! This kit is $15. A professional detailer will cost you around $25-$50 per headlight. You even save hundreds because you don't have to buy new headlights! I love the fact that we did this for a YouTube video on our channel "The Sinister Camaro." Feel free to check it out in our car care maintenance playlist to see how incredible it looks. We will be getting another kit for sure! Things to note: - This comes with the instructions, different sand paper pads, polish, and Velcro/squeegee pad. - This does NOT include masking tape, newspaper, wax sealant, or headlight renew. - Wax will be needed every so often to protect the headlight from the elements, so it will not happen again (I recommend wax on headlights even when it is new, so this is not an added step just to keep the yellow off). - If you do start to see the yellow buildup again after a few months, all you need is an easy spray solution of headlight renew. Easy spray on and wipe off instead of this sandpaper process. Hope this was helpful and have a great day!
A**R
Doesn't come with drill attachment!
This product works, so I can't get too pissed off, but several places in the description say it works with or without a drill. So I got all jacked up to go drill my headlights only to find that there is some kind of separate drill attachment thing that comes with a different kit or something and did not come with this one. Apparently this is a common activity for people and they have purchased and saved all kinds of different kits over the years. And so I found myself in my garage on a cold winter's morning sanding the bejesus out of my headlights by hand, like a moron, while a perfectly good drill sat behind me on the bench, watching me and laughing. Do yourself a favor and make sure the deal you order has the drill attachment.
E**D
Like new when finished? Not quite, but the finished results are excellent...
I have a 15 y/o car that I'm trying to keep alive long enough to get my kids through college. One of the issues of late was lack of visibility at night due to the headlight lenses being yellow and foggy. I saw this on the deal of the day and purchased it on impulse. I followed the directions and started with the 500 sanding pad and all I thought the whole time was I'm going to have to get new lenses. My discomfort didn't fade until I was at the polishing compound stage of the process. Then all I could think was I wish I would have done this sooner. Others say the drill option is better, I'm not sure what the price difference between the two is, if the price is within a buck or two I'd go for the drill option but otherwise the whole process is quite easy and I'm not sure it would be worth spending much more on, but I'm cheap, otherwise I wouldn't be driving a car I need this for in the first place. One tip is before you go to the next step to use the sanding without the sponge applicator and go around the edges of the lens and transition/corner areas that the sponge doesn't quite allow full access to, it will save you from having fine scratches in these areas when finished. For those who say toothpaste will work just as well, I'm not so sure, maybe it would be suitable replacement for the polishing compound but it surely won't work as well as the sandpaper. I didn't think to take before and after pictures as I didn't expect the results would be as good as they were, now I wish I had.
�**�
Amazing results if you take your time!
This kit is worth it’s money in gold. They offer basically the same thing to use with a power drill, but I opted for the hand sander version because I can get into more of the crevices of my cars headlights. My headlights were completely yellowed over and basically useless at night driving through the woods by my house. I had previously used the old WD-40 trick, but this only lasted a few days or until it rained. I priced new headlights and they were $200- I can’t afford that. So I gave this kit a shot. Yes, the hand sander takes more effort, but my headlights look like they just came off the dealership lot. The hand sander is small enough to get into the curves and bends the OEMs design into their headlight lenses (anyone else miss the old square sealed beams headlights when we never had to worry about this crap!??). I drove the car this morning going to work (5am through the woods) and I could see everything without needing the high beams again. My advise is take your time with each step, especially with the finishing grits. I spent close to an hour and a half, making sure I got every spot. While sanding, take a damp cloth and check progress and look for the sanding marks, making sure you’re not leaving any deep marks from the coarse grits. If you take your time like I did, you’ll be blown away by the results. Good luck!
C**J
Prep, patience, and elbow grease.
This is my second purchase for this line of products. Headlight restoration is a relatively straightforward process. If you got the time, you can achieve results comparable to the pro's at a fraction of the cost. This is the manual version of the kit (link for the drill bit compatible product below). Manufacturer packing is a bit much in my opinion, BUT the discs hold up well and there's more than enough rubbing compound for repeat applications, so the package can be used to store everything between applications. I'm estimating that you could effectively restore 6 lights with the materials included in the package. I haven't bothered with my rear lights yet, so that's three applications for headlights (with sealant, easily 18 months). The discs held up well being used with a power drill and generous spray from a water bottle. I don't have "before-and-after" posted, this was a restoration on a 2005 Subaru Baja; it makes the care look 5 years younger. 4 stars as opposed to 5 because the kit does not include a UV sealant (or even a little bit of wax). Oxidation is what causes the lens cover to haze over time. Sealing the restored lens and or protecting against UV rays will increase the time between maintenance. I use Blue Magic 730-6 Headlight Lens Sealer - 8 oz. ; I'm sure other alternatives exist. TIPS: Prep is important. Clean the covers before you get started. (The instructions state this). Read the instructions all the way through before you start. (Begin with the end in mind). 3M does a good job of explain what's happening in each step and what to do for the best results. Each step sets up the next, so understanding the purpose may be helpful. Keep a spray bottle with water and a cloth handy. The instructions say to tape everything off. If you're even a little bit handy, I'd recommend pulling the lens assembly out partially/completely (like if you needed to swap out a headlight bulb). This allows your to hit all the angles well. If you disconnect completely, it will give you the option of working at whatever height you find comfortable. It also allows you to move away from your vehicle altogether. If you're using a drill during the slurry steps, this can limit the amount of crud you'll have to clean off your vehicle at the end. The last time I restored my headlights, I purchased 3M 39045 Headlight Renewal Kit with Protectant (the same kit with a drill bit attachment). I thought about doing one light by hand and using the drill for the other (the discs are cross compatible). After finishing the first light with the drill I'm doubtful that I would have achieved the same results by hand. I sure it's possible, and if you don't have a drill the manual method is effective. I think the biggest difference would be during the "slurry" steps.
T**S
Bloody amazing.
Old BMW's have a habit of having grubby old headlights. Mine appears new with this product. Simple, easy to use, just use a bit of elbow grease.
B**B
VERY GOOD
NICE PRODUCT, NEED TWO PACKS FOR FULL YELLOW HEAD LIGHT.
I**A
Extremely Good, even deep UV yellow layers cleared
Extremely Good, even deep UV yellow layers cleared. Can use on more than one car. However, protection spray is not included which is a must after such workout. Suggest people to buy the protection layer after working on this.
J**N
A+
Very happy, he did the job thank you
H**I
Not up to the mark with poor result.
I have seen several videos before placing the order. I was eagerly waiting for this product to come. Finally received after 3 weeks. Followed the instruction and applied on the headlight. I invested around 2 hours on one headlight. And finally the result is very very poor. I have attached the picture, the one which is installed in the car, I have used this product, and the other one I had removed earlier. After using this product, I realise the headlight which is removed, is better than the current one installed in the car. very bad experience.
Trustpilot
1 day ago
1 month ago