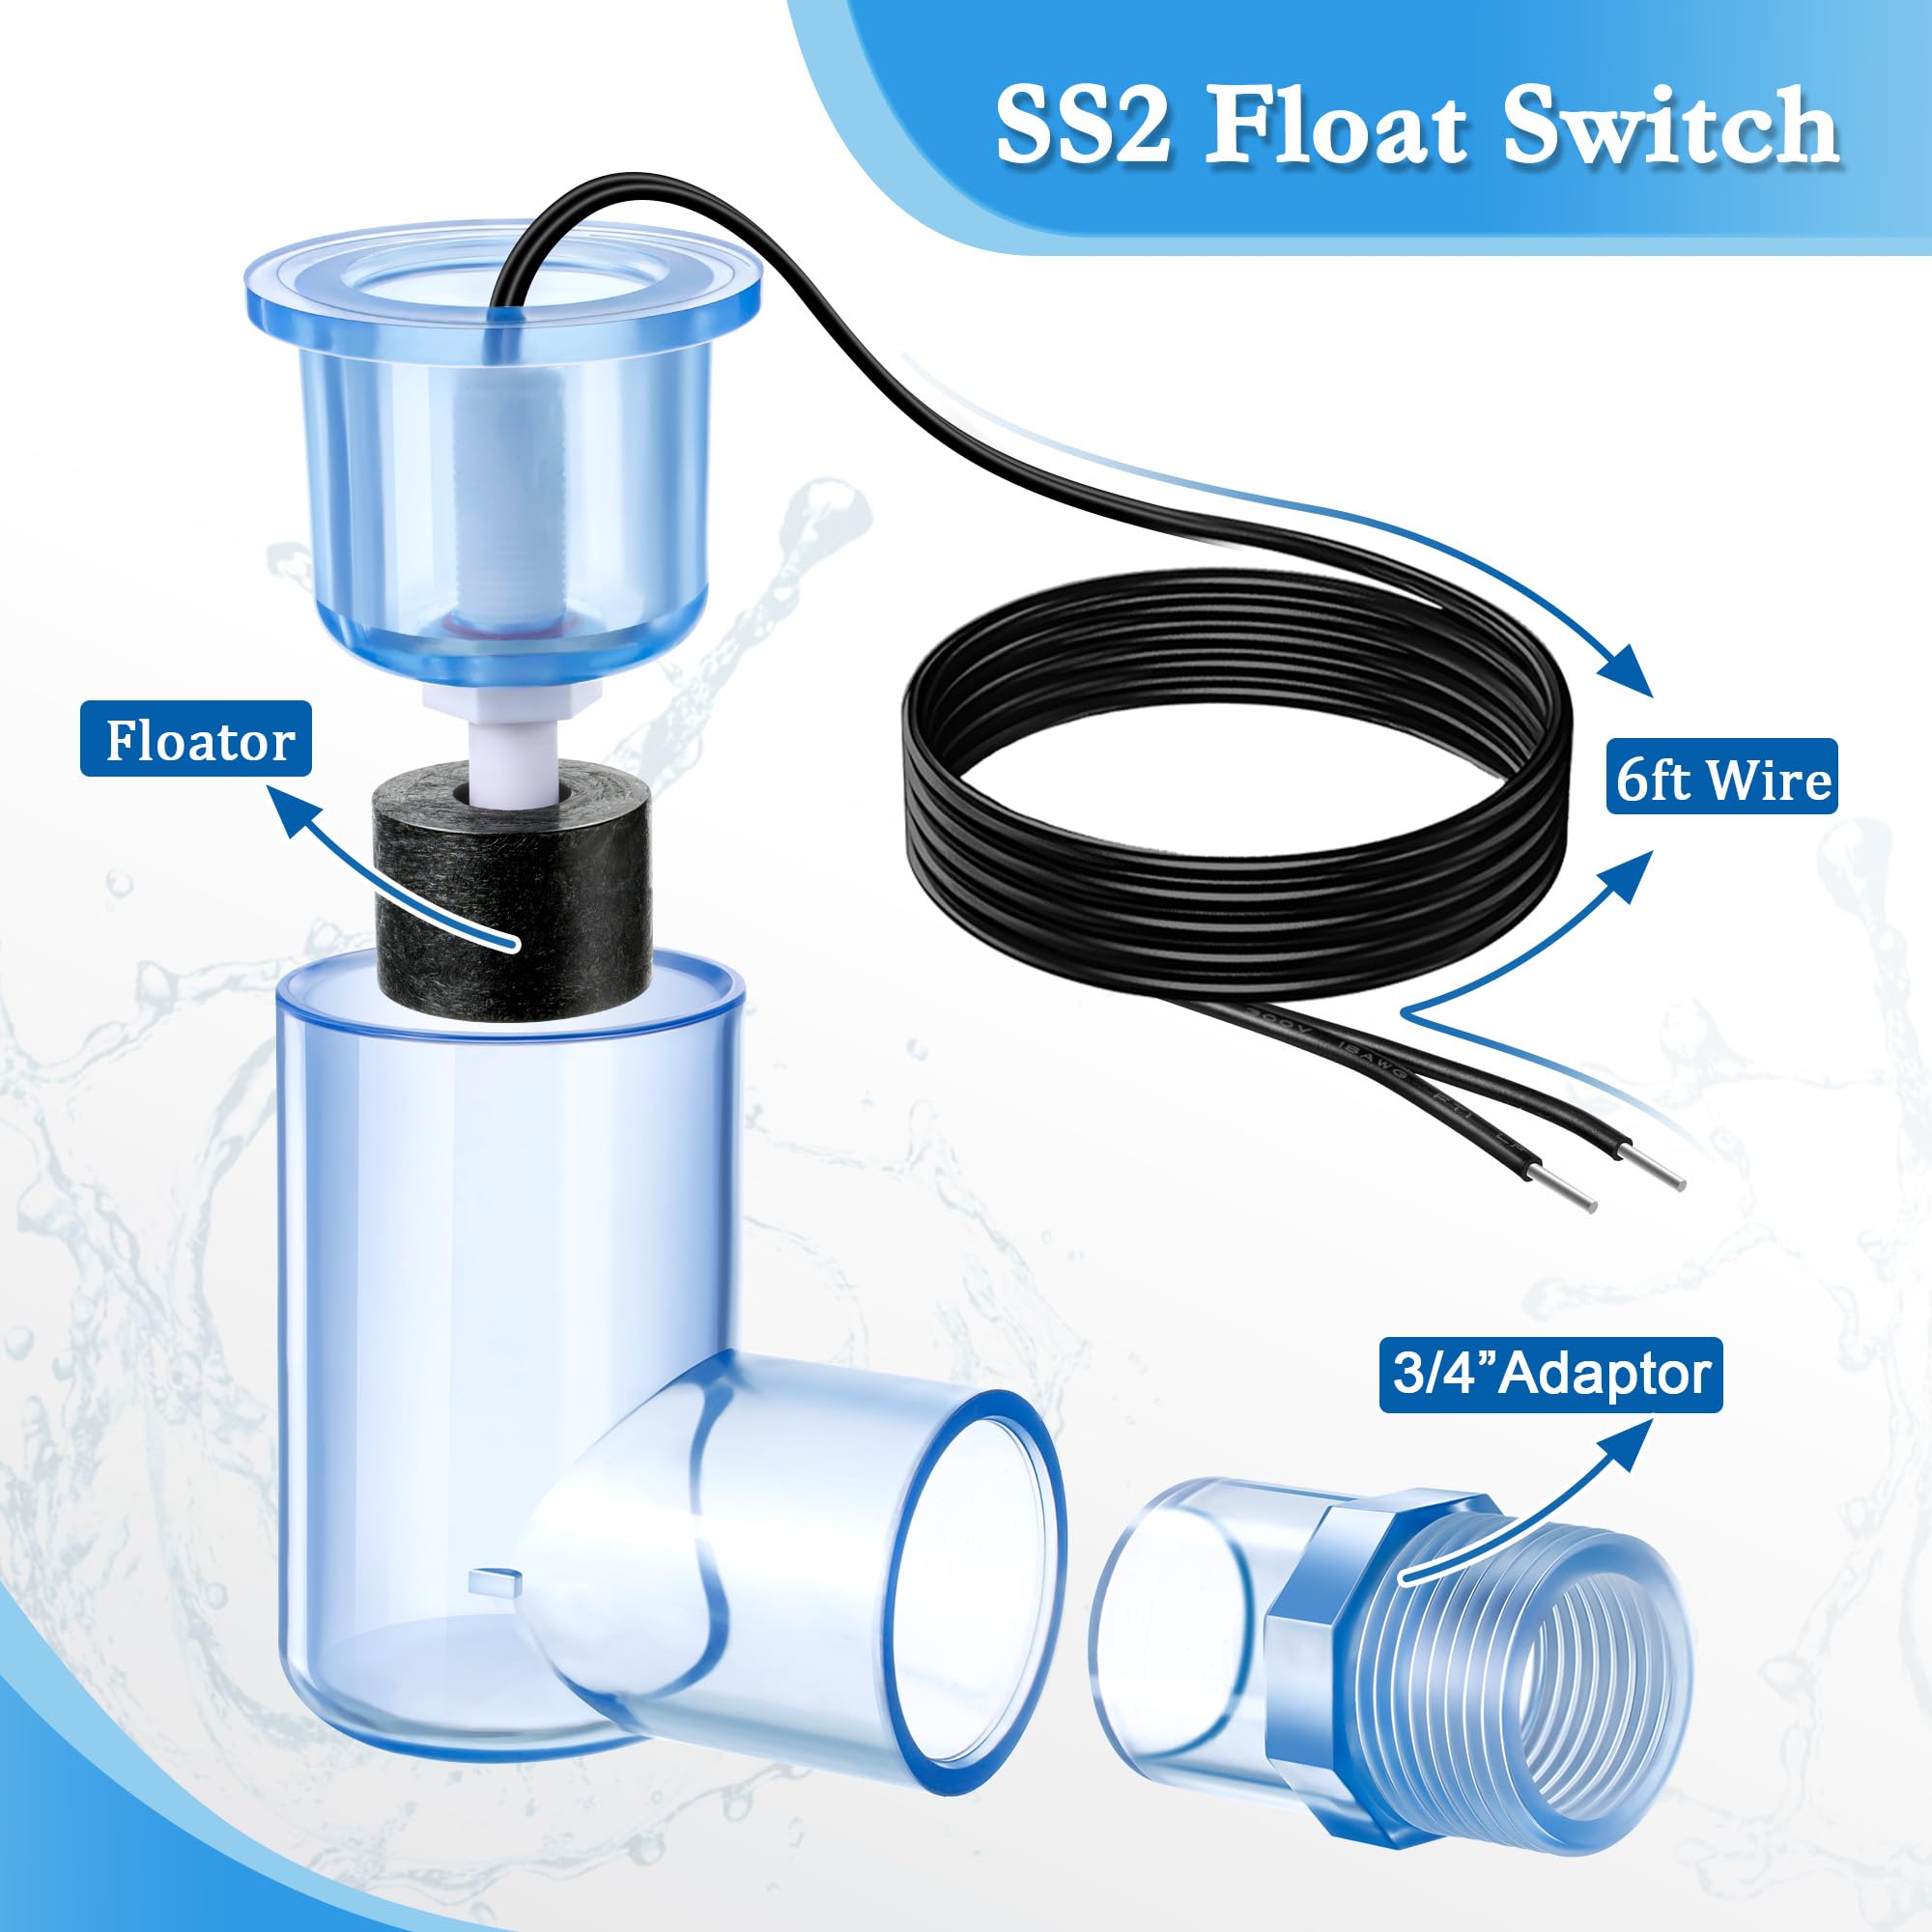
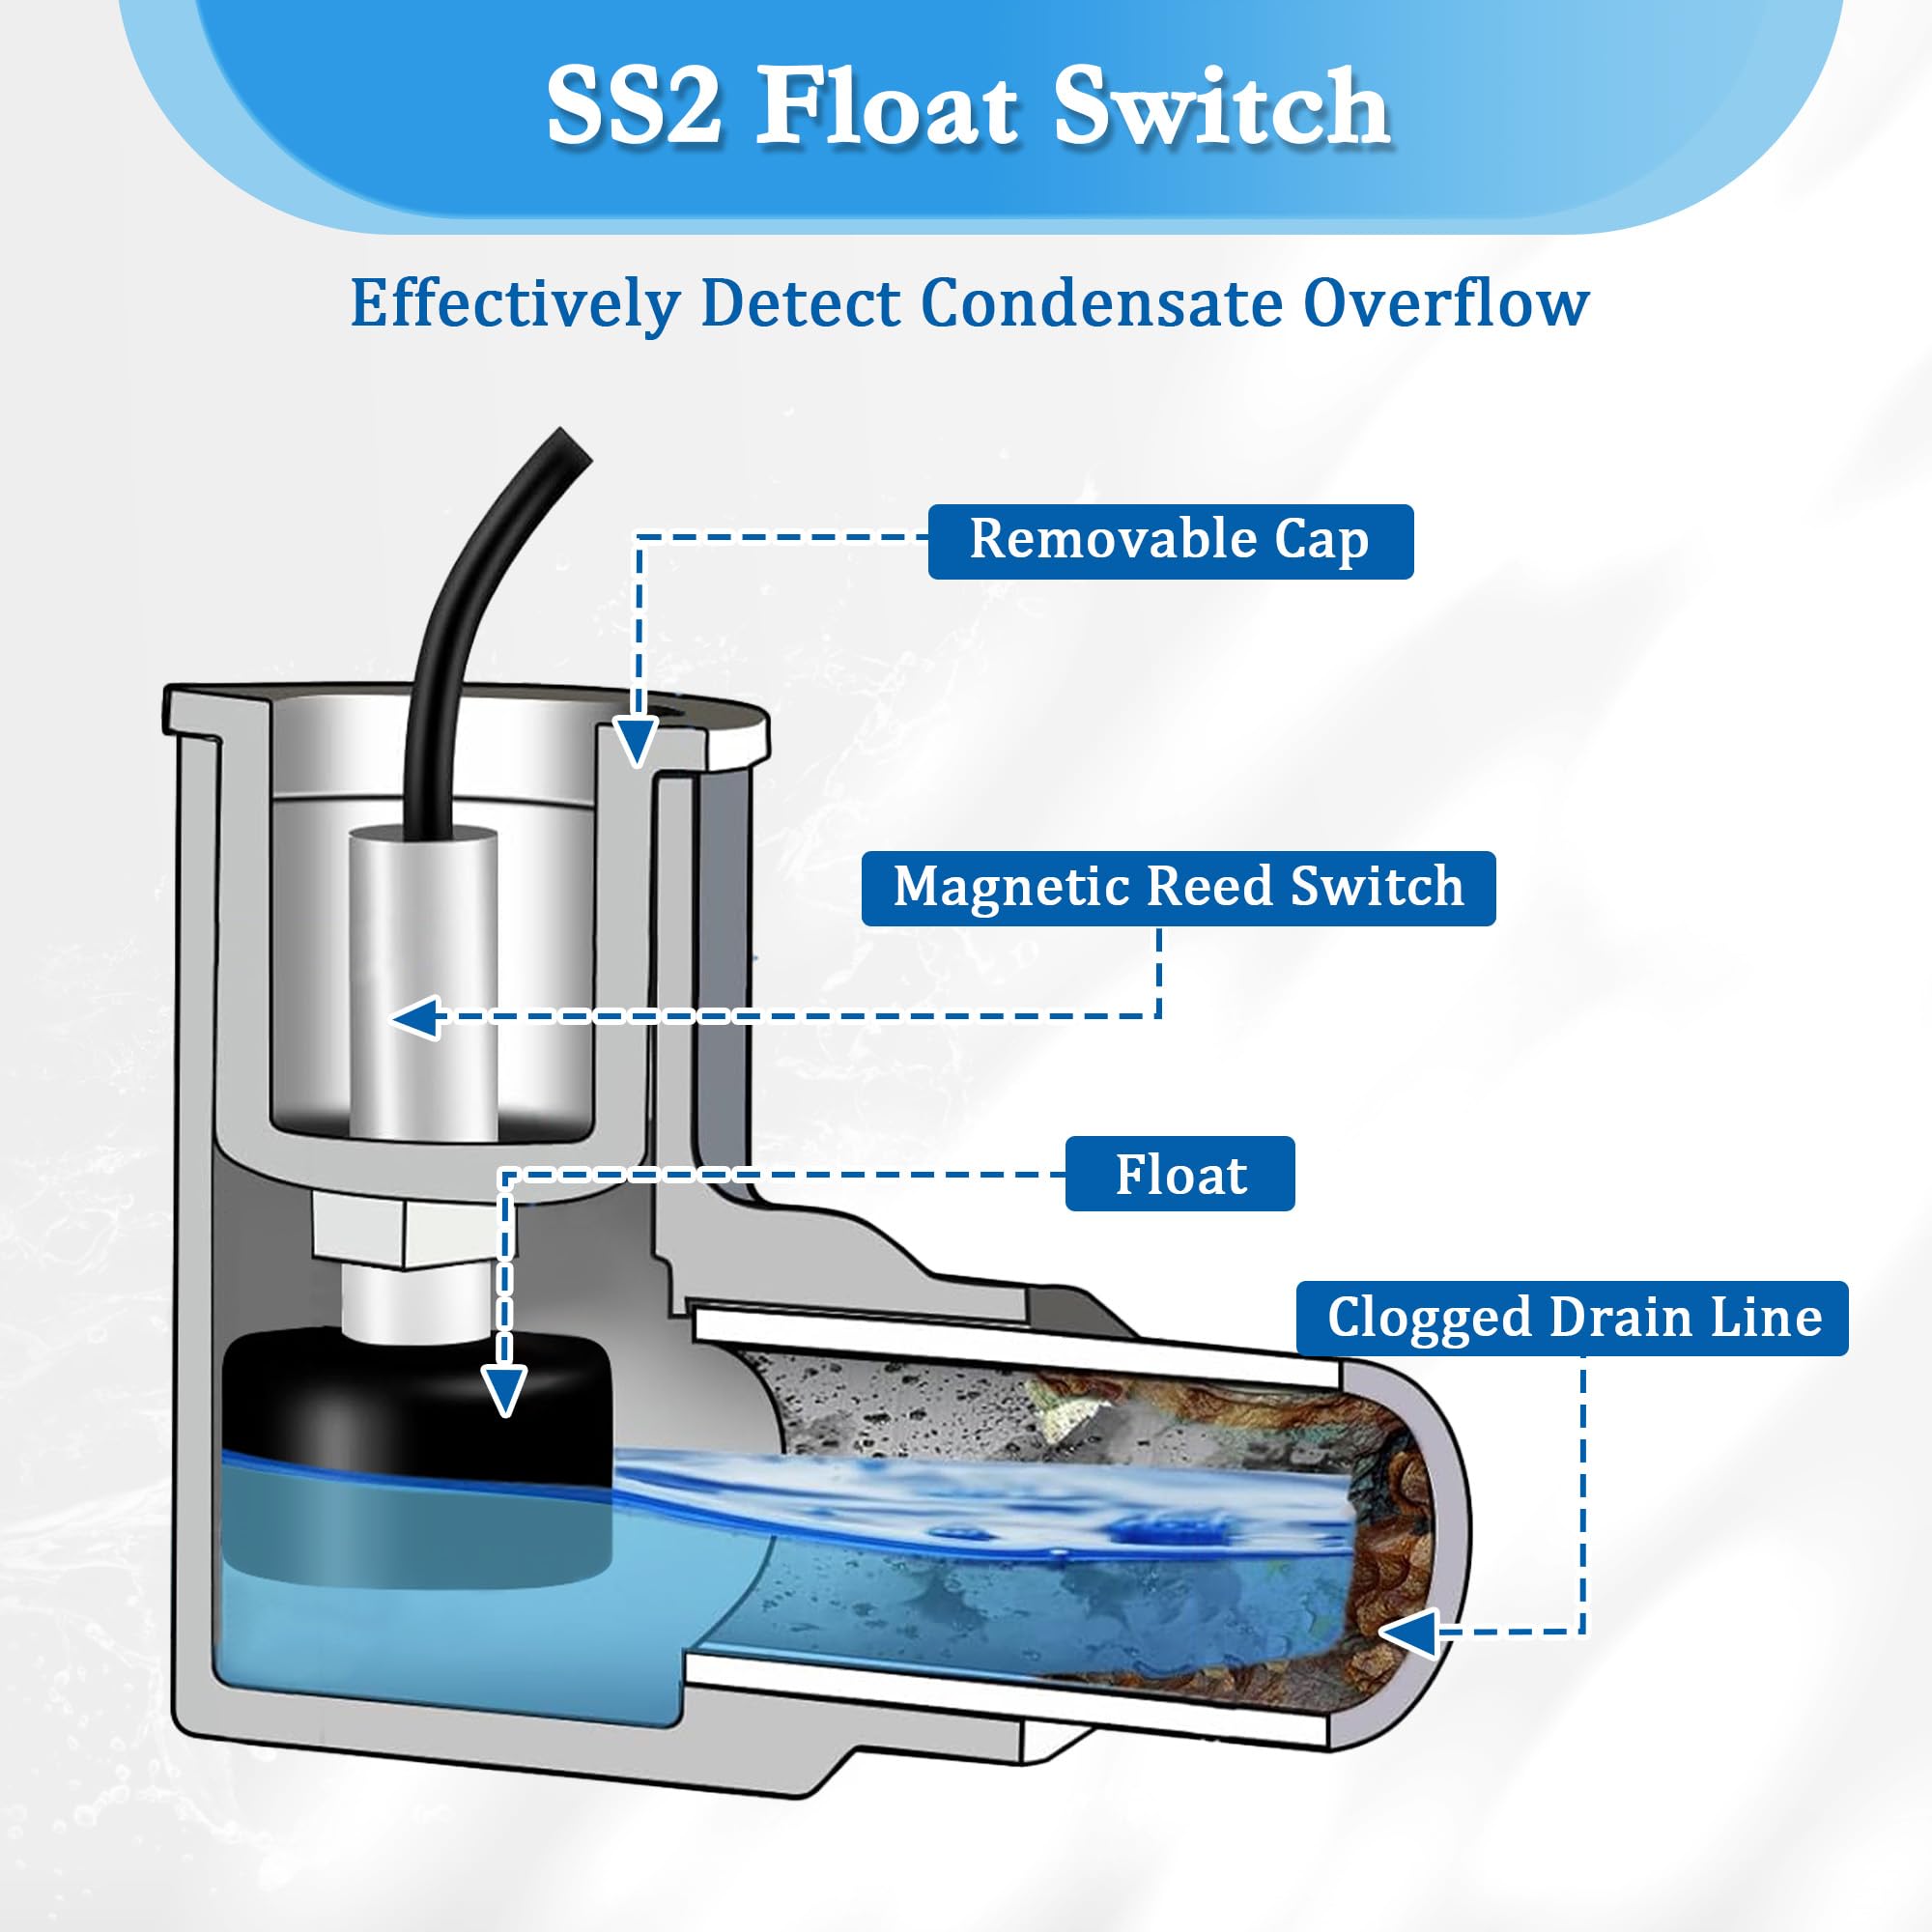
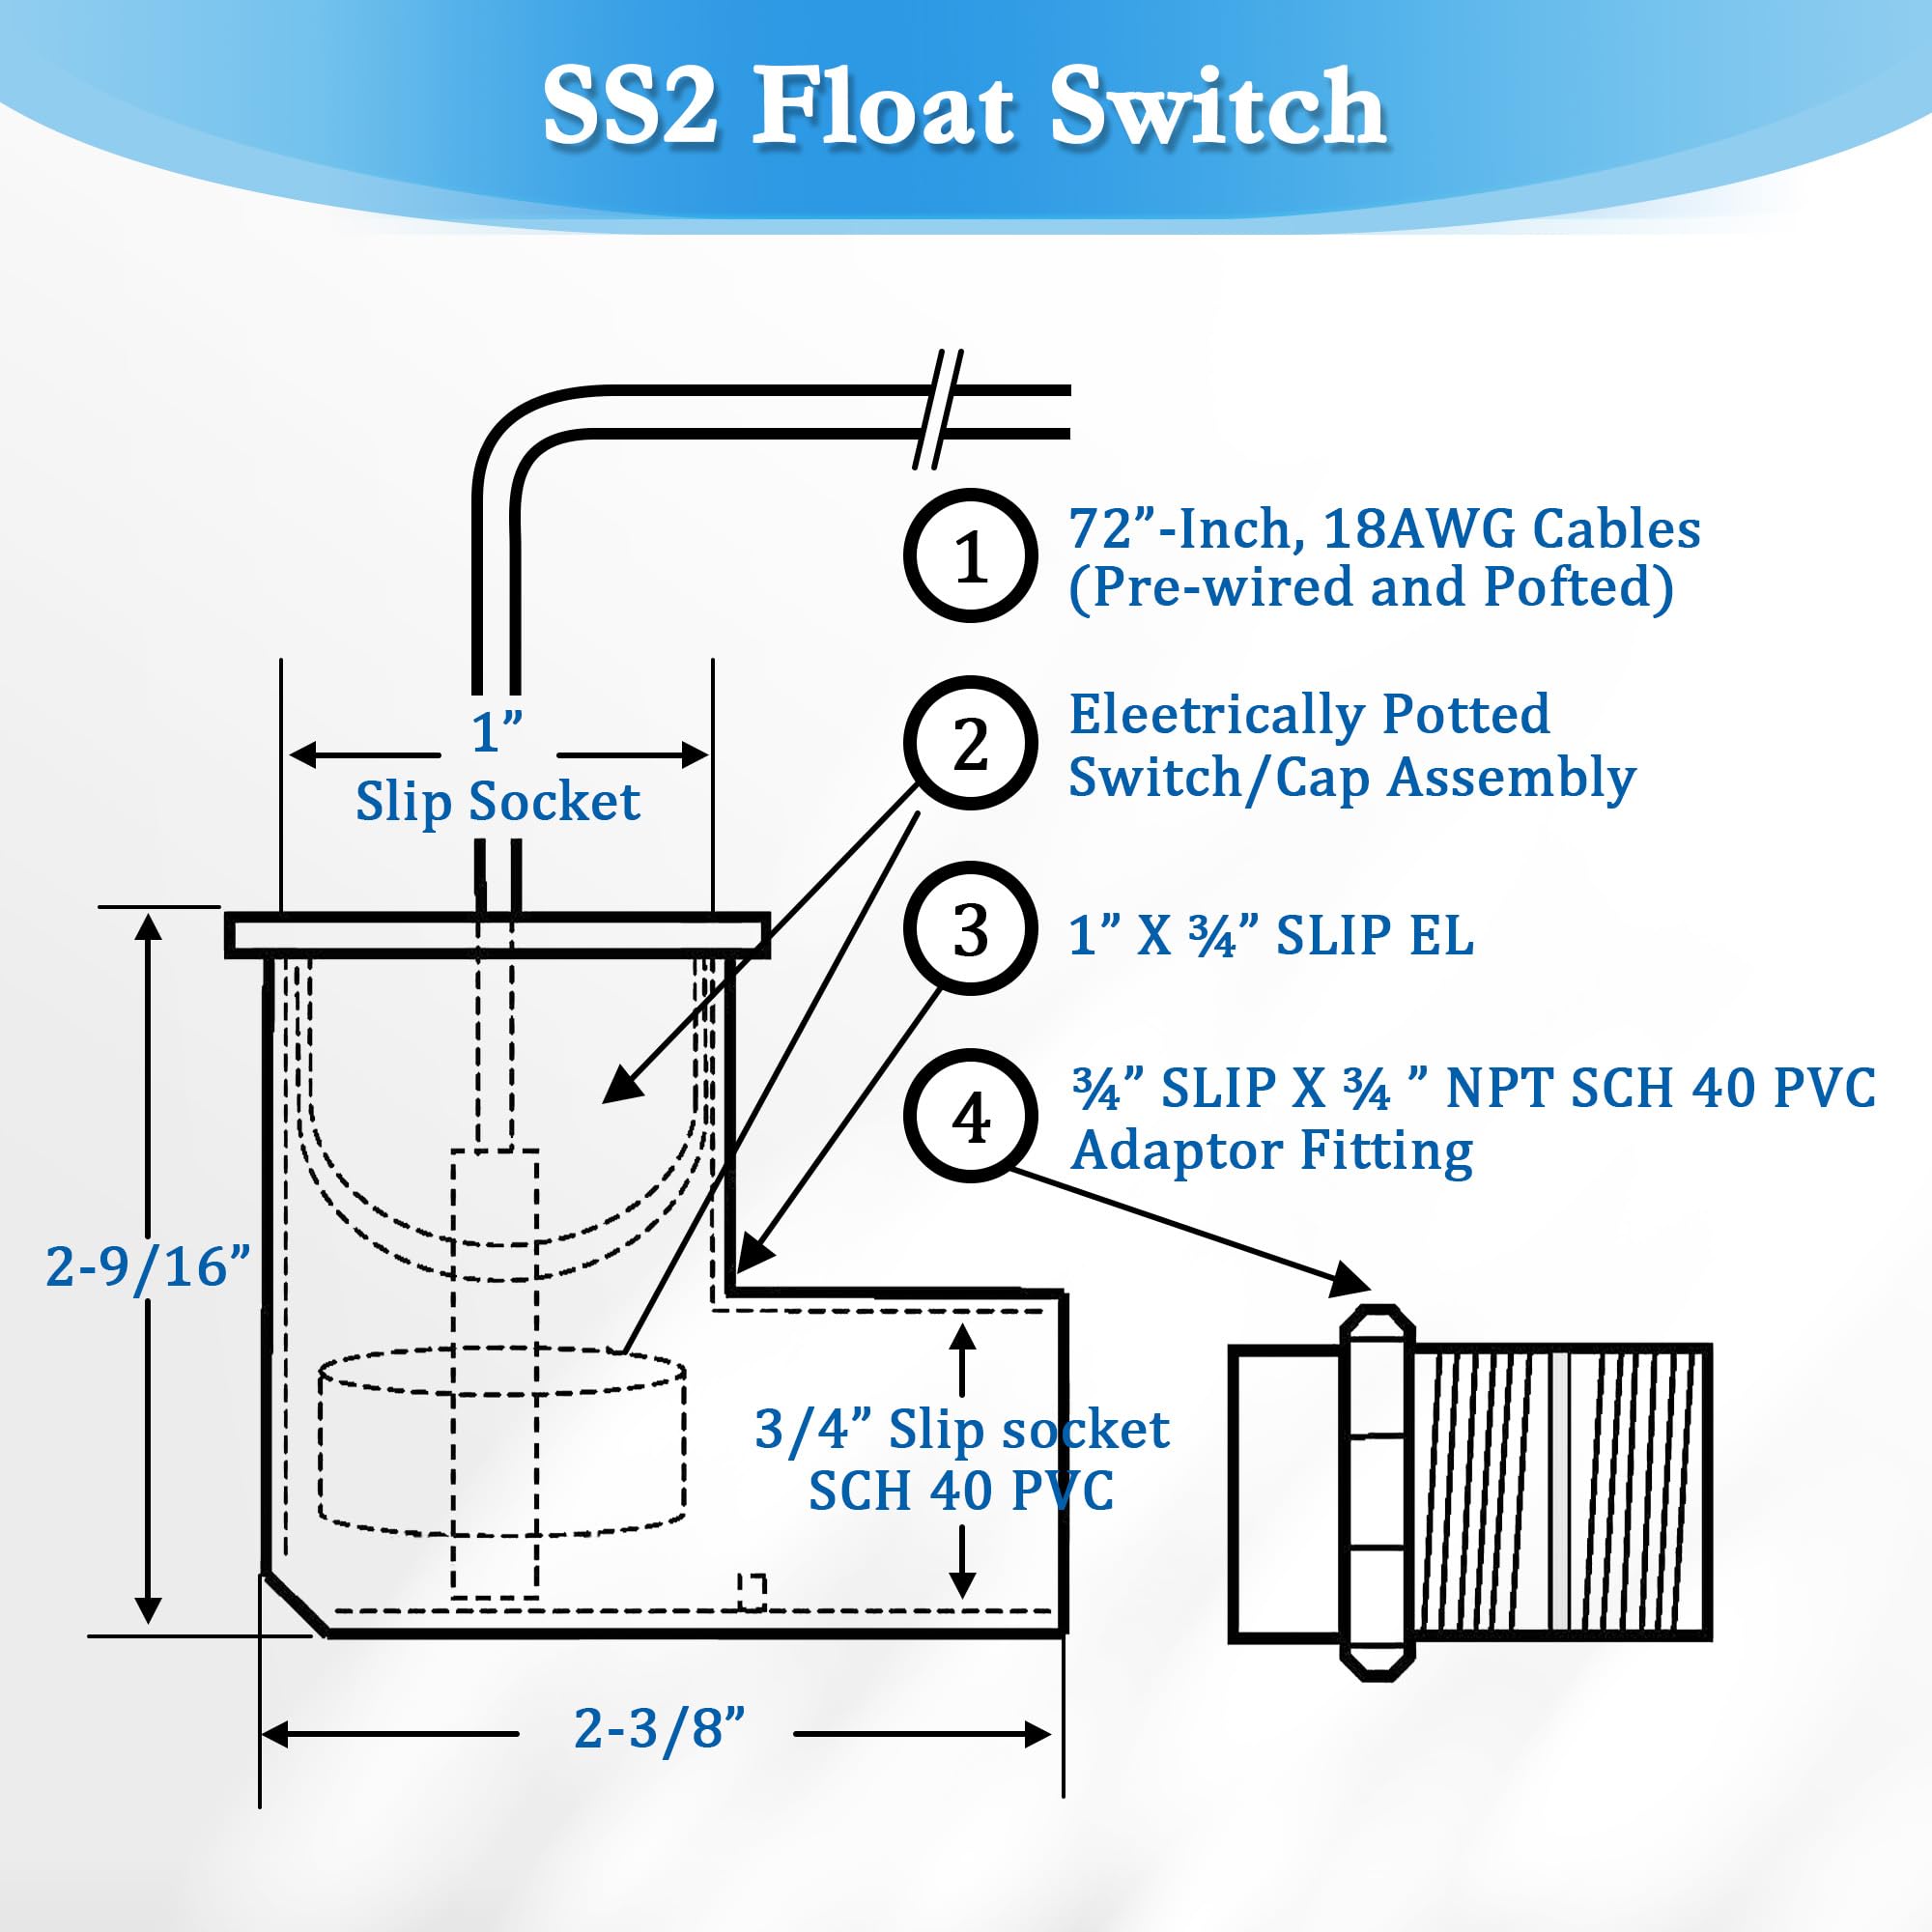
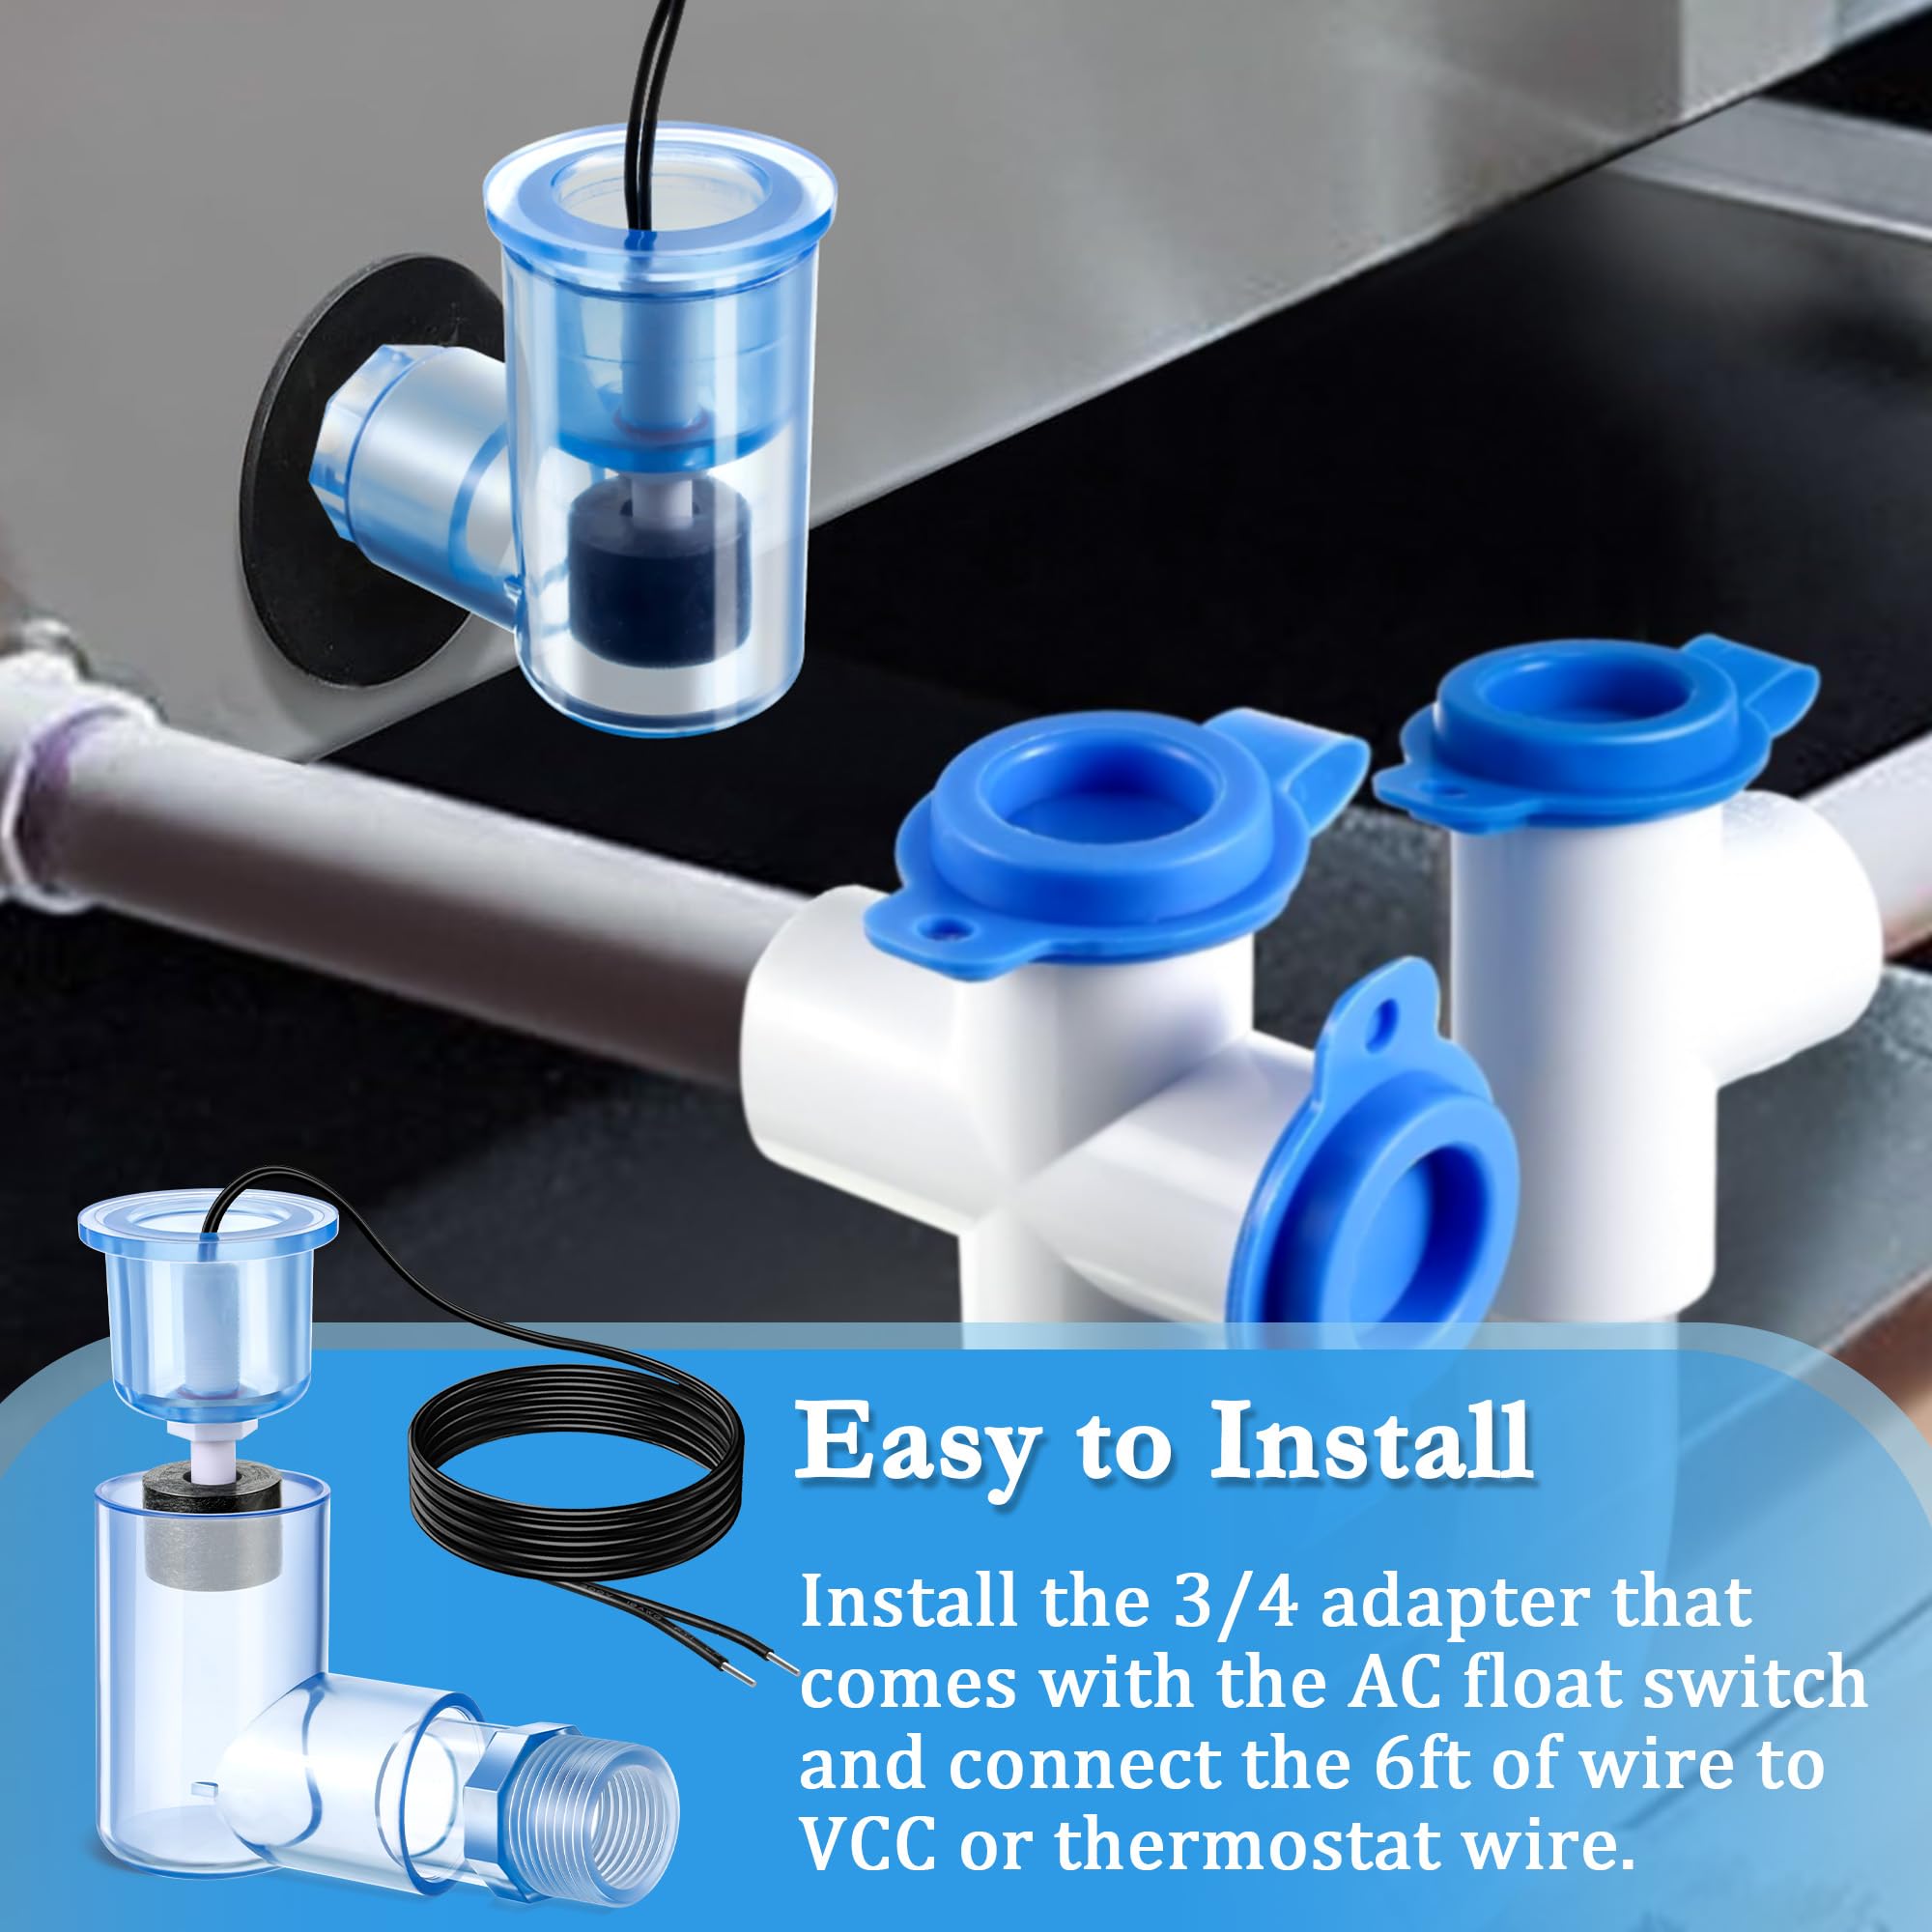
Are you still worried about soaking your furniture due to condensation leaks when using your HVAC? Then you absolutely need a float switch! Here are the specific installation steps for you: INLINE INSTALLATION FOR (WALL) UNITS WITH VERTICAL DRAIN OUTLETSIt is recommended that this device be installed on the primary drain line between the pan outlet and P trap on wall units with vertical drain outlets. This will prevent the switch from shutting off the fan coil or activating the alarm circuit in the event condensate drips directly from the coil into the auxiliary pan outlet when the coil becomes dirty. 1. Disconnect power to unit at main panel and glue 5'' stub down from the primary pan outlet. 2. Glue 3/4'' Tee to bottom of stub with Tee stem horizontal and plumb. 3. Glue 3/4'' stub into horizontal outlet of Tee, insuring it is also plumb. 4. Ensure switch/plug assembly is inserted into 1'' inlet of PVC elbow so that float stem is at inside (bottom) of switch elbow. Float stem can be adjusted by threading it out of the plug assembly. DO NOT GLUE. 5. Glue a drain line with P trap onto the remaining outlet of Tee. 6. Connect the wires to VCC or the thermostat wires. 7. Test switch by lifting float with unit running. Unit should stop running if correctly connected. 8. Test all fittings and connections for plumbing leaks. INSTALLATION FOR HORIZONTAL CEILING (PANCAKE) UNITSNOTE: Primary drain (inline) is also recommended on horizontal ceiling (pancake) units as some flooding may occur if installed on auxiliary outlets, due to the closeness of the outlets to the top of the pan. 1. Glue 3/4'' stub to primary pan outlet. 2. Glue 3/4'' Tee onto stub with Tee stem positioned horizontally away from the unit and plumb. 3. Follow steps 3-9 under INLINE INSTALLATION FOR WALL UNITS, above.
| Manufacturer | Feekoon |
| Part Number | DC-Feekoon-414 |
| Item Weight | 4.6 ounces |
| Package Dimensions | 4.06 x 3.58 x 2.01 inches |
| Country of Origin | China |
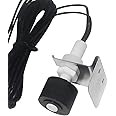
| Item model number | SS2 Float Switch L Shape |
| Material | PVC |
| Item Package Quantity | 1 |
| Mounting Type | fittings mount |
| Switch Style | Normally Closed |
| Batteries Required? | No |
A**.
Excellent Working and Priced Fair!!
5 stars for sure. I installed one on a new furnace install and this see thru float switch looks and works great. The customer was amazed that they could see thru the float switch. The price when you buy 4 is much cheaper and a value & Saving. Over all a good product.
C**M
Works well and reversible.
Depending on the orientation, you can change it from NC to NO by flipping the inside float.I used it with a battery operated alarm on my sump pump. Just Zip Tied it to the outlet PVC pipe. that way I can adjust the depth of activation.
C**E
A lot better
Than waiting until the water hits the floor and then trips a sensor.
D**.
Nice!
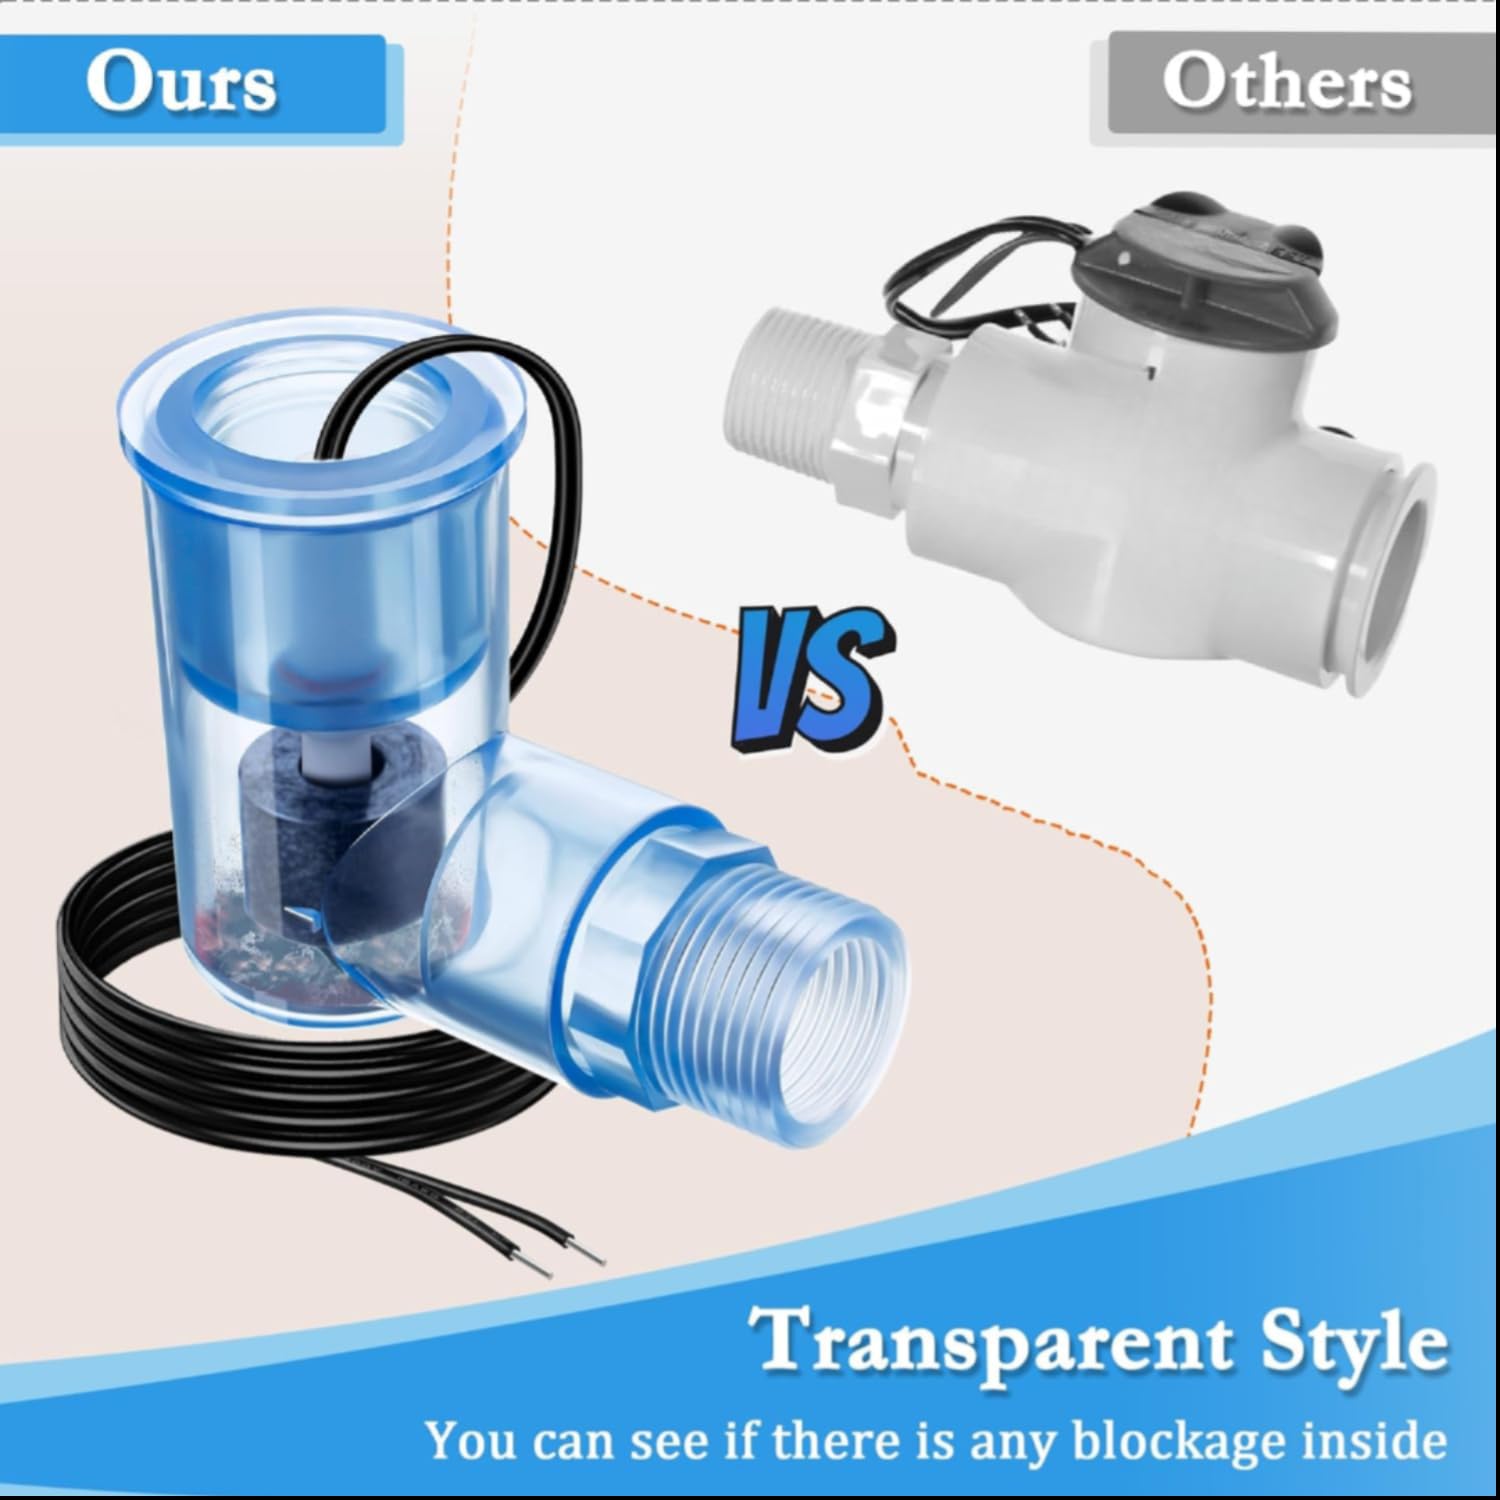
Nice switches...I like that they are transparent!
L**S
Works great
Easy to put in
E**C
Not NPT thread
Should’ve went With Rector seal version like I’ve used in the past. I thought these would be nice cause you could see in there to see that there is water buildup, but the threads are straight threads not tapered NPT threads and the slip pipe fittings are not standard. So I couldn’t use it with my own PVC to thread adapter.
M**.
Wrong attachment component
Need a male attachment this was female. Sadly was my error not returning sooner.My significant partner died and too much more important things to consider
G**M
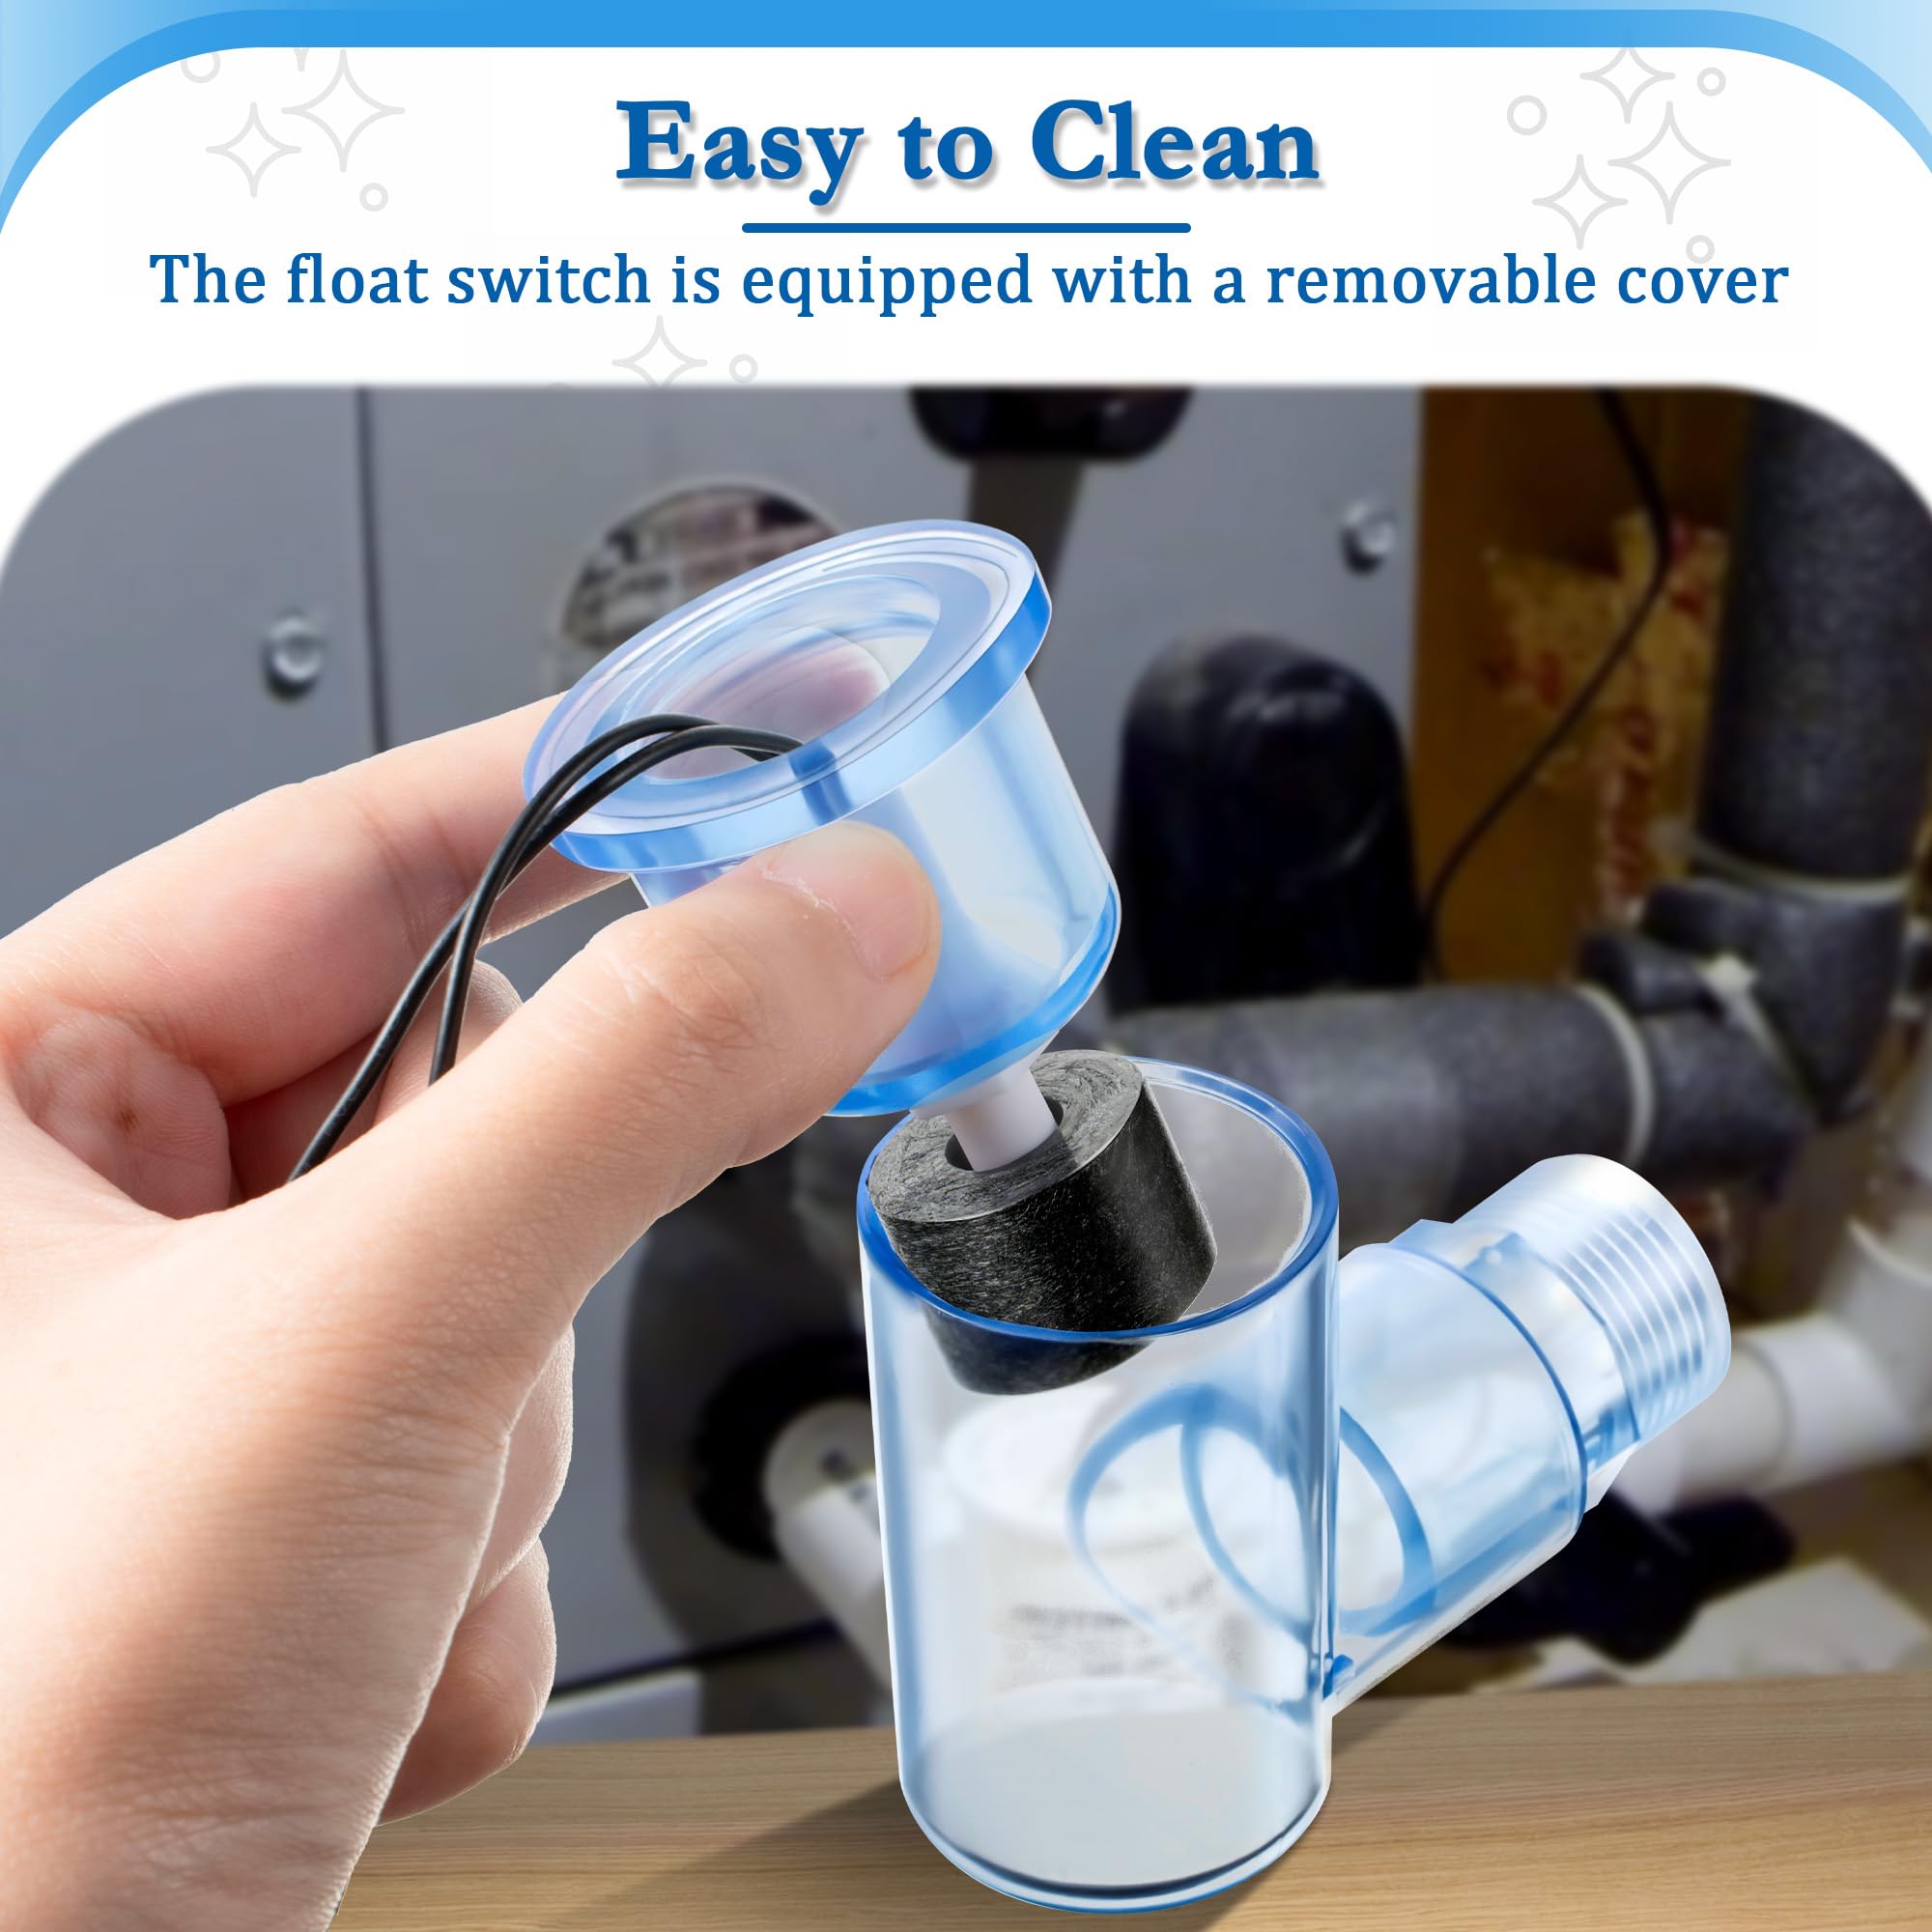
easy install, easy to remove for cleaning, it works
I selected this float switch to replace the one on my Carrier system which was no longer working.Before installing, I checked the switch for continuity with a multimeter and the switch worked as it should.Removing the old switch and installing the new was easy. Rather than running all new wire, I just left the old wiring and coupled it to the new with two lever operated wire connectors....easy peasy. Note: if you tackle this yourself, firs turn off ALL of the breakers related to the A/C system otherwise the control board might short and then you've got a lot more problems than a bad float switch!Where the switch body connects to the Carrier unit is threaded. The other parts just press together so they are easy to pull apart for cleaning. If there is anything that might be improved, it is the gauge of the wires. They are a lighter gauge than the original part. Having said that, they are rated to carry the 24v that the system requires....so maybe the original is just over-engineered??? No biggie.So far so good. Recommended.
Trustpilot
1 week ago
1 week ago