🍰 Bake it till you make it!
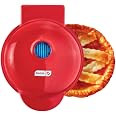
The Mini Pie Maker in vibrant red is your go-to kitchen gadget for creating delicious mini pies effortlessly. Weighing just 1.7 pounds and featuring a compact design, it heats up quickly and evenly, ensuring perfect results every time. With a non-stick coating for easy cleanup and a PFOA-free construction, this pie maker combines style and safety. Plus, enjoy peace of mind with a 1-year manufacturer warranty and an optional 2-year extension.
| Item Weight | 1.7 Pounds |
| Item Dimensions D x W x H | 4.7"D x 6.7"W x 1.7"H |
| Style | Cooking |
| Color | red |
| Material Type Free | PFOA Free |
| Material Type | Metal |
| Warranty Type | Manufacturer warranty (1 year for base, 2 years for extended) |
| Voltage | 120 Volts |
| Number of settings | 1 |
| Wattage | 350 watts |
| Additional Features | Non Stick Coating |
K**L
A little too hot, so I modified it
So, on a dare, I'm posting my full modification of this adorable pie baker - scroll below.But first, my favorite recipes and tips!Best crust recipe:1c flour1 stick cold butter1/4 teaspoon salt1 egg yolkIced water - ice is crucialPut flour, butter and salt in food processor. Blend until the butter is all in pebbles - don't overdo it. Add the yolk and process until just mixed. Add iced water until the dry flour sticks and makes pea shaped balls.Flour a surface well and roll handfuls into circles large enough to use the cutter. Make them fairly thick so the pie doesn't fall apart when you remove it. After each circle cut, take the extra pieces and put them into the next ball to roll out. You may have to spray the pieces with water so they stick. This prevents over working the dough which makes it hard like a cracker. Stack these crusts with parchment between and refrigerate for a week or so or freeze.(Edit: still making quiche every morning! I discovered frozen spinach at my grocery! I also chop my onions raw and freeze, also raw peppers, also tomato slices with parchment between and freeze. My modified pie baker cooks them perfectly in 18mins. I also stopped adding sugar to my apple pies - the crumble is plenty sweet. 1 apple makes 2 pies. Freeze half, or munch slices while waiting. :) Super Protip: for quiche, lay sage leaves on top of the cheese, not inside. The oils fry the sage and release amazing flavor! Also I put way too much white pepper on top, and my quiche has a bite! Ok, back to my older post:)Tips for quiche:Chop bacon, cook, drain, and store in a jar in the fridge.Chop spinach, onion, peppers, mushrooms, etc, cook, cool, put into a Ziploc bag, freeze, then chip off pieces.Chop a bundle of asparagus into thin coins, leaving the tips for looks, cook, cool, freeze in Ziploc and spoon out a tablespoon at a time.Freeze grated cheese.Spinach can be "chopped" fresh using scissors.A single fresh mozzarella ball makes a nice center.Make one of these ingredients each day and soon you'll have a freezer full of a broad menu of quiche!I make quiche every morning: total time, 15minsLay crust in cold pie maker.Assemble any combo of the above.Top with cheese.Blend one egg, a tablespoon of milk, salt, pepper, herbs.Pour over ingredients in crust.Bake until knife comes out clean.Note: it puffs up insanely high!Sweet pie filling tips:Chop about a cup or two of any fruit and simmer with sugar and water to taste.I don't like my pie too sweet, so I add a 1/2c-1c water.When fully cooked and sweetened to taste, mix 1-2 tablespoons of cornstarch mixed with some water, add and stir quickly so it doesn't lump up.Fill 4oz canning jars and process, or refrigerate. (8oz jars make two.)They should jell hard enough to keep their shape - this will elevate the crust so it touches the upper lid. The crust cooks best this way, or it might end up raw in spots.Another tip is try using canned biscuits for crust - peel apart biscuits and roll out.Edit: adding a couple more recipes:Au gratin potatoes! I added some pics too.1t flour1t butterHeat these in the microwave until bubbly.Add 4T milk and heat again for roux for the sauce.Take one slice of cheese and break out a circle to fit the pie, use the rest in the roux.Pour over sliced fingerling potatoes, place cheese circle on top. Bake 15mins, check with fork (but don't scratch the bottom!)Apple crisp:Make crust as above, but add 1t cinnamon, and 1/4c brown sugar. Roll into crusts the same as above. I call this a graham cracker crust.Crumble:3/4c oats3/4c flour1t cinnamon1 stick butterPut everything into a food processor - butter in chunks - and process until nicely crumble-like. Store in the freezer until needed.Slice an apple into tiny bits. Add 3-4T brown sugar, 1/2T cinnamon, plus some nutmeg, and cloves. This will make about 2-4 pies. Store in the fridge.Use one graham cracker crust, apples until piled above the lip, then cover completely with crumble. It will come out a little dark, but still good! You can also veeery carefully rotate it halfway through.Last added recipe: I like to make fried egg bites, just toss in some veggies (I use tomato's, mushrooms, and spinach) and crack an egg on top! Add salt and pepper to taste, and sprinkle with fresh herbs - sage is best fried on top, not inside. The veggies cook nicely on the bottom. A small strip of parchment can help remove the finished bake.Many more can be found on YouTube.So now here's how I modified it: (Note: this requires access to a spot welder.)It baked too hot, so I opened it up and sure enough, the thermal switch was a standard 155°C NC thermal switch. ("NC" means normally closed - means it's on until it reaches 155°C.)I spent over $30 trying different temps, ha! and eventually figured out that 120°C works perfectly.So I spot welded the new switch in the place of the old switch, and now it's baking absolutely perfectly! It takes a little longer now - it's 15mins for a quiche - but the center gets perfectly cooked and the crust never burns.If I add cold filling, I can wait as long as I like and the crust is always perfectly golden brown.The spot welder I have is a cheap Chicago Electric welder used for autobody work. You might see if a local collision repair shop can help you out.
P**M
DEFINITELY A WINNER. LOVE IT
LOVE THESE PIEMAKERS. I bought a second one because its a great little machine. I make chicken pot pies. It comes with a nice cutter that cuts a perfect bottom crust and then you flip the cutter over and it curs a per fect top.After trial and error, this how I bake my pie. Fill bottom crust. Add filling, DO NOT OVERFILL or it will ooze out and not seal properly, which makes a mess trying to remove it. At first it kept scorching the top crust before the middle was done. So, I folded a strip of foil in half and laid on top of the pie before closing the lid. Do not press down hard just a gentle press and leave it. I open it after 6min and 30 seconds to 7 minutes and its perfect. I spoon a little extra filling over the top and serve. A quick and filling meal. Don’t let its little size fool you. Its a good meal , however we make 2 each. I havent tried yet, but I think it would make great little quiches and much more. Highly recommend
M**T
UPDATE: From 2 to4 stars.
UPDATE: We actually love this little machine! It is great for cooking eggs, both hard (husband) and sunny (me). Quick, nothing sticks so it’s easy to clean. Also makes great little individual quiches. Just use the top crust and press into place to avoid the burnt edges. Another favorite is using Hawaiian sweet rolls to make French toast. Soak the rolls in the egg mixture, add a little butter to the cooker, and cook until nicely browned. The only reason I don’t give it a 5 is because it won’t make a pie!I love the idea of this little pie maker. I love the look and feel and ease of use. I don’t like the outcome. I read the reviews and was so hoping I was going to have a five star experience but instead I had the same result as most 1-star reviewers. I’m being generous with 2. I first made quiche and after I resolved myself to the fact that to cook it all the way, the edges had to burn. Then I tried two cherry pies. You can see the result. The top 'crust’ is still dough. I removed it completely from one pie and just ate the bottom. I will probably do the same with the other.I’m still undecided about returning the machine. Is it worth the effort to try to make it work? I’m so disappointed that the manufacturer would make such a beautiful product and not resolve the issues before selling them.
D**E
Love this little pie maker
Being a single retired person this little pie maker makes pies just the right size for one person. It worked very well browing the crust top and bottom.A suggestion: when you add the pie filling mound it up in the center a little so it raises the top crust up to meet the top of the pie maker. I would recommend this product.
A**R
Soo Much Fun!
I am having so much fun with this mini pie maker! I've made a taco pie(meat was precooked), quiche, and cheese pie.I follow "Counter Cooking" on You Tube and fell in love with the Dash mini appliances. You can cook biscuits, omelets, muffins and more. Each mini pie maker comes with a small cook book and tips. Plus you can extend your warranty by going to a website! Cooking is Fun again!
C**1
Big Learning Curve
So I thought that this would be a great way to make individual pies. There is definitely a learning curve to using this pie maker. I have and used several Dash products. This works well with thin dough ( I tried with thicker dough and it never got done). I tried using fresh blueberries and canned, I would recommend only using canned fruit unless you cook your fresh fruit first. I am going to try a pot pie next but I believe that the vegetables and meat need to be cooked first. If you don’t get the correct amount of filling, otherwise the top crust will not cook. Not sure how much I will use this just because it’s really not that great a machine, first time I’m disappointed with a Dash product.
J**A
best gadget ever
totally awesome, best gadget ever, we take it camping, we make meat pies, breakfast pies, fruit pies, etc...10 out of 10 !!! cooks evenly and quickly.
Trustpilot
2 weeks ago
3 weeks ago
4 days ago
3 weeks ago