Illuminate Your Creativity! ✨
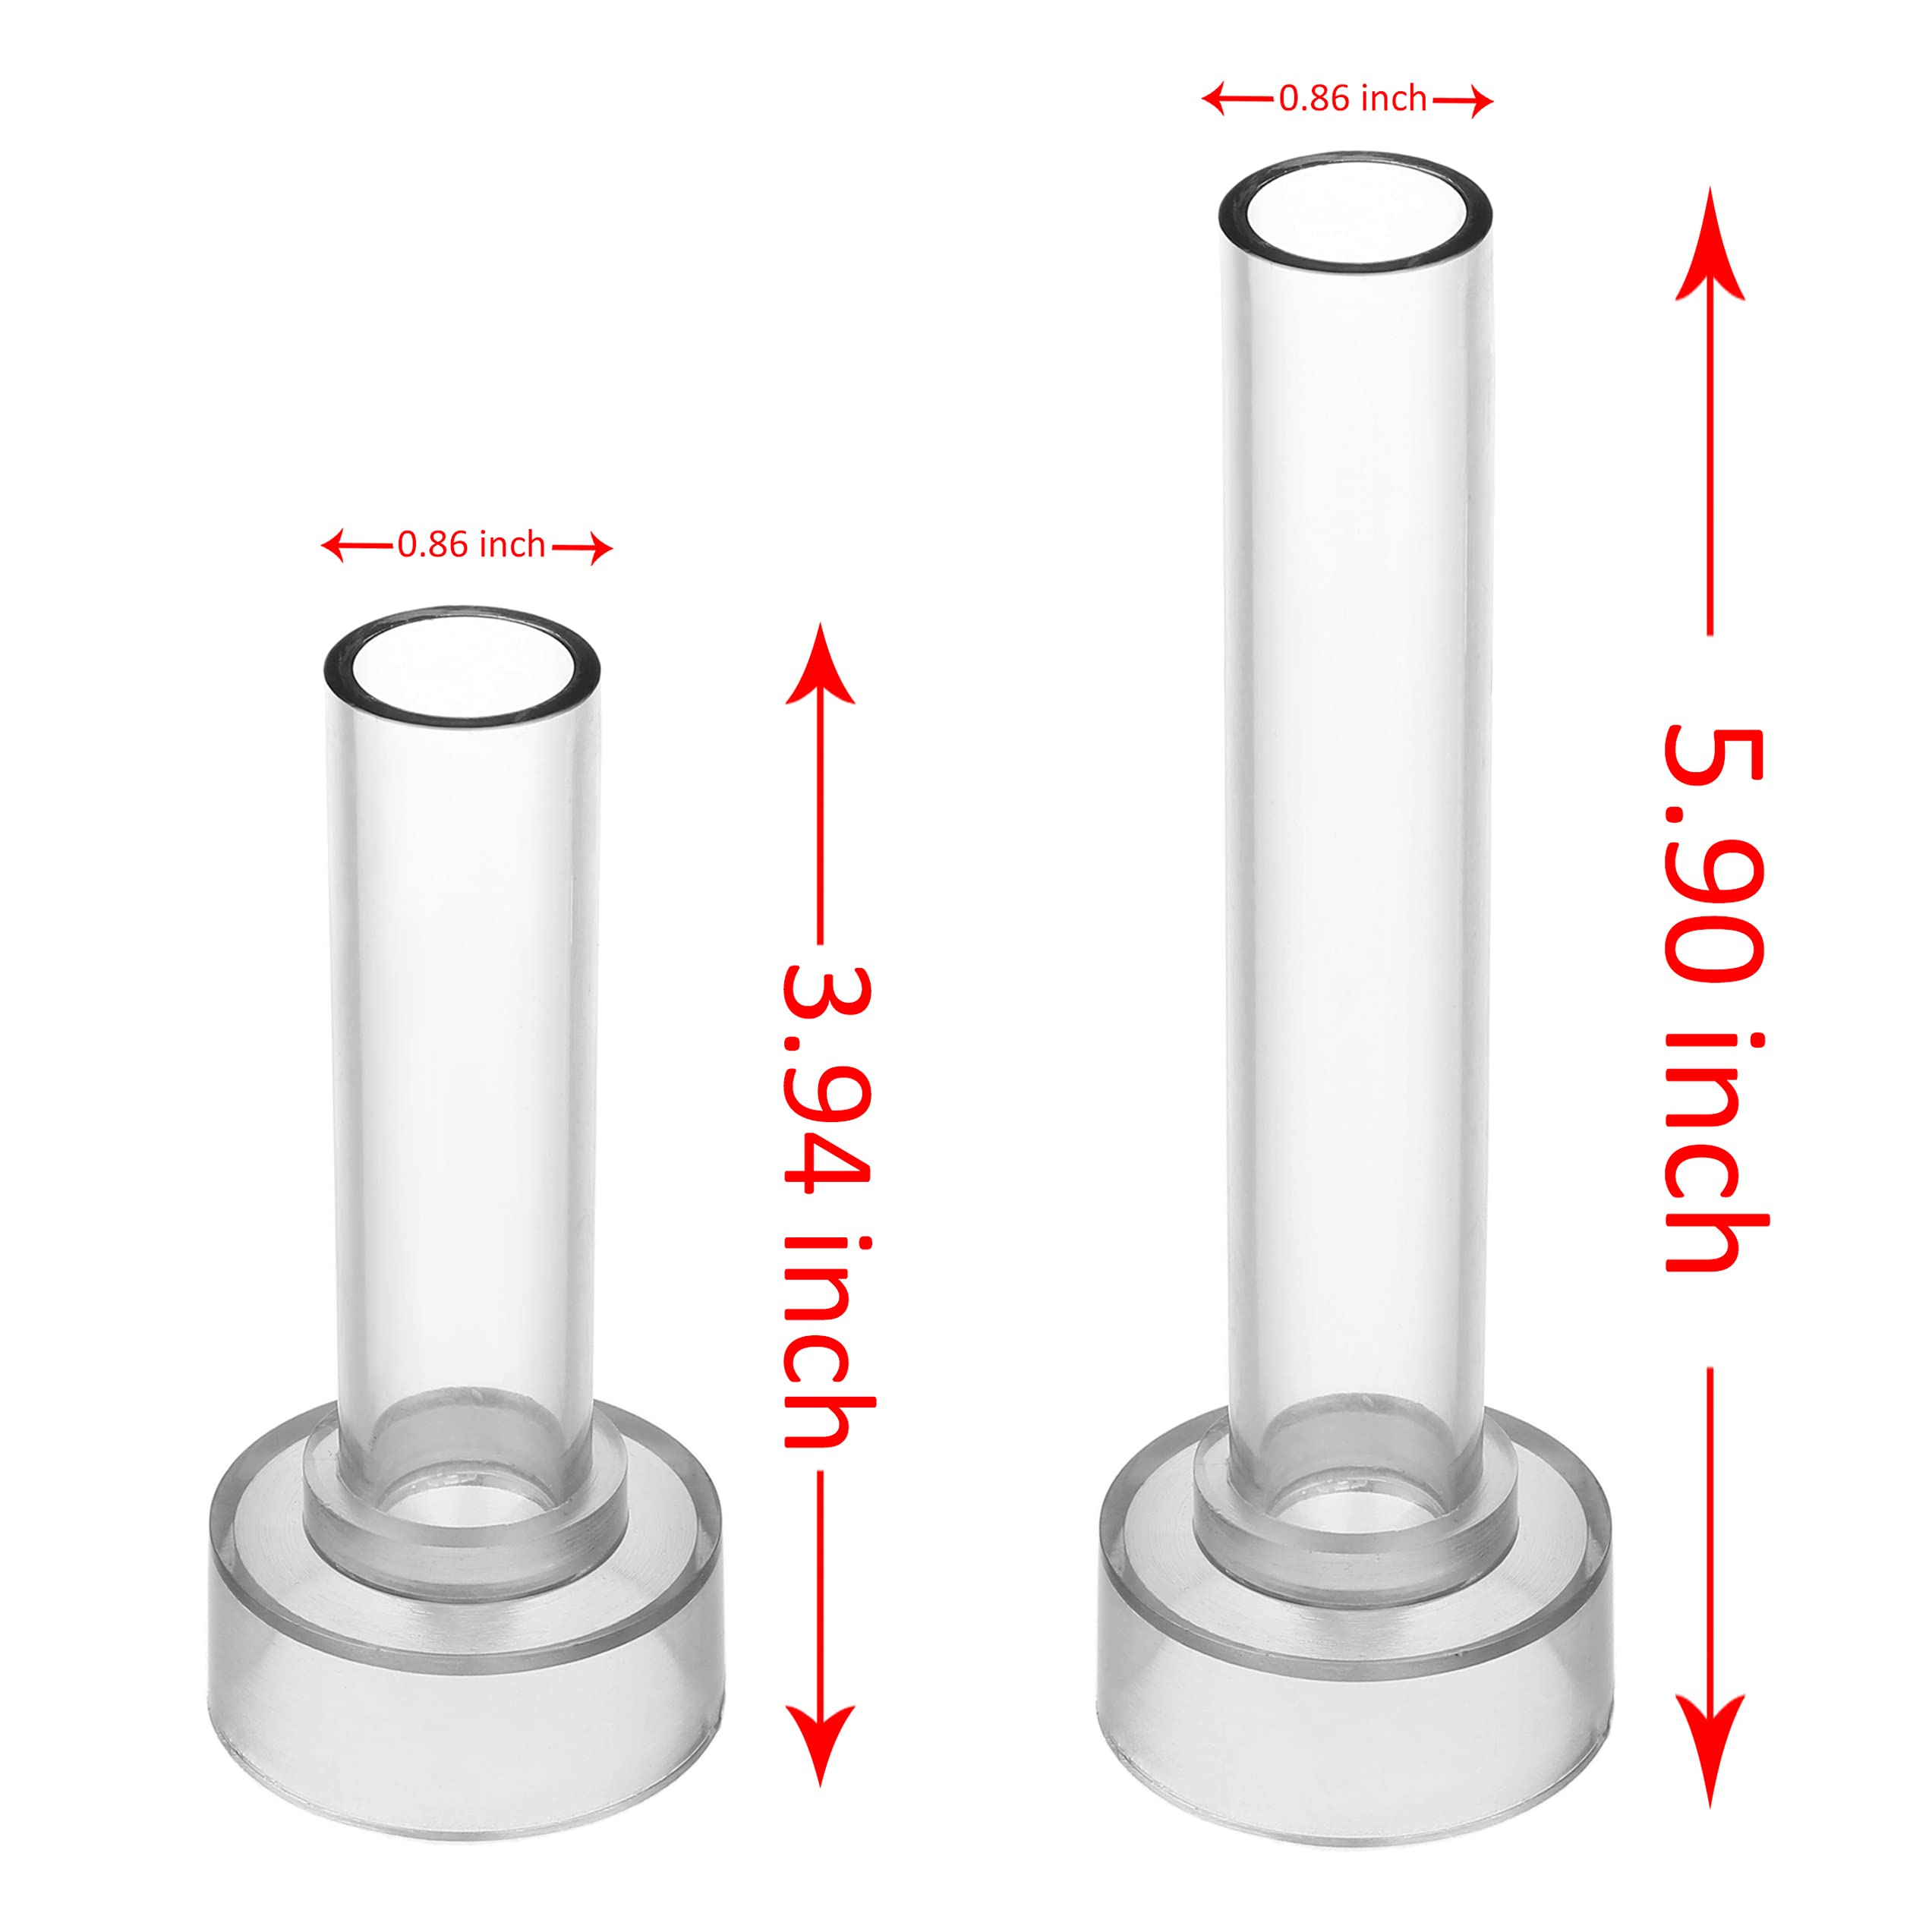
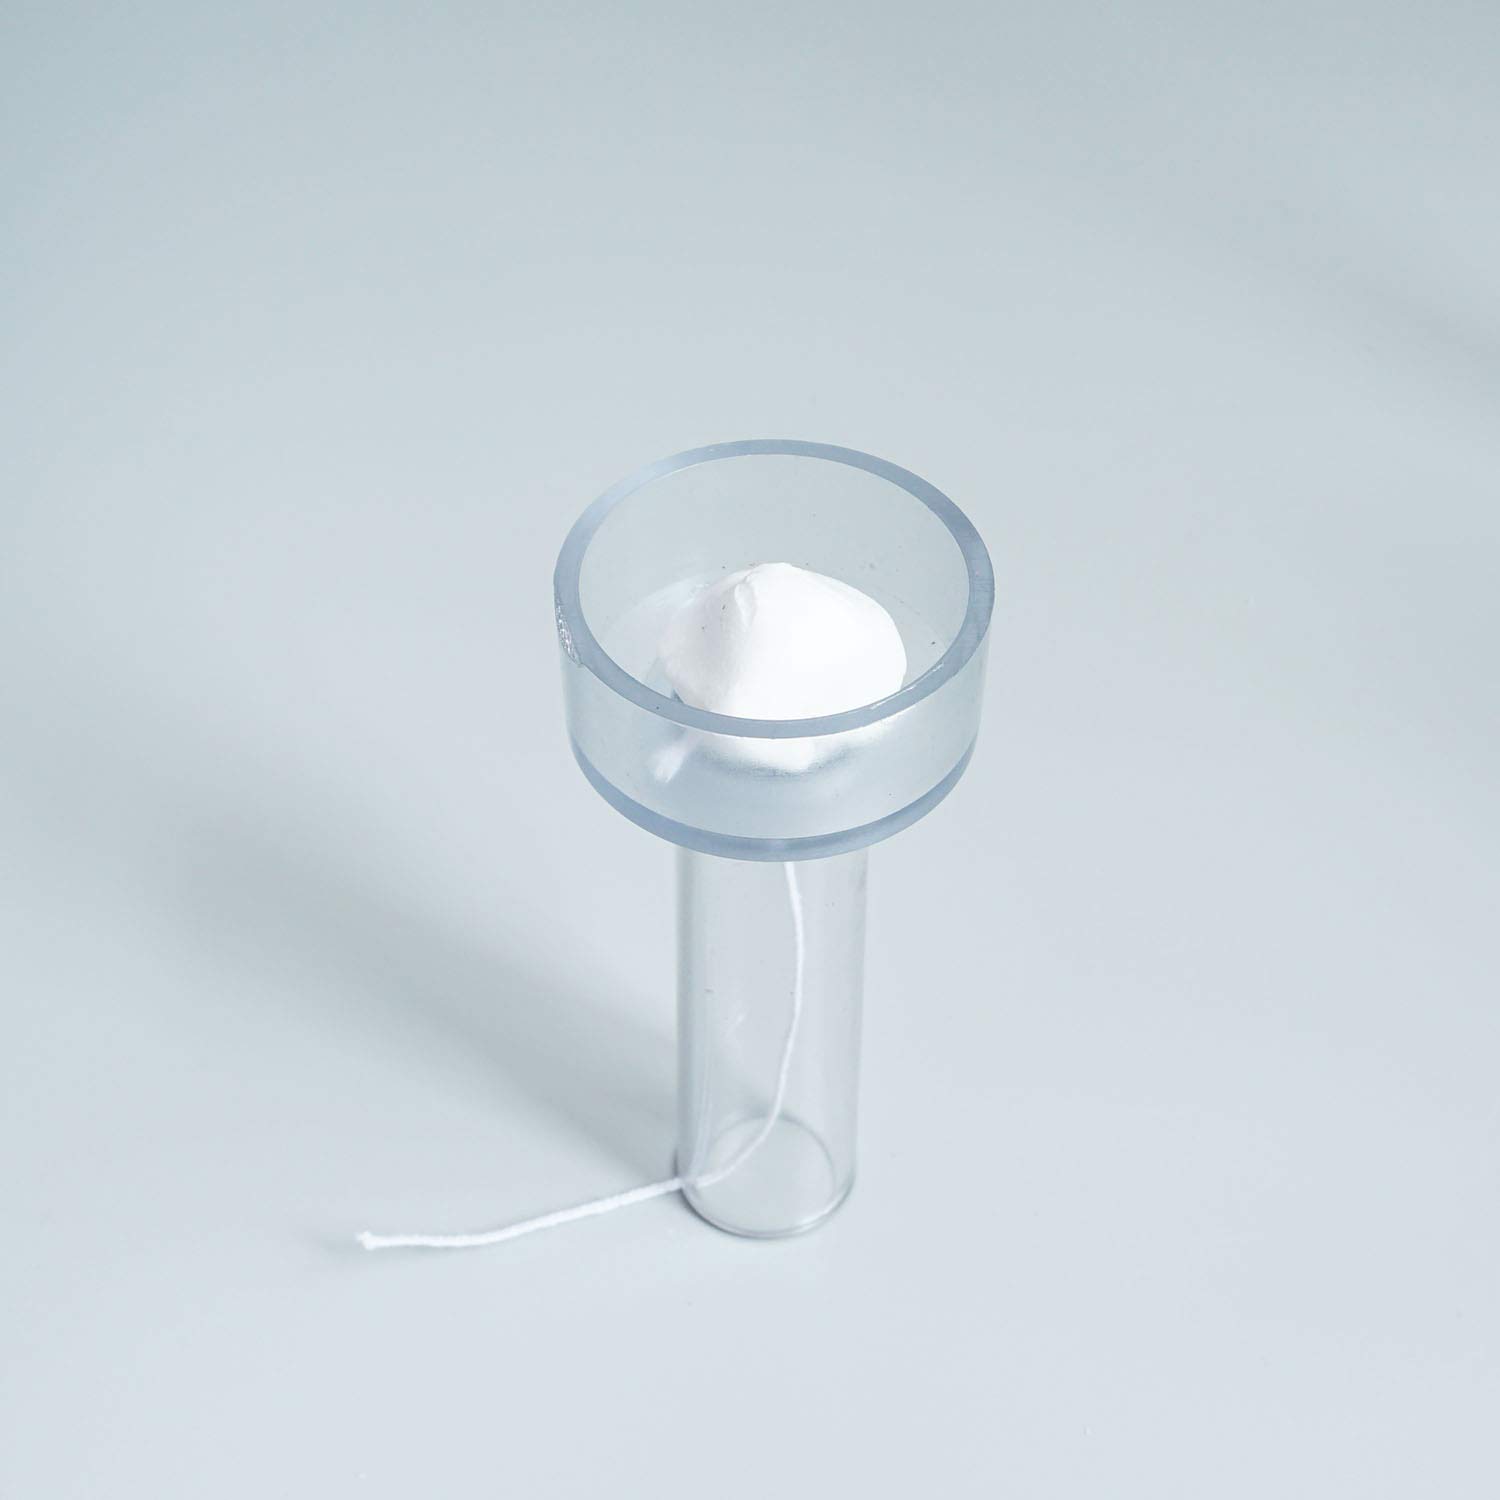
The Taper Candle Mold Set includes two pillar molds, 30 feet of wick, a mold sealer, and two wick clips, making it the perfect kit for crafting emergency, chime, and table candles. With two size options and an easy-release design, this set is ideal for both novice and experienced candle makers.
K**
I like
Bigger than I imagine but perfect
S**F
Wonderful Mold
Perfect mold for what I need!Tip: Use mineral oil inside the mold with a paint brush beforehand and your candle will come out rather easily.My method: mineral oil, placing wick, pouring the soy pillar wax and letting it cloud almost fully before placing it in my deep freezer for 10 minutes to quicken the final cure. The tip will break if you rush your wax.Mold is designed well, functional, strong, withstand changes in temperature, doesnt leak, and (when prepped correctly) candle comes out with easeI need 3 more to keep up with my production. Plan on purchasing them soon...unless the seller would like content in exchange...Either way I'm getting 3 more so I can make 6 candles at a time 😊
A**H
what you'd expect
Standard and simple molds. Each base came with chips in the plastic but nowhere it can affect the actual candle.I did NOT use the wick it came as i thought it was too thick for the size of the candles.I use a soy beeswax blend and have little to no issue de-molding the sticks after cooling. I wish there was a 2 pack option of just the longer molds tho.
R**R
Outstanding molds!!
Outstanding product! On the very first try we had some beautiful bees wax candles that were internally dressed for my clients. Regardless if you use a mold release spray or a bit of veggie oil in a pump spray bottle you will ZERO sticks. After the pour we immediately place them in a cool refrigerator and demoed is fast. We have 100k viewers on TikTok and they love these once we showed them the best way to use them.
C**R
Obnoxious to use
There is no time-efficient way to make use of these molds. It got so frustrating that I just gave up on candles entirely.
J**Y
Perfect and easy
Really easy to use. I put tape on the end of the wick to feed it through
T**.
Little bit of learning
Ok, so I will tell you what I do, I make sure my wax (beeswax) is about the 200 degree F before pouring. But I prepare my molds with vegetable cooking spray and let it coat by sitting upright to drain. I then make the tips of my wicks, either dipped into the wax, if not soak the wicks completely, until the bubbles leave the wicks when completely submerged, neither way is better and both burn down the same. I let my wax solidify somewhat, keeping the level enough below the fill line, you WILL get sink holes, you simply heat your wax back up and fill the hole back in, covering the top layer slightly. You can let them cool slightly before placing them into the freezer, 15 to 25 minutes. Remove them from the freezer, and gently push them out. If they don't come out, place them back into the freezer for 5 minutes more. I have used a hair dryer to melt a little the stuck one, but found its just better to let your freezer do the work. Perfect! Thank you and God bless
G**S
Not good
Do not get.That was a waste of money, like everyone said in other reviews hard to get out of the mold.Find a way to have the mold split in half just a suggestion.
Trustpilot
1 week ago
1 day ago