Some deliveries may take a little longer than usual due to regional shipping conditions.

DOWNLOAD THE APP


Customer Services
Copyright © 2025 Desertcart Holdings Limited
DOWNLOAD THE APP


🌟 Refresh your space, rule your day—cabinet glow-up made simple!
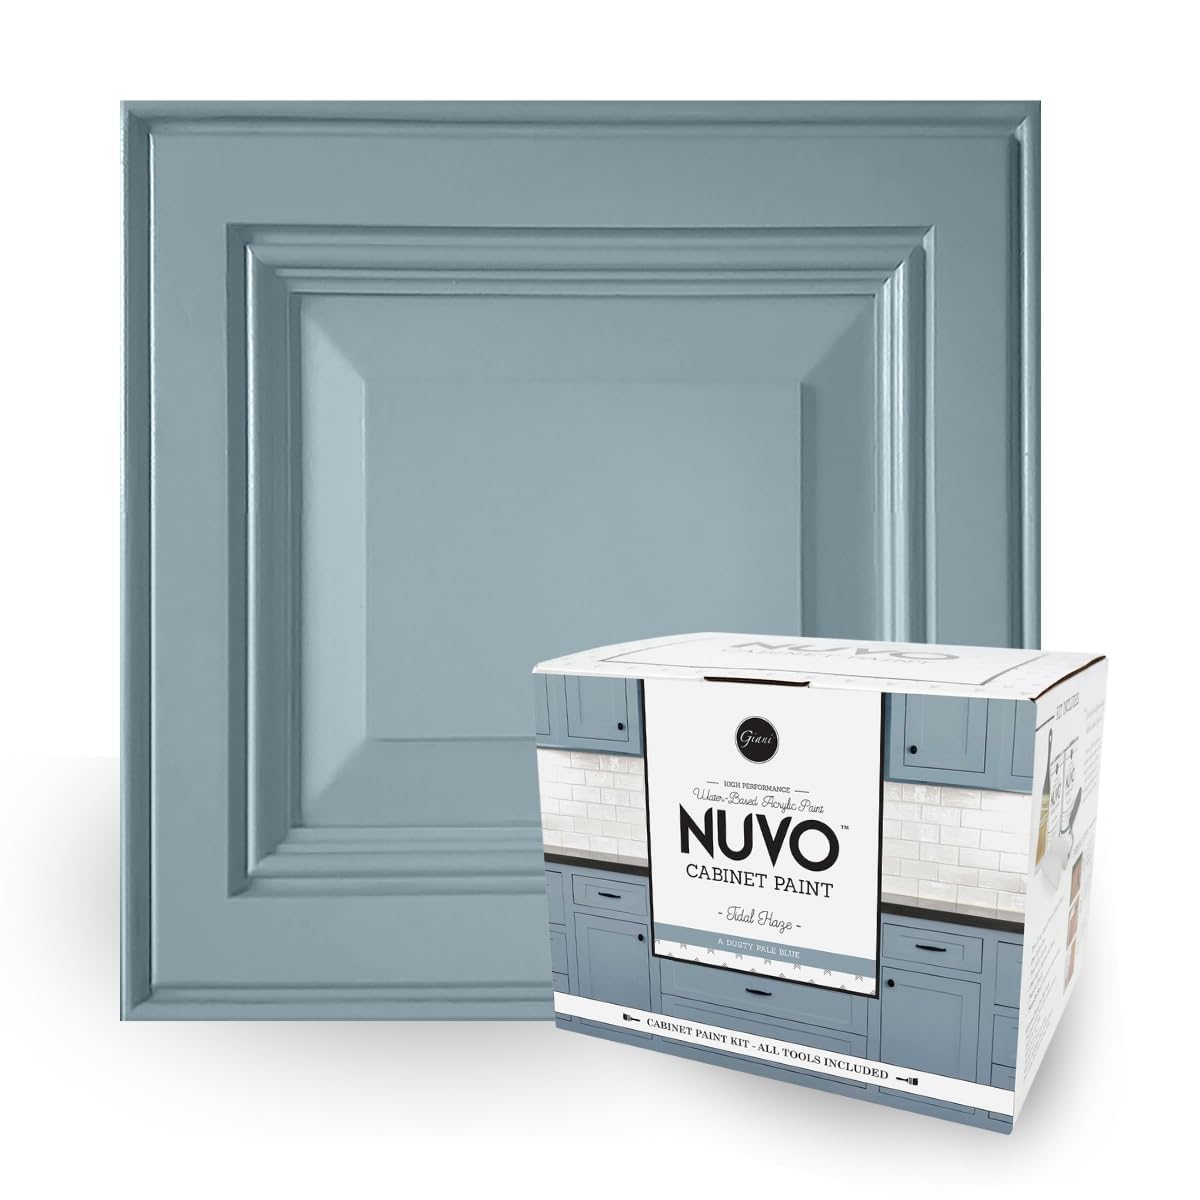
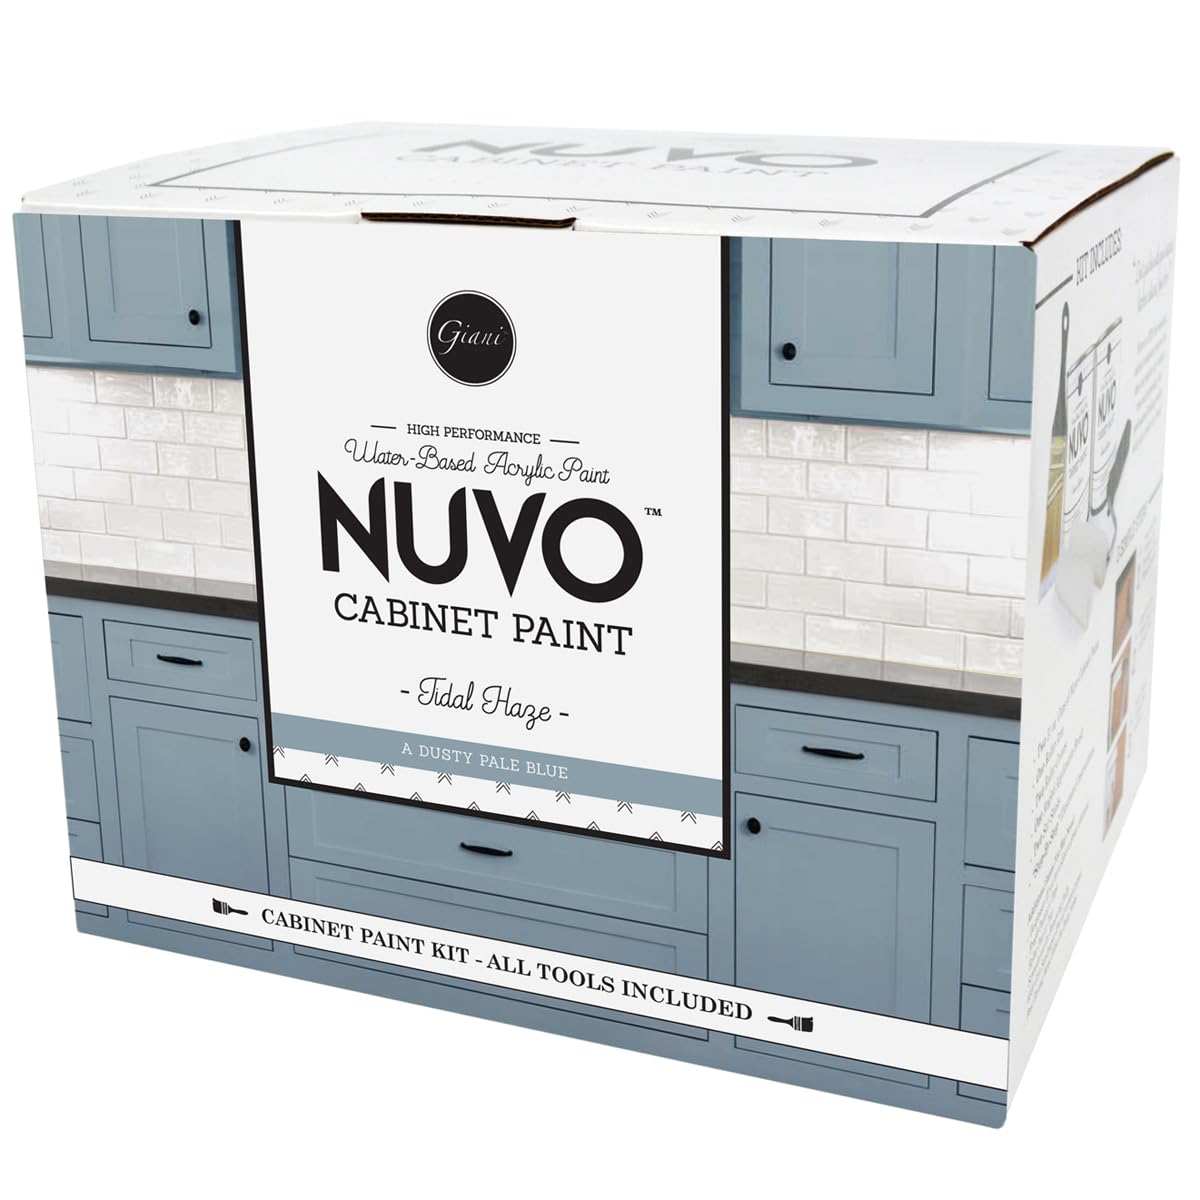
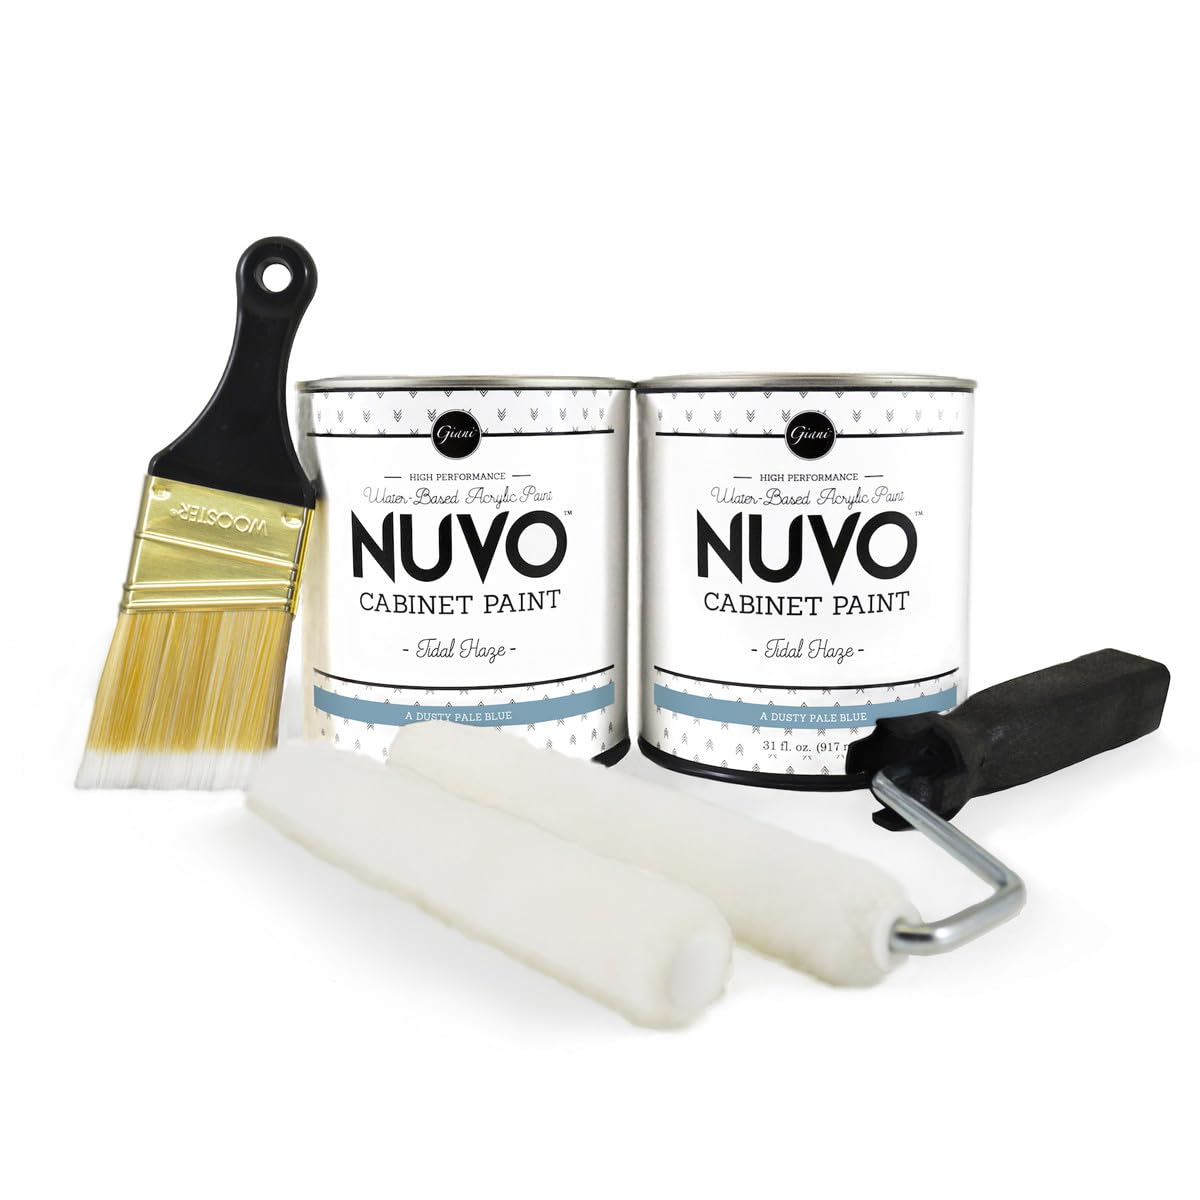
Nuvo Tidal Haze 1 Day Cabinet Makeover Kit offers a professional-quality, eco-friendly cabinet paint solution in a serene pale blue shade. Designed for quick, no-fuss application, this all-in-one kit covers up to 100 sq. ft. and delivers a durable satin finish without priming or topcoats. Perfect for wood, laminate, and metal surfaces, it enables a stylish kitchen transformation in just one day.


| ASIN | B0749Q6KKY |
| Brand | Nuvo |
| Capacity | 1 Count (Pack of 1) |
| Color | Tidal Haze |
| Colour | Tidal Haze |
| Colour Code | #83969C |
| Coverage | 100 Sq. Ft. |
| Customer Reviews | 4.6 4.6 out of 5 stars (649) |
| Date First Available | 17 August 2017 |
| Dry Time In Hours | 8 |
| Finish Type | Satin |
| Full Cure Time | 8 Hours |
| Generic Name | Cabinet Makeover Kit |
| Global Trade Identification Number | 00856512007101 |
| Included Components | 1 Angled Brush, 1 Roller Arm, 2 Roller Covers, Step-by-Step Illustrated Instructions, Stir Stick, Two 31 oz. Cans of Nuvo Cabinet Paint |
| Indoor/Outdoor Usage | Indoor |
| Is Waterproof | True |
| Item Dimensions LxWxH | 23.5 x 21 x 18.4 Centimeters |
| Item Form | Liquid |
| Item Model Number | Tidal Haze |
| Item Part Number | FG-NU TIDAL KIT |
| Item Volume | 31 Fluid Ounces |
| Item Weight | 1 kg 360 g |
| Manufacturer | Giani, Inc. |
| Model Name | All-In-One |
| Net Quantity | 62.0 Fluid Ounces |
| Package Information | Tin |
| Paint Type | Acrylic |
| Primary material | water based |
| Shipping Weight | 2.9 Kilograms |
| Size | 1 Count (Pack of 1) |
| Special Feature | Washable |
| Specific Uses For Product | Water-based,Satin Finish,Durable |
| Surface Recommendation | Laminate, Wood, Metal |
| UPC | 856512007101 |
| Water Resistance Level | Water Repellent |
| Weight | 3 Pounds |
M**A
This paint is really good quality and has good coverage. 1-2 layers over a dark color is plenty and it doesn’t dry tacky. We’ll see how long it lasts though but I’m impressed so far.
A**R
This is INCREDABLE paint ! Used it numerous times on reno. BUT DO NOT BUY the discounted returns!! Idiots buy and use then add water and return!! I made that mistake! The paint texture is suppose to be very thick...my return purchase was thinner than pancake batter! Live and learn! Buy the full price brand new item, you won't be disappointed!
M**A
Solid budget-friendly option for DIYers I used this on my 1990s builder-grade cabinets (likely maple-tone with real wood frames and pressed-wood inserts). Overall, it’s a great product for non-professionals as long as you have reasonable expectations. Prep: I removed doors and hardware, but painted drawer fronts in place. I used Crud Cutter, a rough scrubby sponge, a damp towel, and a fine sanding block to prep all surfaces. Don’t skip this step! Painting: The paint is self-leveling, so brush strokes will mostly smooth out as it dries—but take your time to apply carefully. It dries fast (sometimes too fast), so keep an eye on drips and pooling, especially in corners and edges. After the first 2 light coats, lightly sand to keep the surface clean and even. Two thin coats on day one, followed by a third coat the next day gave great coverage with no bleed-through. Tips: Check door edges and underside for drips before drying. Let doors dry for several days before reattaching or adding hardware. It may feel dry to the touch, but it’s not fully cured. One of my cans seemed old and had clumps that wouldn’t mix in, so I tossed the last quarter and switched to a new can. Wasn't too happy with the product waste and that I had to sand off those clumps. Durability: Still early, but after a few weeks the finish on door fronts looks solid. I did see some scuffing on a painted shelf edge inside a cabinet. Based on pro advice, I plan to apply a clear topcoat once the paint fully cures (after several weeks). Final thoughts: This won’t beat a professional spray job, but for a DIY solution on a budget, it looks good and should hold up for a few years. I recommend it. Pro tip: Skip the kit. It comes with extras I didn’t use. Just buy the paint and a quality brush separately—it’ll cost less and give you better results.
M**M
When I applied the first coat of paint I was worried that I wouldn't have enough paint to throughly cover my dark brown cabinets. I needn't have worried. The second coat went on like a dream and gave perfect coverage. In fact, I didn't even need to open the second can of paint, and that was for a 12 foot long run of cabinets. It is quite a fiddly job painting the frames if you don't take the doors off of the cabinets, but it's possible as long as you tape off the hinges as recommended. Another warning, take the time to be sure that you have everything taped with masking tape before you begin--all around where the frame meets the cabinet interiors, walls that butt up to the cabinets, every hinge, etc. This paint dries quickly, so you don't want to pour a tray of paint and then have to stop to move anything or to tape something -- as I did when I realized that I need to move the fridge freezer and tape the wall for an end panel. The kit comes with small rollers, but I opted for my favorite paint pad. It gave a flawless, streak-free finish. One more tip, have some glass cleaner on hand to clean the cabinets before painting (as recommended in the information that comes with the kit.). Only small issue I had was where I had filled a couple of dents and dings--when I painted over the filler, it left a matte instead of a satin finish, so maybe I should have used a primer over those areas before painting. I can't speak to durability yet or to how well it cleans. The manufacturer's instructions recommend avoiding harsh chemicals or scouring, which makes sense. After being advised by family not to attempt painting kitchen cabinets without removing all the doors and using a paint sprayer I'm feeling very pleased. Professional looking finish!
O**-
I just finished painting my kitchen cabinets using this product. I did it all by myself, and it took me about 15 hours (incl. cleaning and sanding) over two days, which I think is pretty good. This is by far the fastest drying paint I have used, so it took me some time to get used to it. I’ll write down some tips below. *It is pretty watery, and it gets separated very quickly. For the best results, you need to stir it as often as possible. Pretty much every time you dip your brush or roller in the paint tray. if you don’t stir well, the paint appears to have tiny specks of black, and when you paint without stirring well, the painted surface gets tiny little bubbles all over, which freaked me out. But after applying the second coat, it turned out fine. It still did have almost like a crackled texture, whereas the cabinet doors that I painted after stirring the paint well turned out very smooth. So stirring the paint is key!! * I read someone’s review that the roller and the brush in the kit are poor quality. I found that to be the case. I had prepared better quality roller and brush, so I used them. Ultimately, a good angled brush I had bought worked better than a roller. *Because the paint dries so fast, it’s very hard to wipe it off once it dries. Use liberal amounts of tape!! *The paint has a great self-leveling quality and does not drip very much, but it did puddle a bit on the bottom of some cabinet doors. I used a dry foam brush to absorb the excess paint, and it worked great. I also used the same brush for small touch ups.
Trustpilot
2 weeks ago
2 weeks ago