
DOWNLOAD THE APP


Customer Services
Copyright © 2025 Desertcart Holdings Limited
DOWNLOAD THE APP


🔥 Elevate your backyard BBQ game — grill like a pro, impress like a boss!
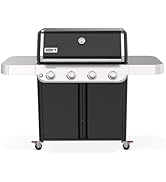
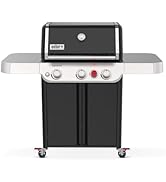
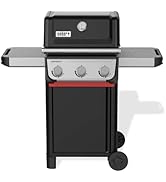
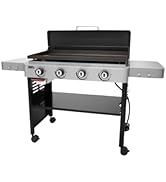
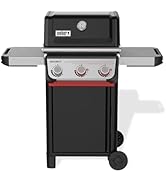
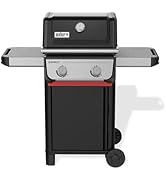
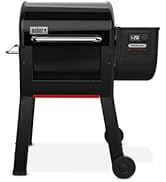
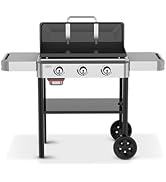
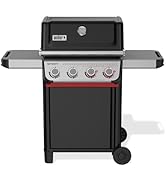
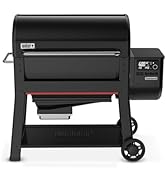
The Weber Spirit II E-210 is a premium 2-burner liquid propane grill featuring a robust 26,500 BTU output, 450 square inches of porcelain-enameled cast iron cooking surface, and the innovative GS4 grilling system. Designed for compact spaces, it offers an open-cart design with six tool hooks and two large wheels for easy mobility. Engineered for durability and consistent performance, this grill is perfect for millennials seeking a reliable, stylish, and efficient outdoor cooking experience that turns every meal into a social event.


| ASIN | B077K1MK8N |
| Assembly Required | Yes |
| Best Sellers Rank | #192,168 in Patio, Lawn & Garden ( See Top 100 in Patio, Lawn & Garden ) #315 in Propane Grills |
| Brand | Weber |
| Color | Black |
| Cooking Surface Area | 360 Square Inches |
| Cooking System | grill |
| Customer Reviews | 4.6 4.6 out of 5 stars (3,669) |
| Finish Type | Painted |
| Frame Material | Stainless Steel |
| Fuel Type | Gas |
| Global Trade Identification Number | 00077924058516 |
| Grill Configuration | Cart |
| Handle Material | Stainless Steel |
| Heating Elements | 2 |
| Heating Power | 18000 British Thermal Units |
| Included Components | Grill |
| Indoor/Outdoor Usage | Outdoor |
| Installation Type | Free Standing |
| Item Weight | 20 pounds |
| Item model number | 44010001 |
| Main Burner Count | 2 |
| Manufacturer | Weber |
| Material | Porcelain-enameled, cast iron |
| Model Name | Spirit II E-210 Gas Grill Black LP |
| Number of Racks | 1 |
| Product Dimensions | 48"D x 26"W x 57"H |
| Recommended Uses For Product | Outdoor |
| Series Number | 44010001 |
| Special Feature | Porcelain-Enameled, Cast-Iron Cooking Grates |
| UPC | 077924058516 |
| Voltage | 1.0 |
R**E
nice little grill
This Grill literally cost 3 times the cost of my last grill. It better be great. I've only had it for a couple of weeks, so here is a preliminary review for preliminary folk. UNPACKING: This thing was packed... I don't even have words for how it was packed. It was like a tightly compacted cardboard singularity. The packing material literally filled up my recycle can. I'm saying that it was packed quite well, as if it were a precious jigsaw puzzle that needed to be protected. Which is kind of what it was. ASSEMBLY: Lots of folks say it took 2 hours to assemble or some other amount. So I'm not gonna say that. Assembly was not complex. The most difficult part was identifying the various pieces. There are a lot of bolts and washers, and by a lot I mean a lot. In the end, everything fit together like it was supposed to and I've been grilling ever since. QUALITY: This thing is built like a tank. It's not cheaply made, and one can tell that effort has been made to achieve quality both in the instructions and the manufacturing tolerances. After I completed the assembly, I turned it on. Everything worked like it was supposed to. I was satisfied. And more than a little surprised. The friend who recommended this device to me made sure to tell me that, like almost every other grill, I would still encounter flare ups as grease from the cooking ingredients drip down on the flames. This turned out to be true. But no more or less than any other grill I've owned. It has not been a problem. SUMMARY: I like the grill and look forward to using it. I feel that the hood does a great job keeping the smoke and heat in. Best of all, it starts each and every time with the 1st push of the electronic starter. Outstanding. Compared to the 15 year old grill I'd been using recently, this 2 burner grill works like a dream. Walk out to my backyard, press a button, and I'm grilling. The only 2 critical comments I have are that 1, it's pretty darn expensive for a little grill, and 2, I didn't enjoy the assembly. It was just long and involved. But not difficult. I've owned a couple of nice Weber grills in my life. I think this will be another one.
K**H
Well engineered and constructed
This is an excellent grill, especially for the price and considering that it is on the low end of the Weber line. I give it 5 stars in every category. I'll talk about the assembly process first because many people report having trouble putting the grill together. I am an automotive service technician at a car dealership and have better than average mechanical skills. The cars I work on are orders of magnitude more complex than a gas grill, and assembling this grill was a breeze. First, get yourself a powered screwdriver or screw gun with a torque-limiting clutch. If you don’t have one, borrow or buy one. There are around 40 screws that you will need to install and tighten, and doing it by hand will be tedious and time consuming. Also, someone mentioned getting a cut from a sharp edge. The edges of the metal are indeed sharp, so be careful handling the parts. Weber should have done a better job of de-burring the edges. Some reviewers reported having difficulty getting the screws started because the holes didn't line up. This is absolutely not the case, the build quality and manufacturing tolerances are excellent, and everything lines up perfectly. Where some people run into trouble is that they tighten each screw as they install them. Doing this will make assembly difficult or impossible. It is very important to start all screws by hand and leave them loose until all are installed. I cannot emphasize this enough, tightening the screws should be the very last thing you do when assembling the grill. This should be stated in the instructions, but it is not. Leaving them loose during assembly allows the parts to shift a little so the holes can be lined up. All screws and small hardware are packaged in bags labeled A through F, and the instructions indicate which bag to use. I initially thought they had shorted me some screws, the instructions were calling for screws from the A bag, which were all used up. I robbed screws from the C bag to complete the assembly, and in the end I had a screw, a washer and a cotter pin left over. Some reported finding the legs bent when they were unpacked. One of the legs on mine was slightly bent, but the steel is light-gauge and I was able to straighten the leg by hand and with no tools. It took me about an hour and a half to complete the assembly, using a helper to place the cover on the grill and install the hinge pins. It could be done by one person, but having a helper for this step makes the process easier. The assembly instructions are almost entirely pictorial, with very little text. I usually don’t like this, but the drawings are clear and very detailed. If you follow the steps listed in the instructions in order, you will have no problems. I attached a tank of LP, checked for leaks (very important!) and fired it up. Light the left burner first, the right burner lights from the left one. The grill reached 600 degrees in about 10 minutes on a hot July day. I haven’t cooked anything yet, but the grill appears to work fine and I expect good results. Another excellent product from Weber!
J**S
Great grill!!
This is one nice grill. We wanted a two-burner since we it is only us mostly and it is large enough for the occasional dinner party. It heats up extremely fast. It is Weber sturdy and high quality through out. It should last a long time. It took me over two hours to assemble. Finding the right screw in the bag sometimes took some extra attention. The instructions were easy to use and the BILT app I down loaded was specific for this model with 3D movable pics of all the assembly step by step. That was really nice! It came packaged like an incredible Chinese wood puzzle. Amazing how they got all the parts in the least space possible. The package was heavy! Definitely a two man lift or a hand truck where it was still heavy to put on its side to use the truck. It is easy to roll around after assembly though. The only issue I had with assembly was I put the AA battery in backwards so the spark didn't work. The burners are easy to adjust. It heats up much faster than any grill we have every had. We like the disposable tin grease trap at the bottom. It's easy to replace. I bought non-Weber grease pans for a lot less. The instructions a very good. The Weber website has a lot of tips and other goodies and worth the time to review. Very, very happy with this grill.
Trustpilot
2 weeks ago
2 weeks ago